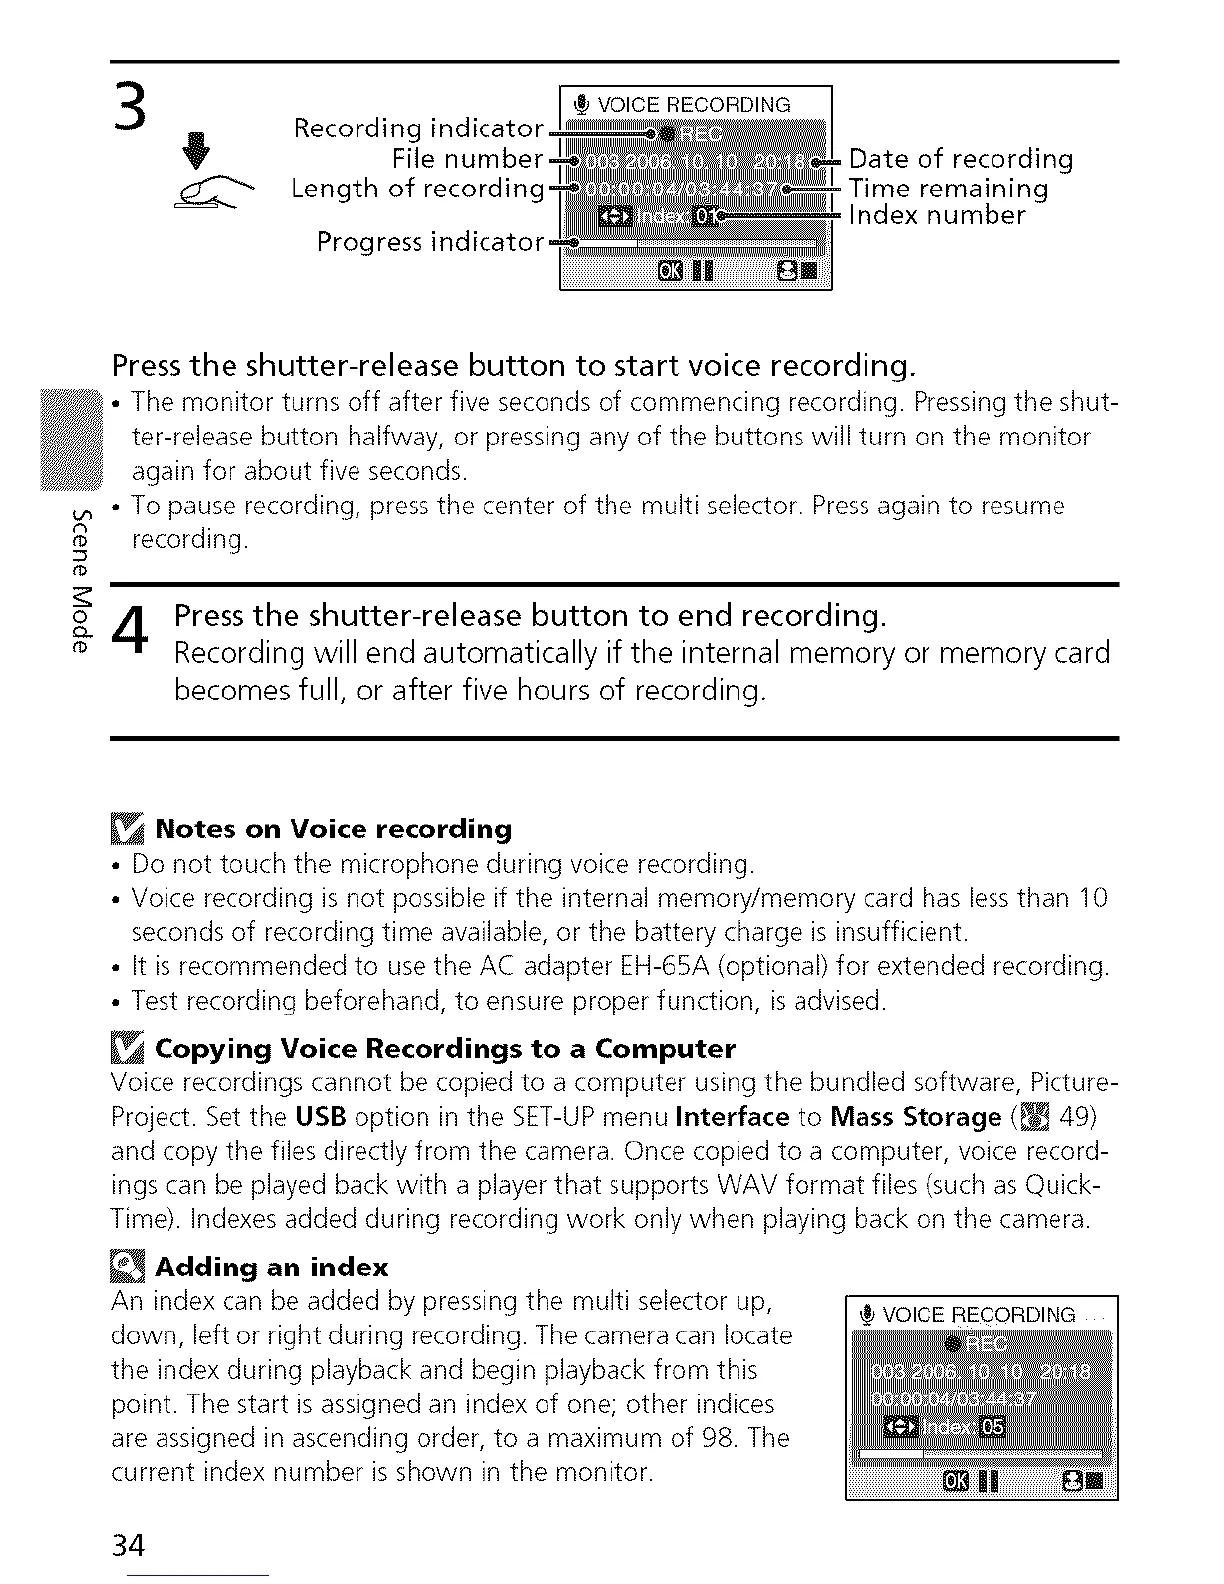
3
Recording indicator.
File number.
Length of recording.
Progress indicator,
VOICE RECORDING
• Date of recording
- Time remaining
• Index number
t_
t_
o
34
Press the shutter-release button to start voice recording.
• The monitor turns off after five seconds of commencing recording. Pressingthe shut-
ter-release button halfway, or pressing any of the buttons will turn on the monitor
again for about five seconds.
• To pause recording, press the center of the multi selector. Press again to resume
recording.
Press the shutter-release button to end recording.
Recording will end automatically if the internal memory or memory card
becomes full, or after five hours of recording.
Notes on Voice recording
• Do not touch the microphone during voice recording.
• Voice recording is not possible if the internal memory/memory card has lessthan 10
seconds of recording time available, or the battery charge is insufficient.
• It is recommended to use the AC adapter EH-65A (optional) for extended recording.
• Test recording beforehand, to ensure proper function, is advised.
Copying Voice Recordings to a Computer
Voice recordings cannot be copied to a computer using the bundled software, Picture-
Project. Set the USB option in the SET-UPmenu Interface to Mass Storage (_ 49)
and copy the files directly from the camera. Once copied to a computer, voice record-
ings can be played back with a player that supports WAV format files (such as Quick-
Time). indexes added during recording work only when playing back on the camera.
Adding an index
An index can be added by pressing the multi selector up, @VOICERECORDING
down, left or right during recording. The camera can locate
the index during playback and begin playback from this
point. The start is assigned an index of one; other indices
are assigned in ascending order, to a maximum of 98. The
current index number is shown in the monitor.
34
 Loading...