66 67
1
Choose position (flash mode selector). Confirm
in the LCD panel.
2
Choose position* (flash sync mode selec-
tor).
* Since TTL Auto Flash operation can be performed regardless of the flash sync
mode selector setting, for simplicity, always leave the switch at this position.
3
Set ISO speed of film in use. Usable film speeds are
ISO 25 to ISO 1000.
For instruction, see “Setting ISO Film Speed (Manual
Adjustment),” pages 27 to 28.
4
Set the built-in zoom head position.
For instruction, see “Setting Zoom-Head Position (Manual
Adjustment),” pages 29 to 30.
Shooting indicator bars in the LCD panel move as the
figure input changes.
Setting Up Your Camera
5
Select one of the following exposure modes:
a. Programmed auto (either P
DUAL, P or PHI) to perform
Programmed TTL Auto Flash.
b. Aperture-priority auto (A) to perform Standard TTL
Flash.
c. Manual exposure mode to perform Standard TTL
Flash.
6
Perform other settings:
a. For programmed auto, set lens to minimum aperture
(highest f-number).
b. For aperture-priority auto, set desired aperture.
c. For manual exposure mode, set desired shutter
speed* and aperture.
* Camera automatically shifts to the fastest synchronization speed if you choose
a speed that is not within the synchronization range.
TTL Auto Flash Mode: For F-501/N2020 and F-301/N2000 Users
Chapter
3
Confirm Settings
7
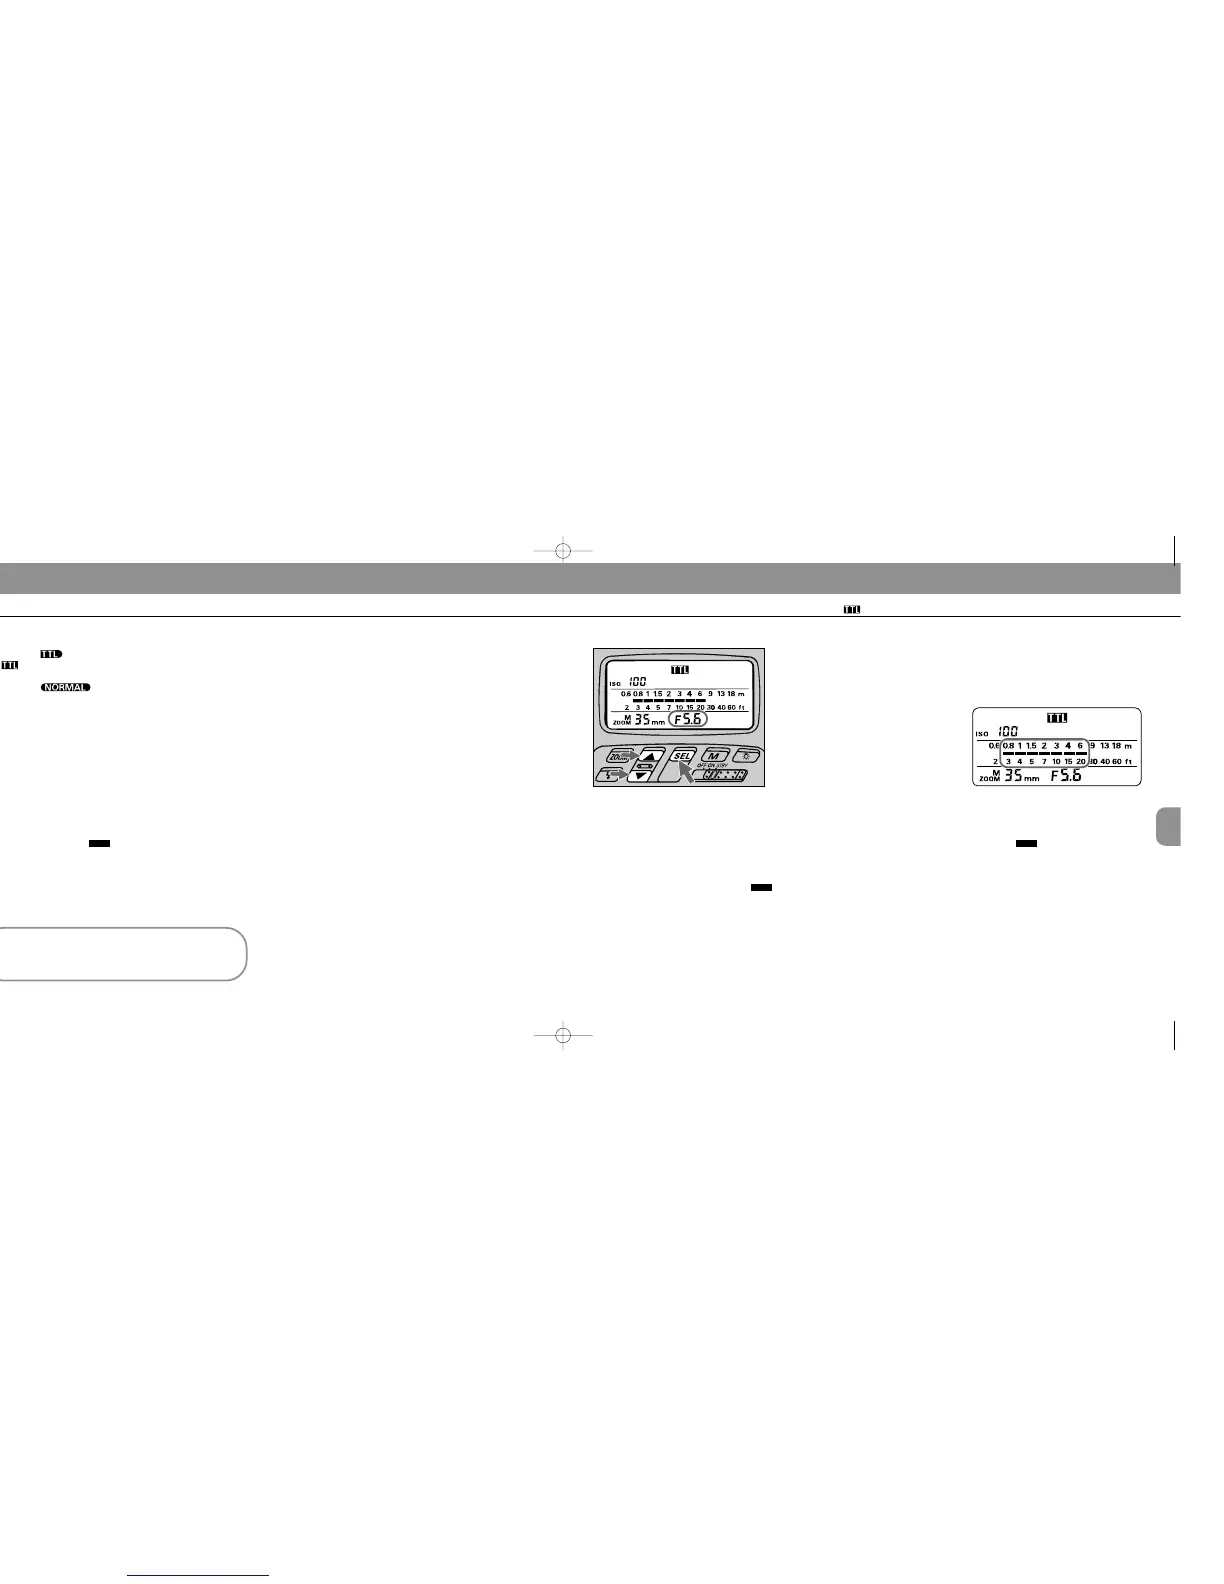
Set aperture in the SB-25’s LCD panel*.
For instruction, see “Setting Aperture Value (Manual Adjustment),” pages 28 to 29.
In programmed auto exposure mode, aperture is automatically controlled by the
camera. Choose a value, using “Shutter speed/aperture settings in Programmed
TTL Auto Flash” in the following page.
In aperture-priority auto or manual exposure mode, set the aperture value that you
have set on the camera (from step 6).
Once aperture is set, indicator bars show the shooting distance range.
* This operation is important for reading the appropriate shooting distance from the indicator bars (step 8);
setting a wrong aperture value on the SB-25 does not affect all TTL Auto Flash operations — a shot will be
taken with the aperture set on the camera.
Quick reference on the relationship between
usable apertures and flash shooting distance
Use table on page 142 in this instruction manual.
8
Confirm shooting distance.
Check whether subject falls within the
range of the shooting distance indica-
tor bars in the SB-25’s LCD
panel. If not, move closer to subject or
select a wider aperture (when aper-
ture-priority auto or manual exposure
mode), then repeat steps 7 and 8.
SB-25_En 03.1.14 8:18 PM Page 66