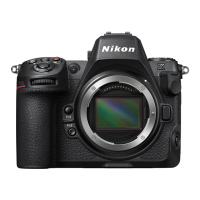
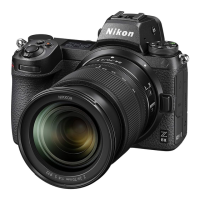
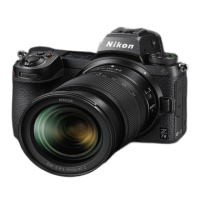
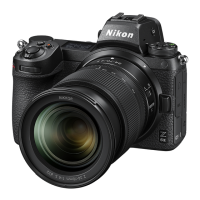
This document serves as a technical guide for the Nikon Z 7 and Z 6 professional cameras, specifically focusing on RAW video recording capabilities. It details the process of outputting RAW video data from the camera to an external recorder, outlining the necessary settings and considerations for optimal use.
Function Description
The Nikon Z 7 and Z 6 cameras, when equipped with activated RAW output options, can output 12-bit RAW video data via an HDMI connector. This RAW video is essentially unprocessed RGB data directly from the camera's image sensor, offering significant flexibility for post-production color grading and adjustments compared to Log video or in-camera recorded video. The RAW video output is compatible with the Atomos Ninja V (version 10.2 or later) and records in the ProRes RAW file format. It's important to note that RAW video cannot be recorded to the camera's internal memory card; an external recorder is always required.
Usage Features
To utilize RAW video output, users must first activate the RAW output options through a paid service provided by Nikon. Once activated, a "RAW output options" item will appear in the camera's SETUP MENU under HDMI > Advanced.
Connecting the Camera to the Atomos Ninja V:
- Ensure the camera is turned off before connecting or unplugging the HDMI cable.
- Connect an HDMI cable from the camera's HDMI connector to the HDMI video input on the Atomos Ninja V.
- A cable clip is recommended to prevent accidental detachment of the HDMI cable.
- If the image is not displayed on the Ninja V monitor, check the HDMI cable connections.
Camera Settings for RAW Output:
- Enable RAW output: Navigate to SETUP MENU > HDMI > Advanced > RAW output options and select "RAW output." Then, choose "Enable (no recording to card)."
- Choose a RAW output mode: In SETUP MENU > HDMI > Advanced > RAW output options, select "RAW output mode" and pick the desired frame size, frame rate, and image area. Available options vary between the Z 7 and Z 6 models.
- Turn on External recording control: Go to SETUP MENU > HDMI > Advanced > External recording control and select "On." This allows you to start and stop recording on the Ninja V by pressing the camera's movie-record button. The camera monitor will display a REC (recording) or STBY (standby) icon.
Atomos Ninja V Settings:
- Select Record > CODEC > ProRes RAW > Confirm: This setting enables the Ninja V to support RAW input via HDMI and display the monitor image in color. If the codec is set to anything other than ProRes RAW, the monitor image will be monochrome.
- Select Input > TRIGGER > HDMI: This allows the camera's movie-record button to control the start/stop of recording on the Ninja V. A red frame will appear on the Ninja V monitor during recording to indicate active recording.
Other Settings:
- Standby timer settings: To prevent the monitor from turning off and stopping video output during recording, set the "Standby timer" in CUSTOM SETTING MENU c3 (Power off delay) to "No Limit" or a duration longer than the anticipated recording time. The default setting is 30 seconds.
- Recording timecodes: To embed timecode information (hour, minute, second, and frame number) into each frame during RAW video recording, enable "Record timecodes" in the MOVIE SHOOTING MENU > Timecode and select "On (with HDMI output)."
- Ninja V Timecode Source: On the Ninja V, select Timecode > Source > HDMI to receive the timecode from the camera.
Important Notes on RAW Output Options:
- Camera firmware will be updated to the latest available version upon receiving RAW video output functionality.
- Other camera features will continue to function normally after RAW video output is activated.
- RAW video output specifications may change with future firmware updates.
- ISO sensitivity can be set up to ISO 25600 for the Z 7 and ISO 51200 for the Z 6.
- Certain in-camera compensations (Electronic VR, Picture Control, Active D-Lighting, high ISO NR, vignette control, diffraction compensation, auto distortion control, and lateral chromatic aberration compensation) are not applied to the RAW video file. These adjustments need to be applied during post-production using third-party software.
- The image is displayed on the camera monitor during recording, regardless of the monitor mode setting, but no viewfinder image is available.
- Standard Picture Control is applied to the image displayed on the camera monitor, but this does not affect the video output to the Ninja V.
- The image displayed on the Ninja V monitor has in-device color correction applied and may not match the final image after color grading. Refer to the Ninja V User Manual for details.
- The "zoom in" function on the camera monitor is not available during RAW video recording; use the Ninja V monitor for zooming.
- During RAW video recording, the image areas (angle of view) displayed on the camera and the Ninja V monitor will differ. The image area on the Ninja V monitor is equivalent to the recorded video.
- Available frame sizes, frame rates, and image areas differ between the Z 7 and Z 6.
- Still images cannot be taken by pressing the shutter-release button during RAW video recording.
- RAW videos can only be recorded to the Ninja V, not to the in-camera memory card.
- For any issues with third-party products like the Ninja V, contact the manufacturer directly.
Editing the RAW Video File:
For post-production, optional third-party software is required. Compatible software includes Final Cut Pro X and EDIUS Pro 9 (as of November 2019).
Maintenance Features
While the guide does not explicitly detail maintenance features, it implies that proper handling of the HDMI cable (turning off the camera before connecting/unplugging, using a cable clip) is crucial for maintaining connectivity and preventing damage. It also suggests that users should refer to the Atomos Ninja V User Manual for specific details regarding its settings and potential troubleshooting, which would include maintenance-related information for the external recorder. The need for a paid service to activate RAW output options and potential firmware updates also hints at a service-oriented maintenance aspect for the camera's advanced functionalities.