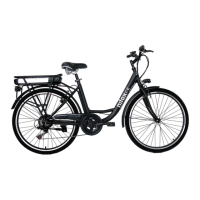
Fit the pedals
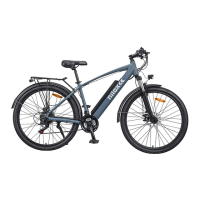
Adjust the saddle
The correct adjustment of the saddle is important for the position of the body while pedaling and allows you to obtain
the best performance with less stress on the joints.
Before use, ride the bicycle and adjust the height and angle of the saddle.
Height
The height of the saddle must be adjusted according to the length of the legs. The height is correct if, while sitting, you
reach the pedal placed in the lowest position with the heel. The leg must be completely straight. Adjust the height
according to these indications. In the height adjustment, in any case respect the STOP MARK on the seat post. THE
NOTCH MUST ALWAYS BE INSERTED IN THE FRAME TUBE (Photo 8).
Angle
In case you want to keep the saddle not completely horizontal but with the "nose" slightly raised, you must loosen the
locking placed under the saddle and adjust the angle. Re-tighten the lock so as not to move the saddle.
Changes in the position of the saddle, even if small, can affect comfort while pedaling. It is recommended, each time
you want to make an adjustment, to make only one change at a time and gradually until you find the most
comfortable and correct position.
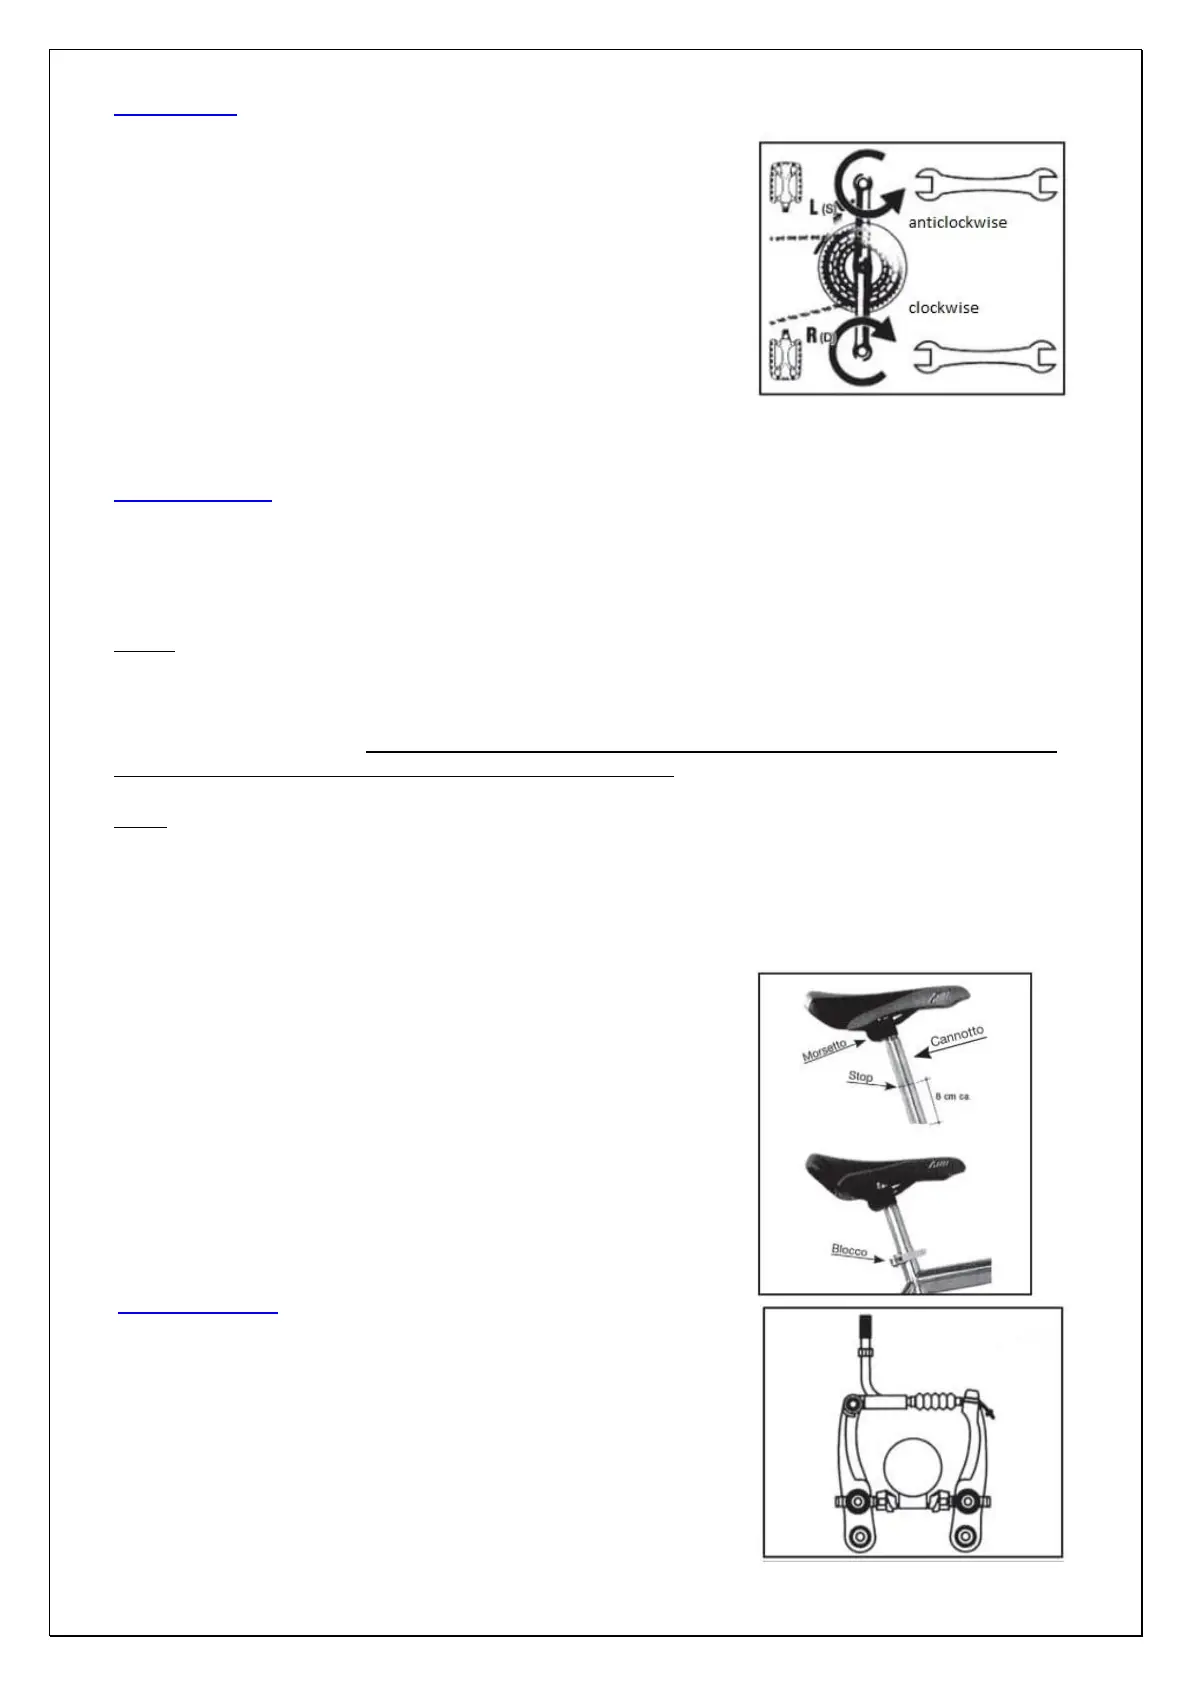
Adjust the brakes
On the seat post there is the notch with stop limit. Make sure that the
clamp nuts that regulate the position of the saddle are well locked (Pic. 8).
The bicycle is equipped with a quick-lock seat post lock; to adjust the saddle
open the lock, raise or lower the seta post to the desired height making
sure that the stop limit is not visible, tighten the quick release mechanism
and make sure that the lever is tight (Pic. 9).
The bicycle is equipped with V-BRAKE brakes (Pic. 10).
To adjust the V-Brake brakes it is necessary to maintain a distance of about
2mm between the brake pads and the rim. The two pads must
simultaneously touch the rim when braking and without touching the tire.
The adjustment must be made by acting on the adjusting screws on the
brakes. In case of doubts or perception of any anomaly during use, have the
bicycle checked by a mechanic.
Screw the pedals to the cranks: the RIGHT pedal is marked on the pin by a
letter "R"; screw this pedal clockwise on the RIGHT crank (chain side). The
LEFT pedal is marked, on the pin, by a letter "L"; screw this pedal
anticlockwise on the LEFT crank arm (Pic. 7). Initially screw the pedals with
your hands, then tighten with the wrench until, without forcing too much,
you reach the end of the stroke.
WARNING: scrupulously follow the instructions to avoid damaging the
threads of the pedal and / or crank. If you notice any anomaly in the
movement of the pedal during use, immediately stop pedaling and have
the bicycle checked by a mechanic.
 Loading...