The lithium battery has no "memory". Discharging and partially recharging the battery does not affect performance or
duration. It is therefore possible to recharge the battery even if it is not completely discharged.
If the bicycle is not used for a long period, keep the battery recharged at least once a month, leaving it to charge for
about 4 hours. In this case, do not pay attention to the battery charger lights.
When the battery is completely discharged it must be immediately recharged. Do not leave the battery discharged
unused but immediately proceed with a recharge cycle. In this case, provide for a longer charging cycle, of about 6
hours to allow complete activation of the battery.
It is recommended to use the bicycle once or twice a year until the battery is completely discharged. Then fully
charge it. This process has a beneficial effect on battery life.
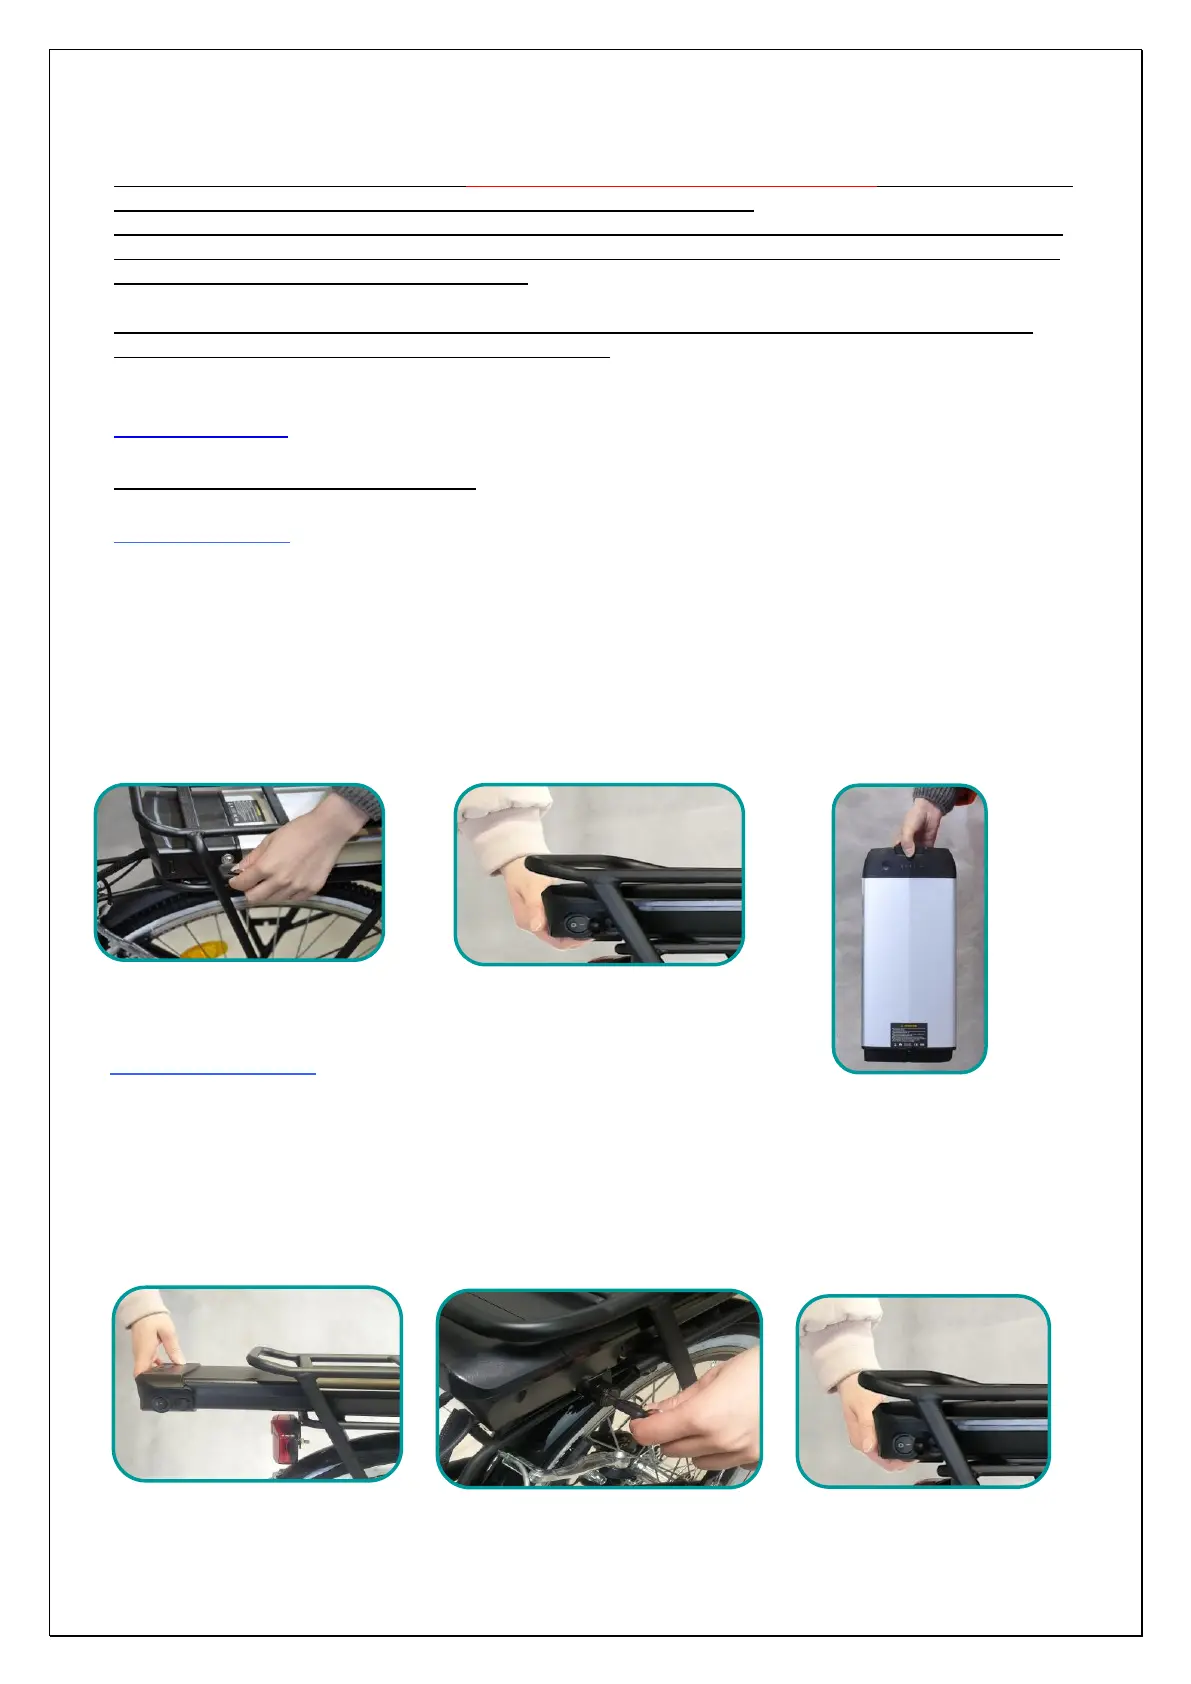
Battery Assembly
The battery is supplied into the rear carrier.
Remove the battery
6. Make sure that the bicycle is firmly on the stand.
7. Turn the key a quarter to the unlocked position "OPEN" (Pic. 28).
8. Firmly grip the battery and pull it back, possibly using the handle located on the bottom and pushing on the rear
rack.
9. Slide the battery into the rails of the luggage rack to extract it completely (Pic. 29). We recommend holding the
battery with both hands.
10. The battery has an ergonomic shape and an anti-slip handle (Pic. 30).
Assembly the battery
5. Make sure that the bicycle is firmly on the stand and remove the key from the lock.
6. Grip the battery with both hands and rest it on the rails of the roof rack, make sure that the block key is not inserted and
push the battery as far as it will go (Pic. 31).
7. ATTENTION: the key MUST be in the "OPEN" position to allow the battery to reach the end of the stroke correctly and
connect to the bicycle (Pic. 32).
8. Check, pulling towards you, that the battery is secured in the housing (Pic 33).