9
42445 Avenida Alvarado, Temecula, CA 92590
(800) 451-9343 · www.nimbuswater.com
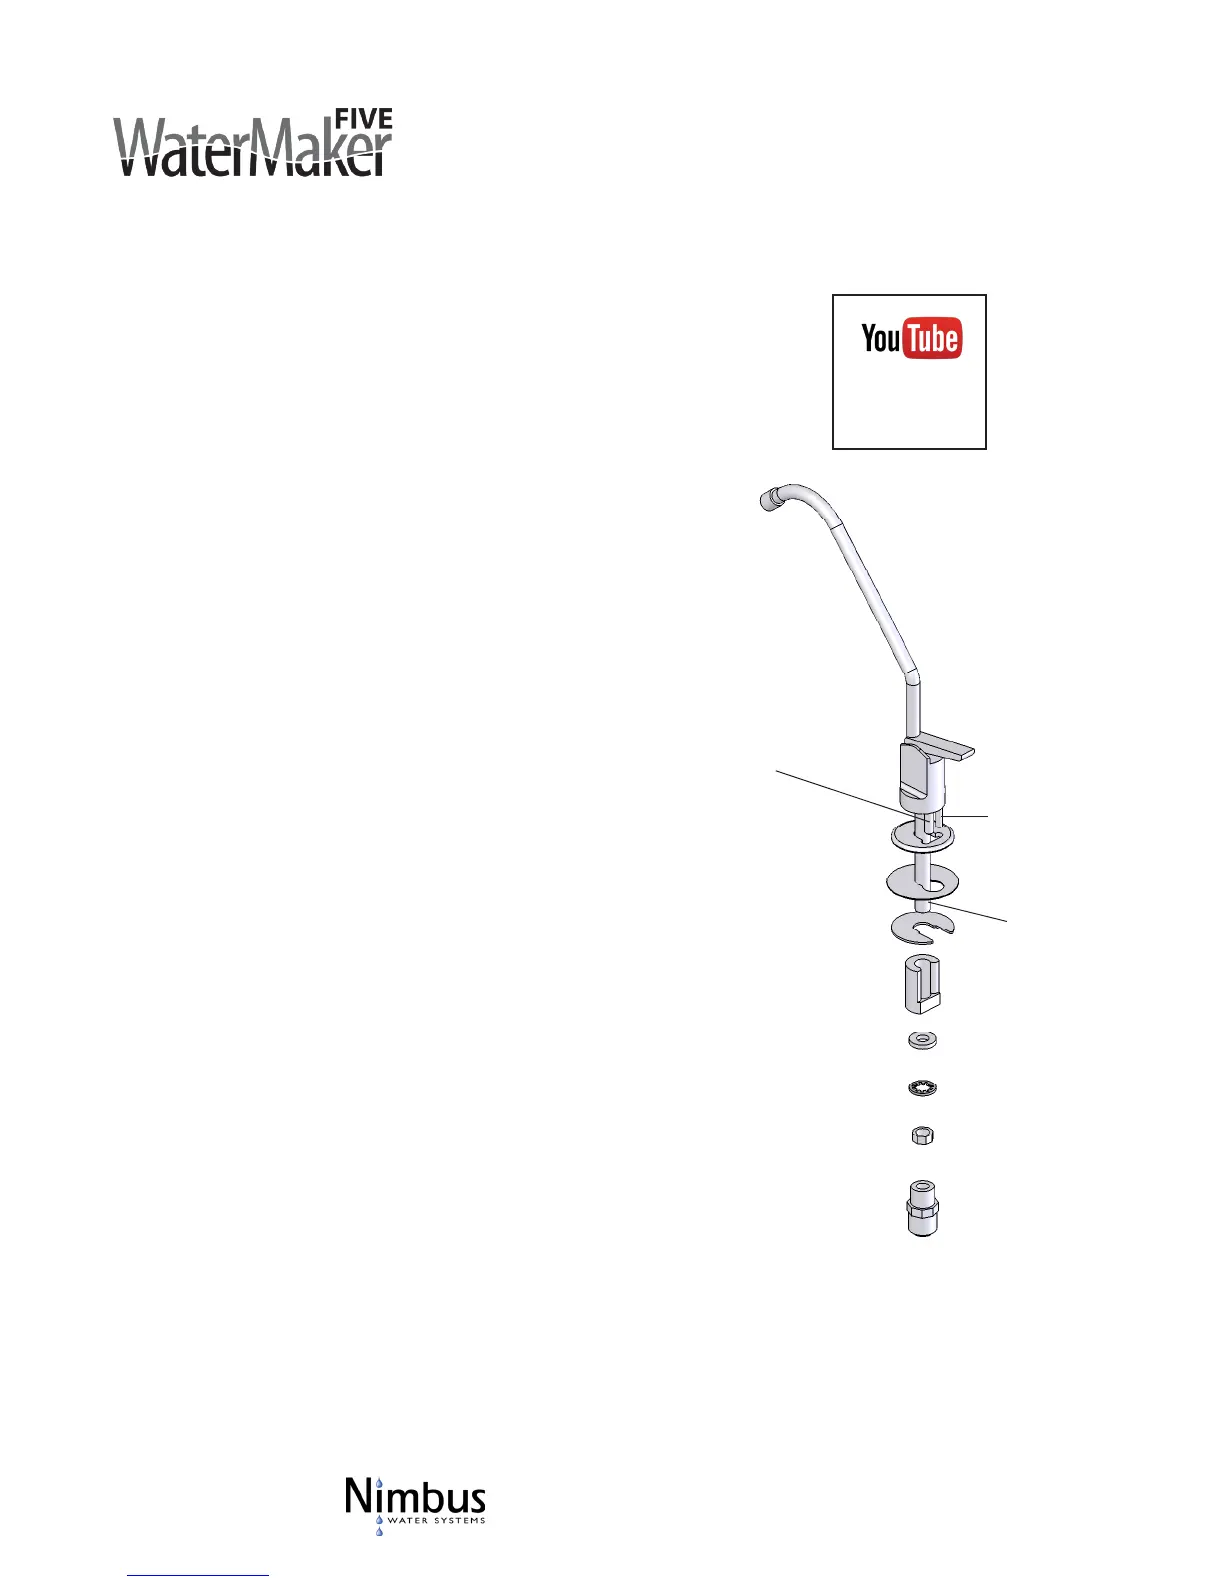
Push Handle Airgap Faucet
Product water
(3/8" blue tubing)
System to airgap drain
(1/4" black tubing)
Faucet to drain saddle
(3/8" white tubing)
Metal base plate
Rubber seal
1
2
3
5
6
4
Note: This faucet requires a 1¼" opening in the sink or countertop.
1. Locate the faucet parts bag and arrange the parts on the
countertop in the sequence shown.
2. The last part in the sequence, the quick connect adapter (6),
will be found in the smaller parts bag.
3. Locate the piece of white tubing. Pull the white, black and
blue tubing up through the faucet hole in the sink.
4. Insert polished faucet base and rubber seal onto base of
faucet.
5. Push the 1/4” black drain tubing aached to the system onto
the smaller 1/4” barb located on the faucet base.
6. Push the 3/8” white tubing onto the larger 3/8” ng located
on the faucet base.
7. Slide white plasc spacer open-end-up onto the threaded
faucet stem (2). Note: This spacer may be omied if faucet is
installed in a granite countertop (or countertop with similar
thickness).
8. Loosely thread the 3/8" washer (3), the serrated washer (4)
and mounng lock nut (5) onto the threaded stem. Leave enough
space for the sloed washer which will be used in step 11.
9. Thread faucet quick-connect adapter (6) on to threads of
faucet stem. NOTE: This connecon should be hand-ghtened only.
Push one end of 3/8" blue tubing into 3/8" connecon.
10. Push the tubing down into the faucet hole and posion the
faucet to the approximate orientaon.
11. From underneath the sink, slip the sloed washer (1) between
the white plasc spacer and the sink. Check the orientaon of
the faucet on the sink. Securely ghten the mounng nut with a
wrench.
12. If necessary, rmly insert spout assembly into the top hole of
faucet body (approximately 1/4"). You may swivel the faucet le or
right.
Installaon Videos
www.youtube.com/
nimbuswaterusa
 Loading...