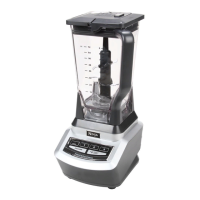
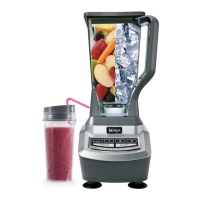
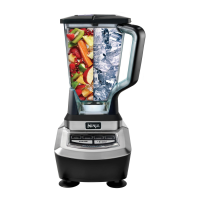
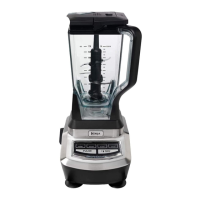
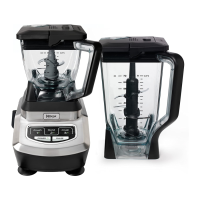
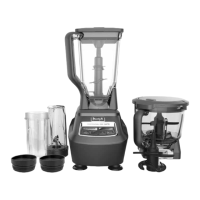
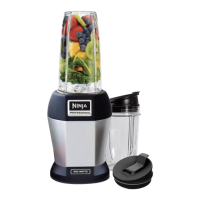
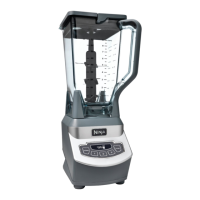
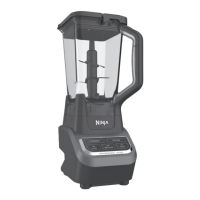
The Ninja Professional Blender 1000 (model BL710WM) is a high-powered kitchen tool designed for a variety of food preparation tasks, including ice crushing, blending, pureeing, and controlled processing. It aims to help users create their favorite recipes quickly and easily with just one touch of a button.
Important Safety Instructions:
The manual emphasizes a comprehensive set of safety precautions to reduce the risk of injury, fire, electrical shock, or property damage. Users are advised to read all instructions carefully before use, as the unit contains electrical connections and moving parts that could pose risks. Key safety points include:
- Handling Blades: Blades are sharp, and extreme care must be taken when handling them. The Stacked Blade Assembly should only be grasped by the top of the shaft, and the Pro Extractor Blades® Assembly by the outer perimeter of its base. Failure to do so can result in lacerations.
- Assembly and Operation: The appliance should always be used on a dry, level surface. It is crucial to ensure that the blade assembly is first attached to its corresponding container (pitcher or cup) with the lid in place before placing it on the motor base. The appliance should never be operated with an empty container or without lids and caps properly installed. Users should not attempt to defeat the interlock mechanism.
- Loading and Processing: Hands, hair, and clothing must be kept out of the container during loading and operation. Containers should not be filled past the MAX FILL or MAX LIQUID lines. Hot liquids should not be blended, as this can lead to pressure buildup and steam exposure, posing a burn risk. Dry ingredients or grinding operations should not be performed with the Single-Serve Blending Cup and Pro Extractor Blades® Assembly, or the pitcher and Stacked Blade Assembly.
- Cleaning and Maintenance: The appliance should be turned OFF and unplugged from the outlet before assembling, disassembling, or cleaning parts. The motor base or control panel should never be submerged in water or other liquids, nor sprayed with any liquid.
- Overheating Protection: The appliance features a thermal switch that temporarily disables the motor if it overheats. To reset, the unit must be unplugged and allowed to cool for approximately 30 minutes before reuse.
- Utensils and Additions: All utensils must be removed from containers before operation to prevent shattering and injury. If additional ingredients are needed during processing, the pour spout cap can be opened to add them through the opening.
- Post-Processing: Upon completion, the blade assembly must be removed before emptying the container's contents to avoid laceration risks. If using the pitcher's pour spout, the cover should be held in place or the lid lock engaged to prevent injury.
- Storage: Ingredients should not be stored in the Single-Serve Cup with the blade assembly attached, as some foods can release gases and cause pressure buildup. For ingredient storage in the cup, only a Spout Lid should be used.
- Cord and Plug: The appliance has a polarized plug; if it doesn't fit, the plug should be reversed. No modifications should be made to the plug. Extension cords are not recommended. The cord should not hang over edges or contact hot surfaces.
- Damage: The appliance should not be operated with a damaged cord or plug, or if it malfunctions or is damaged. It has no user-serviceable parts; contact SharkNinja for servicing.
Technical Specifications:
- Voltage: 120V, 60Hz
- Watts: 1000W
- Pitcher Capacity: 72 oz. (2.1 L)
- Max Liquid Capacity: 64 oz. (8 cups, 1.9 L)
Usage Features:
The Ninja Professional Blender 1000 offers various blending functions controlled by a simple interface:
- POWER (On/Off): Turns the appliance on or off. Always turn the appliance off when not in use.
- LOW (Processing & Mixing): Ideal for mixing thin batters, gravies, and marinades; beating eggs; pureeing cooked foods and uncooked fruits; and chopping vegetables for dips and salsa.
- MEDIUM (Blending & Ice Crushing): Suitable for grating hard cheeses; chopping and grinding nuts; mixing dips; cream soups (cooled to room temperature); blending sauces (cooled to room temperature), spreads, mixed drinks, smoothies, and milkshakes.
- HIGH (Pureeing & Liquefying): Used for mixing smoothies, frappes, liquefying thick mixtures, and blending whole fruits and vegetables.
- PULSE (Controlled Processing & Bursts of Power): Provides controlled chopping and processing. This button should be pressed down in short intervals for even chopping.
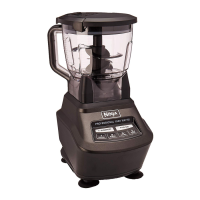
Assembly and Use of the Pitcher:
- Preparation: Review safety instructions. Place the motor base on a clean, dry, level surface.
- Blade Assembly: Hold the Stacked Blade Assembly by the top of the shaft and place it onto the drive gear inside the pitcher, ensuring it is seated properly and standing upright. (Note: The blade assembly will fit loosely.)
- Pitcher Placement: Align and lower the pitcher onto the motor base. Rotate the pitcher clockwise until it locks in place (a click will be heard). The pitcher can be placed with the handle on either the front right or front left corner.
- Adding Ingredients: Add ingredients to the pitcher, ensuring they do not exceed the highest measured marking line (Max Liquid mark of 64 ounces for liquids).
- Lid Installation: Hold the lid by the handle in the upright position, place it on top of the pitcher, aligning the arrow (✔) on the lid with the arrow (▲) on the pitcher's handle. Press the handle down until a click is heard.
- Power On: Plug the power cord into an electrical outlet and press the power button (6). The power button will flash if the pitcher and lid are not installed correctly; it will become solid when properly installed, indicating readiness.
- Processing: Select the desired speed (LOW, MEDIUM, HIGH, PULSE) based on blending requirements.
- Stopping: Once desired consistency is reached, press the power button (6) and wait for the Stacked Blade Assembly to stop turning.
- Lid Removal: To remove the lid, press the release button, pull the lid handle up to a 90° angle, and lift it off.
- Pitcher Removal: Turn the pitcher counterclockwise and then lift it off the base.
- Emptying Contents: Open the pour spout cap to empty liquid contents. For thicker consistencies, remove the lid first, then carefully remove the Stacked Blade Assembly by the top of the shaft, place it away from the work area, and finally empty the pitcher.
- Unplugging: Ensure the unit is unplugged when not in use.
Maintenance Features:
- Cleaning:
- Separation: Separate all parts.
- Hand-Washing: Wash the pitcher, lid, and Stacked Blade Assembly in warm, soapy water. Use a dishwashing utensil with a handle for the blade assembly to avoid direct hand contact. Rinse and air-dry.
- Dishwasher: The pitcher, lid, and Stacked Blade Assembly are dishwasher safe. The lid and Stacked Blade Assembly are top-rack dishwasher safe. Ensure the Stacked Blade Assembly is removed from the pitcher before placing in the dishwasher.
- Motor Base: Wipe the motor base clean with a damp cloth.
- Storing: Store the Ninja® Professional 1000 upright with the Stacked Blade Assembly inside the pitcher with the lid secured on top. Do not place anything on top. Loosely wrap the power cord around the cord storage hook in the back of the unit.
- Resetting the Motor Thermostat: If the unit overloads and the motor stops, follow these steps:
- Unplug the unit from the electrical outlet.
- Remove and empty the pitcher, ensuring no ingredients are jamming the Stacked Blade Assembly.
- Allow the unit to cool for approximately 15 minutes.
- Place the pitcher onto the base and plug the unit into the electrical outlet.
- Proceed to use the unit as before, ensuring not to exceed recommended capacities.
Troubleshooting Guide:
- Motor doesn't start or Stacked Blade Assembly doesn't rotate: Check if the pitcher and lid are securely placed, if the blender is turned on (power button (6) pressed), if the plug is securely inserted, and if the fuse or circuit breaker is intact. If the unit overheated, unplug and wait 15 minutes.
- Ingredients are unevenly chopped: Process smaller amounts per batch.
- Ingredients are chopped too fine or is too watery: Ingredients have been over-processed. Use the PULSE button for controlled processing.
- Ingredients collect on lid or on the sides of the pitcher: The mixture is too thick; add more liquid.
- Cannot achieve snow from solid ice: Use ice straight from the freezer and ensure the pitcher is completely dry before adding ice. Do not use ice that has been sitting out or has started to melt.
Replacement Parts:
Additional parts and accessories can be ordered from ninjaaccessories.com or by contacting Customer Service at 1-877-646-5288.
Warranty:
The Ninja Professional Blender 1000 comes with a One (1) Year Limited Warranty, covering defects in material and workmanship for purchases made from authorized retailers of SharkNinja Operating LLC. The warranty applies to the original owner and product only and is not transferable. SharkNinja will repair or replace defective units or non-wearable parts. The warranty does not cover normal wear and tear of wearable parts (e.g., blending vessels, lids, cups, blades), units tampered with or used for commercial purposes, damage from misuse, abuse, negligent handling, failure to perform required maintenance, or damage due to mishandling in transit. Consequential and incidental damages, defects caused by unauthorized repair persons, and products purchased, used, or operated outside North America are also not covered. To initiate a warranty claim, users must call 1-877-646-5288, provide proof of purchase (receipt), and register their product online at registeryourninja.com. SharkNinja covers the cost of sending the unit for repair or replacement, but a fee of $19.95 (subject to change) is charged for shipping the repaired or replacement unit back to the customer.