9
1-877-646-5288
Assembly and Use for the Food Processor Bowl - cont.
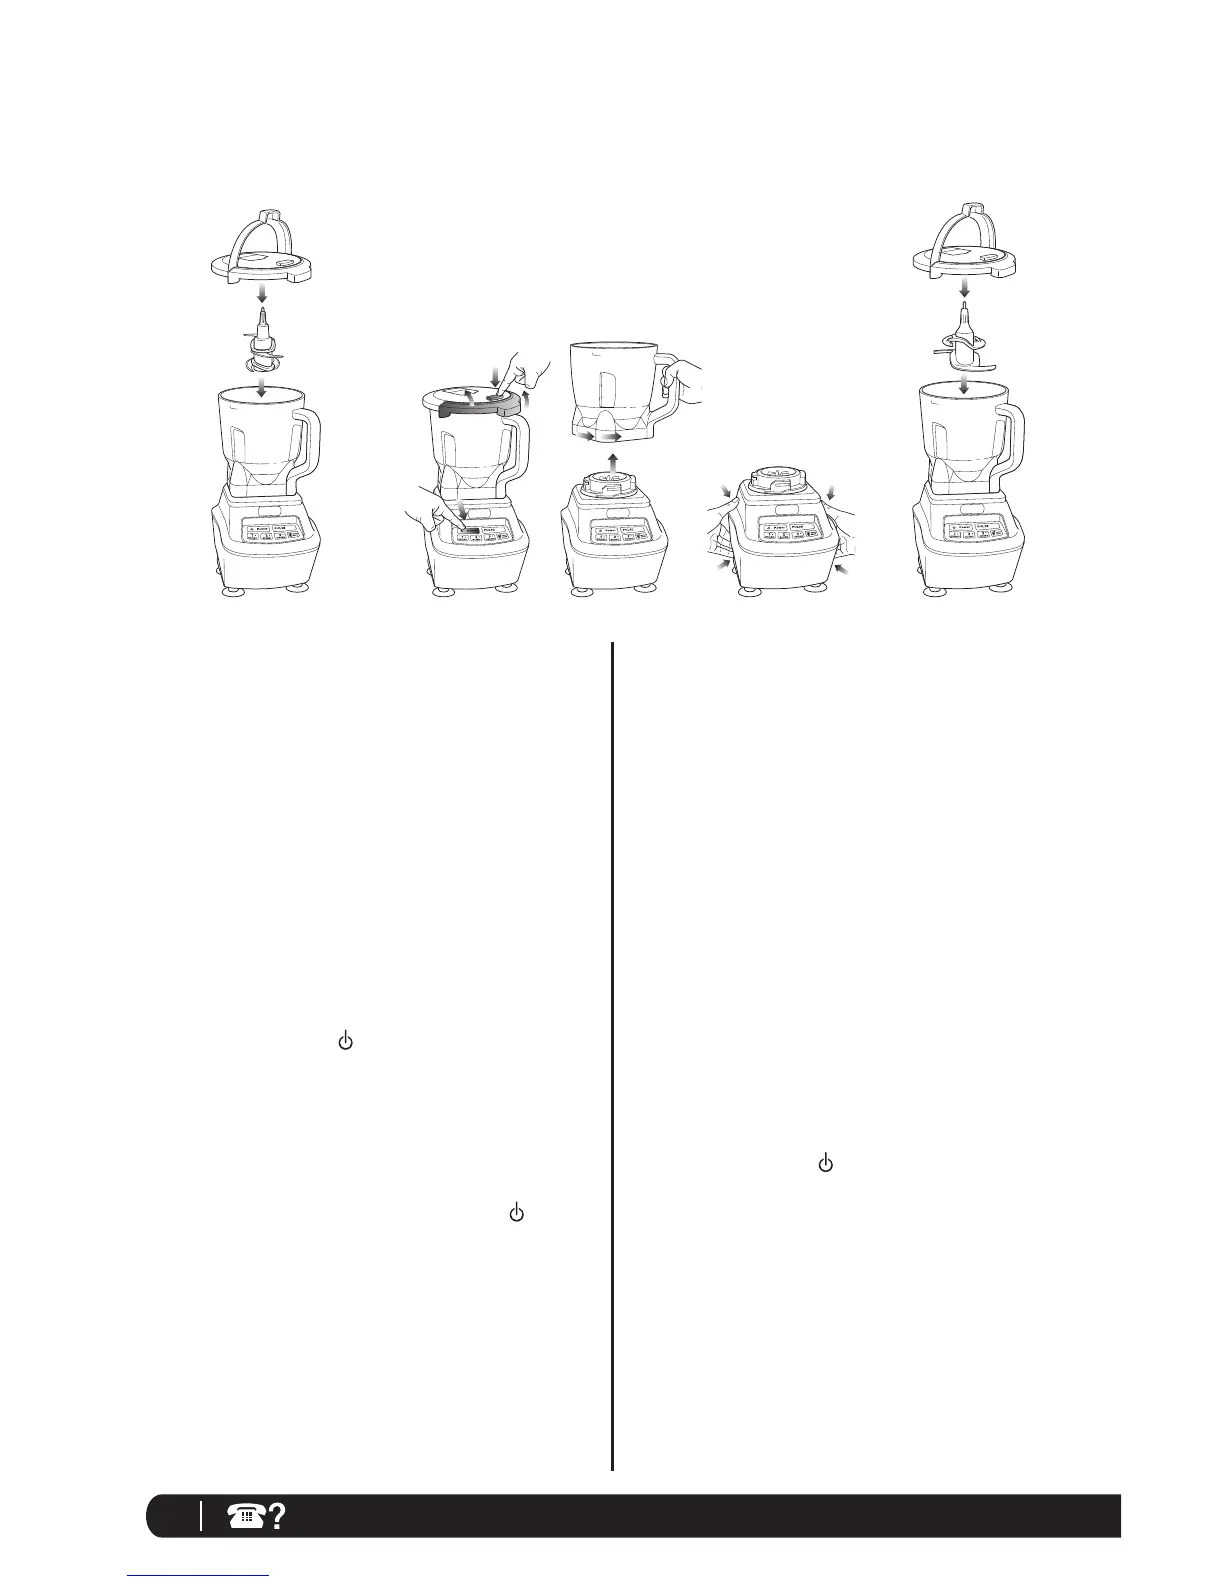
USING THE CHOPPING BLADE ASSEMBLY
1 Review warning and caution statements at the top of
page 8 before proceeding to number 2.
2 Place the motor base on a clean, dry, level surface such
as a counter or table top.
3 Secure the bowl onto the motor base.
4 Holding the Chopping Blade Assembly by the shaft,
place it onto the gear shaft inside the bowl. Ensure that
the Chopping Blade Assembly fits around the gear shaft
and that it is standing straight. (Fig. 1)
5 Add the ingredients and secure the bowl lid onto the
bowl. (Fig. 1)
6 Plug the power cord into the electrical outlet and press
on the power button ( ). (Fig. 2) Select the speed
that best suits your needs. Pulse ingredients for even
chopping by pressing down in short intervals.
NOTE: Please refer to “Speed Settings & Uses” chart
for suggested uses and speeds.
7 When you have reached your desired consistency, stop
the appliance by pressing the power button ( ) and
wait for the Chopping Blade Assembly to stop turning.
8 To remove the lid, press the release button on the lid
and pull the lid handle up to a 90° angle. (Fig. 2)
9 Turn the bowl counter-clockwise and lift it to remove it
from the motor base. (Fig. 3)
10 To release the motor base from the counter or table top,
place your hands underneath both sides of the motor
base and gently pull the unit up and towards you.
(Fig. 4)
USING THE DOUGH BLADE ASSEMBLY
IMPORTANT: Use only the “DOUGH” button when
using this attachment.
1 Review warning and caution statements at the top of
page 8 before proceeding to number 2.
2 Place the motor base on a clean, dry, level surface such
as a counter or table top.
3 Secure the bowl onto the motor base.
4 Holding the Dough Blade Assembly by the shaft, place
it onto the gear shaft inside the bowl. Ensure that the
Dough Blade Assembly fits around the gear shaft and
that it is standing straight. (Fig. 5)
5 Add the ingredients and secure the bowl lid onto the
bowl. (Fig. 5)
NOTE: For best results add wet ingredients first and
then add dry ingredients.
6 Plug the power cord into the electrical outlet and press
on the power button ( ). (Fig. 2)
7 To remove the lid, press the release button on the lid
and pull the lid handle up to a 90° angle. (Fig. 2)
8 Turn the bowl counter-clockwise and lift it to remove it
from the motor base. (Fig. 3)
9 To release the motor base from the counter or table top,
place your hands underneath both sides of the motor
base and gently pull the unit up and towards you. (Fig. 4)
REMOVAL
Fig. 5
USE
CHOPPING BLADE
ASSEMBLY
Fig. 1 Fig. 2 Fig. 3 Fig. 4
USE
DOUGH BLADE
ASSEMBLY