TIMING CHAIN
EM-61
< REMOVAL AND INSTALLATION >
[VQ40DE]
C
D
E
F
G
H
I
J
K
L
M
A
EM
N
P
O
After removing timing chain (primary), do not turn crankshaft and camshaft separately, or valves
will strike the piston heads.
8. Remove crankshaft sprocket, if necessary.
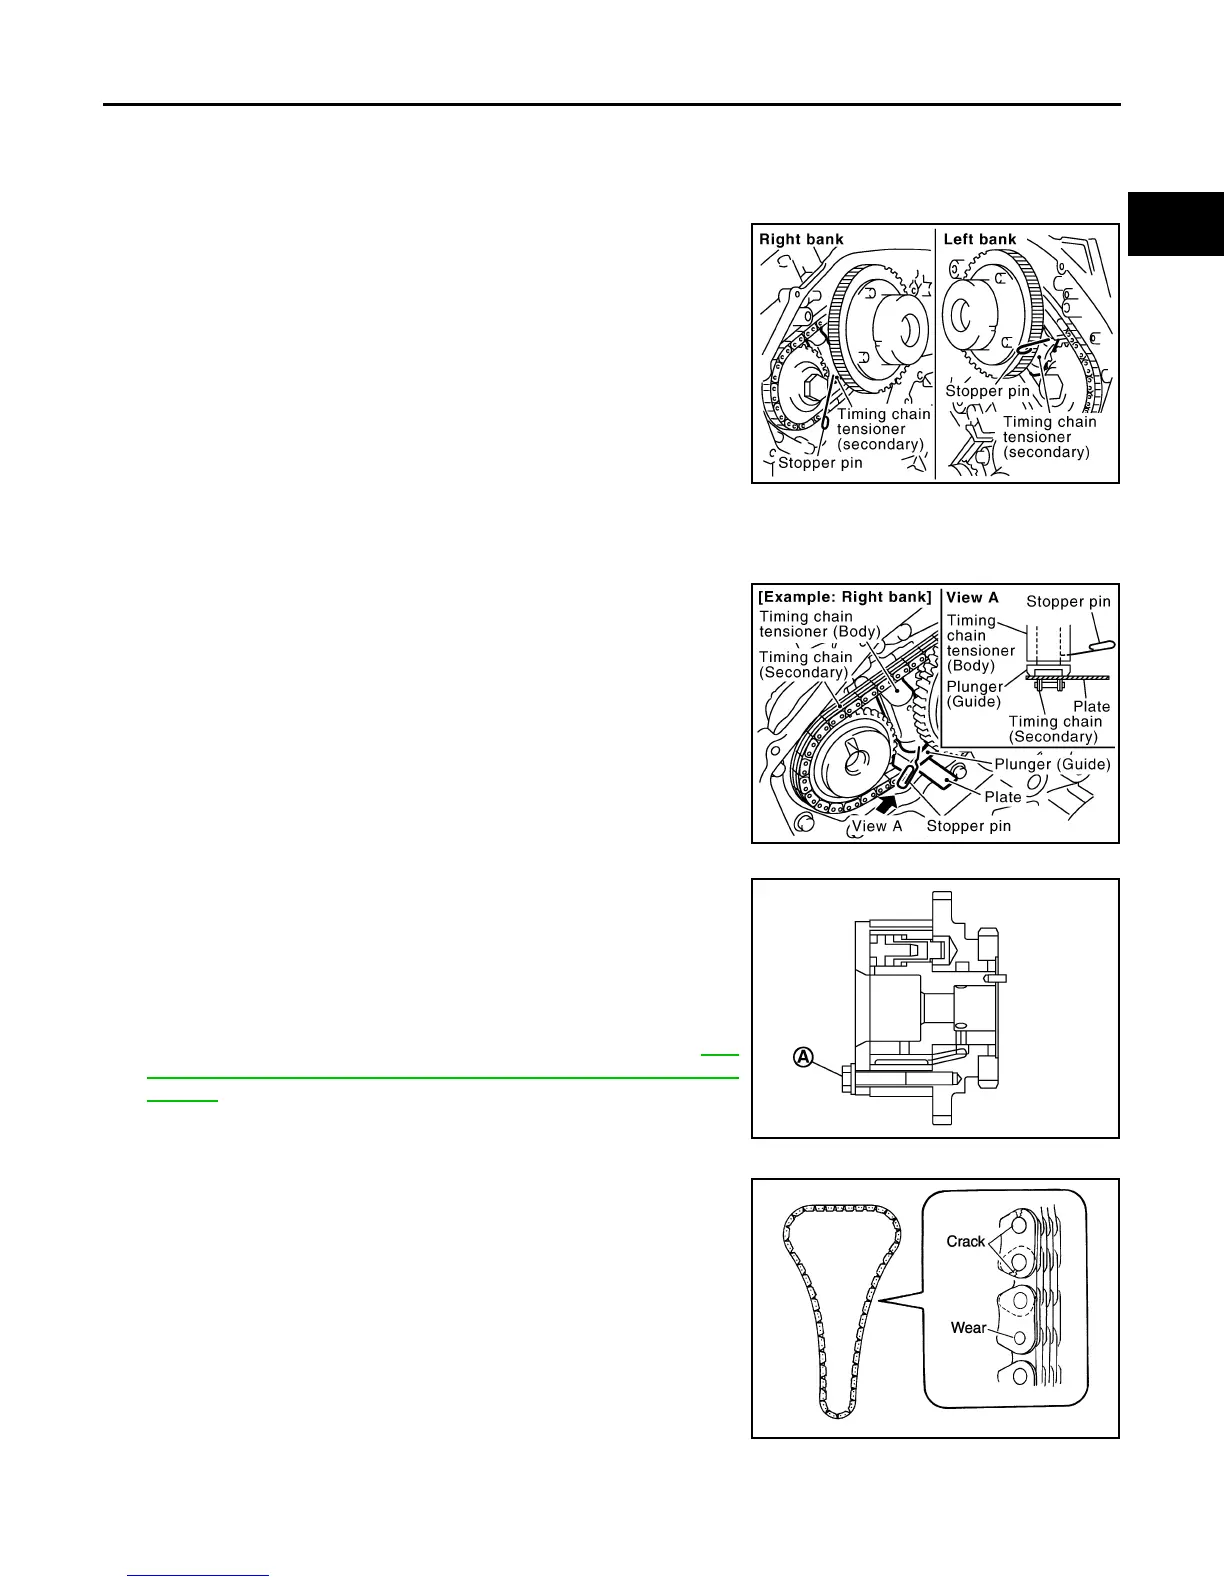
9. Remove timing chain (secondary) and camshaft sprockets as follows:
a. Attach stopper pin to the right and left timing chain tensioners
(secondary).
NOTE:
• Use stopper pin included with Tool J-50246.
b. Remove camshaft sprocket (INT and EXH) bolts.
c. Remove timing chain (secondary) together with camshaft sprockets.
• Turn camshaft slightly to secure slack of timing chain on timing chain tensioner (secondary) side.
• Insert 0.5 mm (0.020 in)-thick metal or resin plate between tim-
ing chain and timing chain tensioner plunger (guide). Remove
timing chain (secondary) together with camshaft sprockets
with timing chain loose from guide groove.
CAUTION:
Be careful of plunger coming off when removing timing
chain (secondary).
NOTE:
Camshaft sprocket (INT) is a one piece integrated design with
sprockets for timing chain (primary) and for timing chain (sec-
ondary).
• When handling camshaft sprocket (INT), be careful of the fol-
lowing:
CAUTION:
• Handle carefully to avoid any shock to camshaft
sprocket.
• Do not disassemble. (Do not loosen bolts (A) as shown).
NOTE:
For removal of timing chain tensioner (secondary), refer to EM-
68, "Removal and Installation (Secondary Timing Chain Ten-
sioner)". [Removing camshaft bracket (No. 1) is required.]
INSPECTION AFTER REMOVAL
Check for cracks and any excessive wear at link plates. Replace
chain if necessary.
• Inspect all timing chains and associated parts for wear or damage,
replace as necessary.
INSTALLATION
PBIC2047E
PBIC1978E
PBIC2920E
PBIC0282E
Revision: January 2013 2013 Xterra