On-Board Mounting.
Mount the charger near the
battery,
ensuring
the
cables
and
charger
are
secure
and
away
from
any
moving
parts
{eg.
fan
blades,
belts,
pulleys}.
Secure
the provided mounting bracket to the
vehicle's
chassis
using
the two included self-tapping screws.
For
best
results,
mark
the position
using
the bracket,
and
pre-drill two
small
pilot
holes.
Once
the bracket
is
secured,
use
the velcro strap to
secure
the
Genius20
in
place.
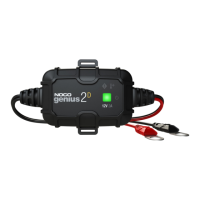
Connecting
to
the Battery.
Do
not connect the
AC
power
plu~
until
all
other connections
are
made.
Identify the correct polarity of the battery tenninals
on
the
battery.
Do
not
make
any
connections to the
carburetor,
fuel
lines,
or
thin,
sheet
metal
parts.
The
below instructions
are
for a negative
ground
system
{most
common}.
If your
vehicle
is
a positive ground
system
{very
uncommon),
follow the below instructions
in
reverse
order.
1.)
Connect the positive
{red)
eyelet
terminal
connector to the positive
(POS,P,+)
battery tenninal.
2.)
Connect the negative
{black)
eyelet
terminal
connector to the
negative
{NEG,N,-)
battery
terminal.
3.)
Connect the battery charger's
AC
power
plug
into a suitable electrical outlet.
Begin Charging.
1
.}
Verify
the voltage
and
chemistry of the
battery.
2.)
Confinn that
you
have
connected the
eyelet
tenninal connectors properly
and
the
AC
power plug
is
plugged into
an
electrical
outlet.
3.)
All
LEDs
will
flash
momentarily,
then
the charger
will
begin
charging without user intervention.
4.)
The
charger can now
be
left connected to the battery
at
all
times to provide maintenance charging.