17
CONFIDENTIAL
Copyright © 2008 NOKIA. All rights reserved.
6220classic RM-328/RM-387
Page (18)
ISSUE 1
Service Manual Level 1&2
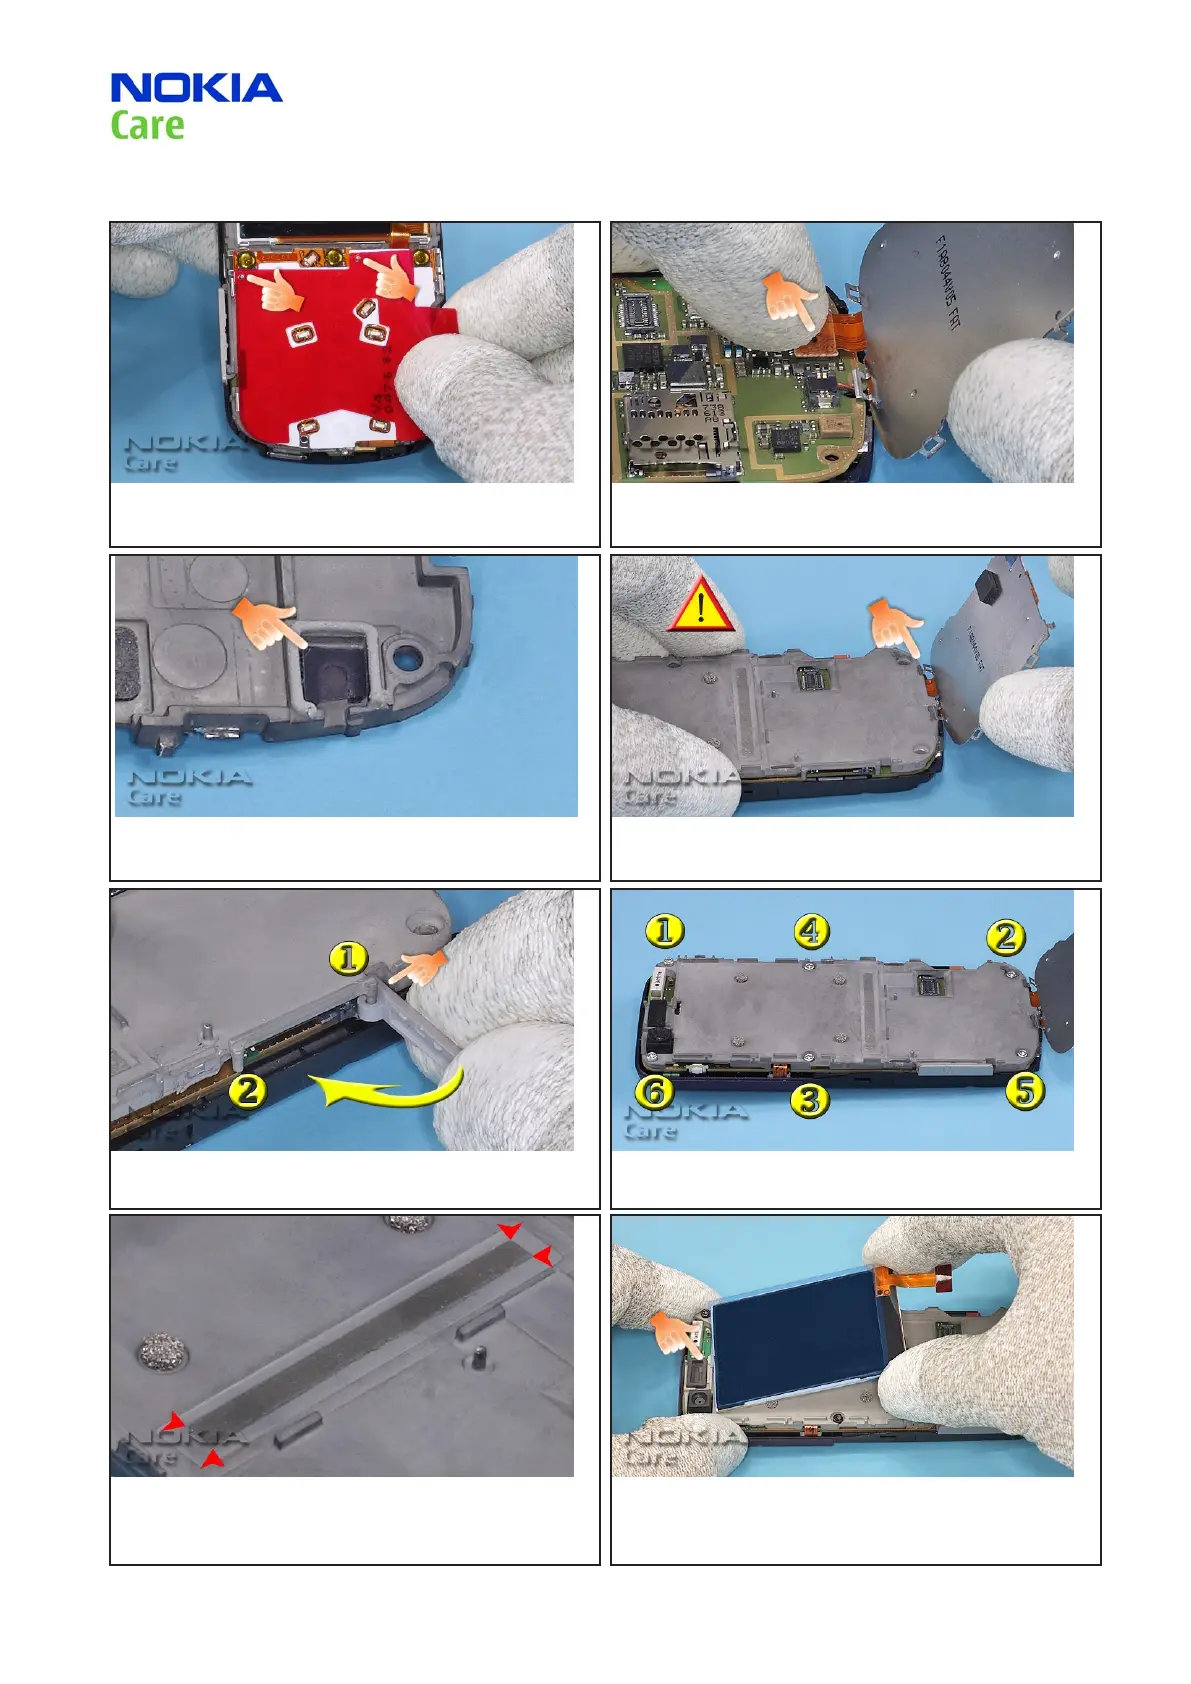
9. Align the markings of the new KEYMAT ADHESIVE with the
UI ASSY. Ensure that the ADHESIVE is glued well and carefully
remove the carrier foil.
10. Connect the UI SHEET ASSY.
11. Always use a new MICROPHONE GASKET when
assembling the unit.
12. Place the DECK ASSY on the PWB.
13. Fit the MEMORY CARD LATCH to the DECK ASSY (1) and close
it (2).
14. Tighten the screws to the torque of 18Ncm in the order
shown.
15. If the DISPLAY ADHESIVE has been re-used more than TWO
times or it is dirty, dusty or partly missing, then use a new DECK
ASSY. Remember to clean adhesive residues from LCD when
using new DECK.
16.SecuretheLCDonthetopsiderstandthenplace
it onto the DECK ASSY.
 Loading...