EasyManua.ls Logo

Nokia TA-1333 User Manual

Nokia TA-1333
2 pages
To Next Page IconTo Next Page
Page #1 background imageLoading...
Page #1 background image
1. Insert the SIM and memory
card
1. Open the SIM card tray: push the tray opener pin
in the tray hole and slide the tray out.
2. Put the nano-SIM in the SIM slot on the tray with
the contact area face down.
3. If you have a dual-SIM phone, put the second SIM
in the SIM2 slot.
Tip: To nd out if your phone can use 2 SIM cards,
see the label on the sales box. If there are 2 IMEI
codes on the label, you have a dual-SIM phone.
4. If you have a memory card, put it in the memory
card slot.
5. Slide the tray back in.
Use only origin
al nano-SIM cards. Use of incompati-
ble SIM cards may damage the card or the device,
and may corrupt data stored on the card.
Use only compatible memory cards approved for
use with this device. Incompatible cards may dam-
age the card and the device and corrupt data stored
on the card.
Important: Do not remove the memory card
when an app is using it. Doing so may damage the
memory card and the device and corrupt data
stored on the card.
Both SIM cards are available at the same time when
the device is not be
ing used, but while one SIM card
is active, for example, making a call, the other may
be unavailable.
2. Charge the battery and switch
the phone on
Plug a compatible charger into a wall outlet, and
connect the cable to your phone. Your phone
supports the USB-C cable. You can also charge your
phone from a computer with a USB cable, but it may
take a longer time.
If the battery is completely discharged, it may take
several minutes before the charging indicator is
displayed.
To switch your phone on, press and hold the power
key u
ntil the phone vibrates. The phone guides you
through the setup.
For an online user guide and troubleshooting help,
go to www.nokia.com/mobile-support..
HQ60722478000 V1.0
xxxxxxxxxx
USB-C USB micro-B
Get Started
Nokia xx
TA-1333/
TA-1340
EN-US-CA
Flash
Fingerprint
sensor
Loudspeaker
Microphone
USB connector
Google Assistant/
Google Search key*
SIM and memory
card slot
Camera
Front camera
Earpiece
Microphone
Power/Lock key
Volume keys
*Google Assistant is not available in certain languages
and countries. Where not available, Google Assistant
is replaced by Google Search. Check availability at
https://support.google.com/assistant.
Headset
connector
Question and Answer IconNeed help?

Do you have a question about the Nokia TA-1333 and is the answer not in the manual?

Nokia TA-1333 Specifications

General IconGeneral
ModelNokia TA-1333
Network TechnologyGSM / HSPA / LTE
SIMSingle SIM (Nano-SIM) or Dual SIM (Nano-SIM, dual stand-by)
TypeLi-Ion 4000 mAh, non-removable
Resolution720 x 1600 pixels, 20:9 ratio (~269 ppi density)
ChipsetUnisoc SC9863A (28nm)
CPUOcta-core (4x1.6 GHz Cortex-A55 & 4x1.2 GHz Cortex-A55)
GPUIMG8322
Selfie camera5 MP
LoudspeakerYes
3.5mm jackYes
WLANWi-Fi 802.11 b/g/n, hotspot
Bluetooth4.2, A2DP
GPSYes, with A-GPS
NFCNo
RadioFM radio
USBmicroUSB 2.0
SensorsAccelerometer, proximity
StatusAvailable
BuildPlastic back, plastic frame
Size6.52 inches
OSAndroid 11, Android Go edition
Internal Storage32GB 2GB RAM
RAM2GB
Charging10W wired
ColorsCharcoal
Main Camera13 MP, AF 2 MP (macro) 2 MP (depth)

Summary

Nokia Phone Getting Started Guide

Insert SIM and Memory Card

Guide on inserting nano-SIM and memory cards into the device tray for phone setup.

Charge Battery and Power On

Instructions for charging the Nokia phone and initiating the initial startup process.

Nokia Phone Safety and Compliance

Network, Battery, and Device Care

Information on network compatibility, battery, device materials, and magnetic components.

FCC SAR Certification and Exposure

Details on FCC RF exposure limits, SAR values, and body-worn operation compliance.

Regulatory Compliance Notices

Key FCC and IC compliance statements, including radio frequency radiation cautions.
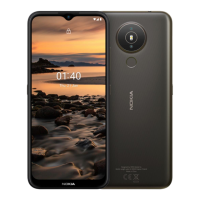
Related product manuals