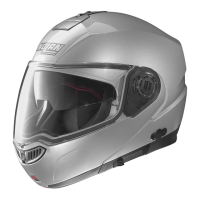
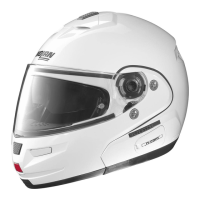
15
(#
%30;=:?0.?4:970A07:1?34>30780?B347>?=4/492/0;09/>@;:9?30.:9142@
=,?4:9,/:;?0/-D?30@>0=?:?,7;=:?0.?4:941?30.3492@,=/,9/A4>:=,=0
.7:>0/;,=?4,7;=:?0.?4:941?30.3492@,=/,9/:=A4>:=,=0:;09
: 9:? =08:A0 9:= ?,8;0= B4?3 ?30 14C492 >.=0B> ?3,? .:990.? ?30 .349
2@,=/?:?30>3077
:9:?@>0?3030780?B4?3:@??30.3492@,=/
:9:?@>0?3030780?49.,>0:11,@7?D.3492@,=/:9?,.?4880/4,?07D,
:7,9,@?3:=4E0//0,70=
'$ #$$*$%
'$ #$$$*
1.1 Open the visor completely with the chin guard closed.
1.2 Press and hold the visor release button (A) towards the front of the helmet and
release the rear inner visor fastening (B) from its seat by pulling the visor out-
wards.
1.3 Let the visor slide forwards until the front inner fastening (C) releases from the
mechanism (Fig. 4).
1.4 Repeat the same steps on the other side of the helmet.
(,=9492:9:?=08:A0?30A4>:=p>:;09492,9/.7:>49280.3,94>8>1=:8?30
.3492@,=/
$$*
2.1 With the chin guard closed, set the visor in open position by placing the inner
visor fastenings (B) and (C) into their seats in the visor mechanism (Fig. 4).
2.2 Insert the fastening (C) in the provided front seat and press the visor against the
side mechanism in line with the rear fastening (B).
2.3 At the same time push the visor release button (A) towards the front of the helmet
until you hear the fastening click of the visor to the mechanism.
2.5 Repeat the same steps on the other side of the helmet.
(#
,60>@=0?3,??30>D>?084>B:=6492;=:;0=7D ;09?30A4>:=D741?492?30
.3492@,=/?30A4>:=.7:>0>,@?:8,?4.,77D
:9:?@>0?3030780?41?30A4>:=3,>9:?-009,>>08-70/;=:;0=7D
1?30A4>:=:;09492.7:>49280.3,94>8>,=09:?B:=6492;=:;0=7D:=41>@.3
80.3,94>8>20?/,8,20/;70,>0.:9?,.?,:7,9,@?3:=4E0//0,70=
(Available as an optional accessory)
!
a
#'$ #$$*
1.1 Remove the visor.
1.2 Make sure that the inner surface of the visor is clean and check that the pin adju-
stment external levers are turned inwards.