Installation and Owner’s Manual 7
Installation Instructions
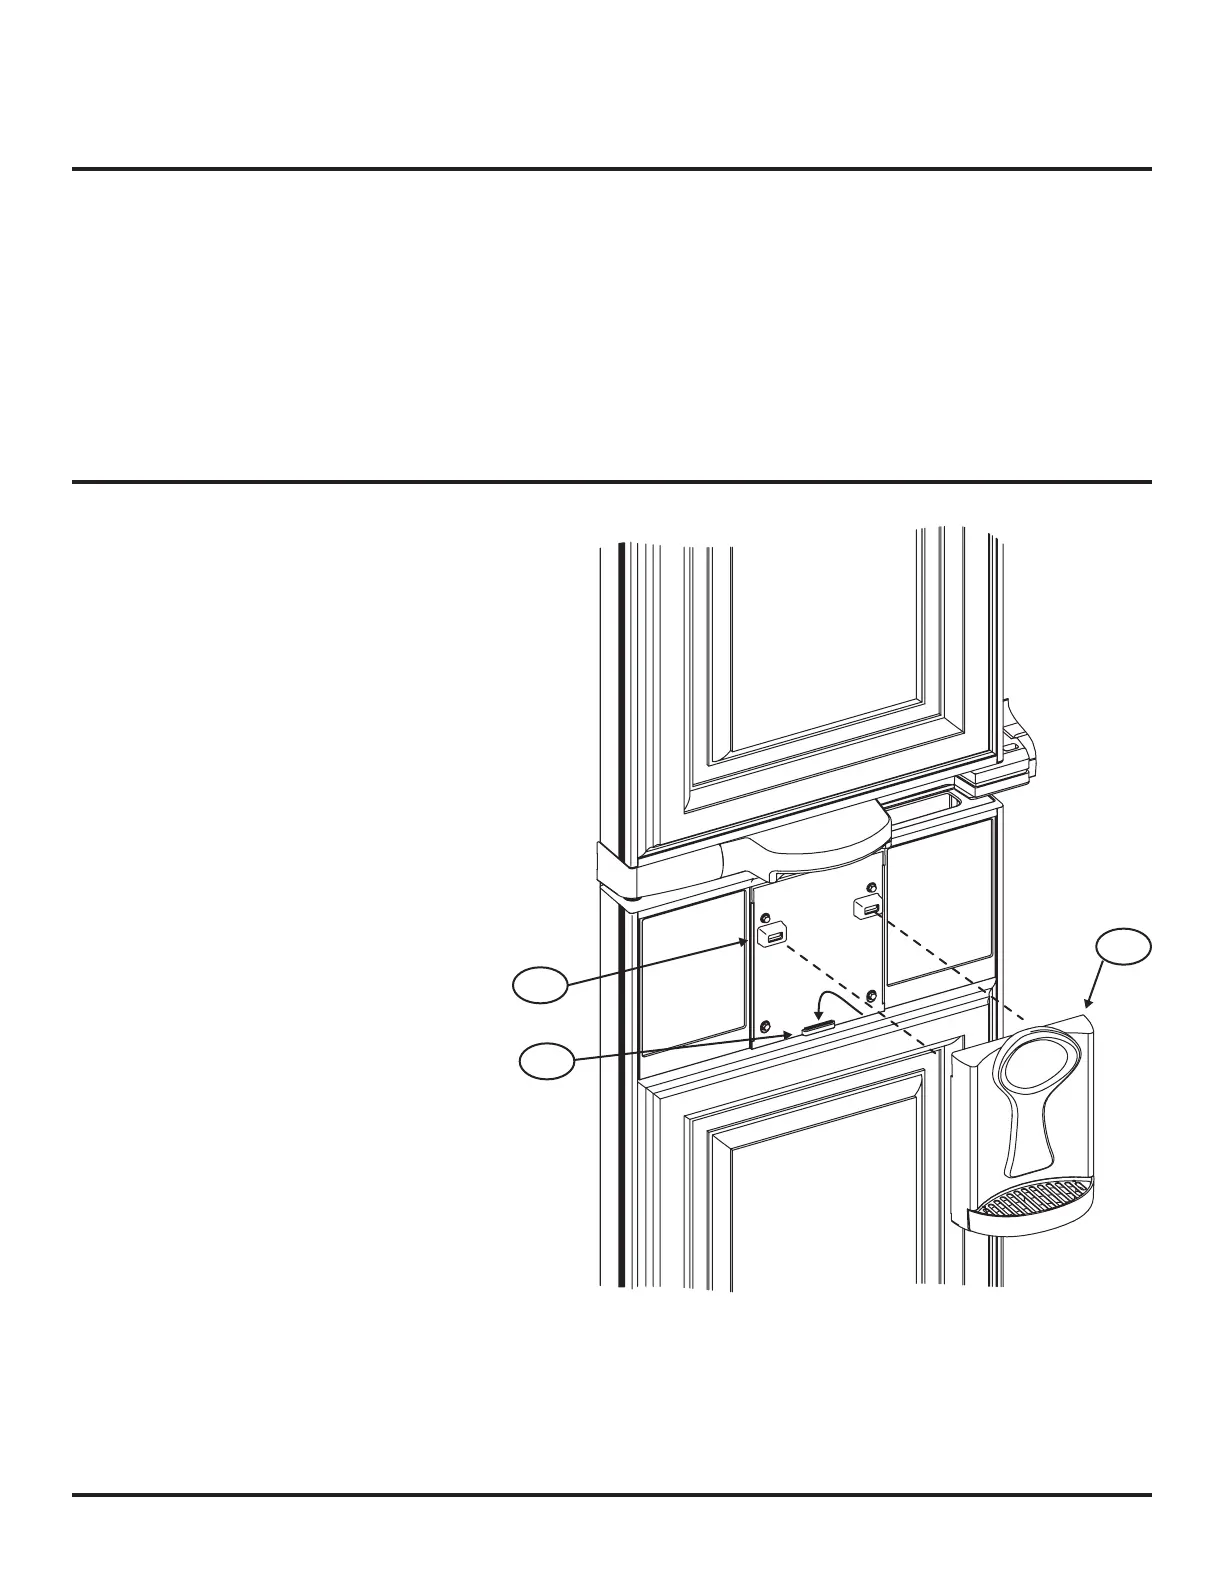
1. Install the back splash assembly (See Art01820):
- Put the hook on the bottom of the back splash assembly [193] down into the slot [157] of the water dispenser panel.
- Align the two (2) rectangular mounting studs on the rear of the back splash assembly with the two (2) mounting lugs [196] on the
water dispenser panel.
- Using equal pressure, push both mounting studs into the mounting lugs at the same time.
- The mounting studs should engage and lock into the mounting lugs with a “click” sound.
Install the Water Dispenser Components (non-metal door models)
1. Install the back splash assembly (See Art01820):
- Put the hook on the bottom of the back splash
assembly [193] down into the slot [157] of the
water dispenser panel.
- Align the two (2) rectangular mounting studs
on the rear of the back splash assembly with
the two (2) mounting lugs [196] on the water
dispenser panel.
- Using equal pressure, push both mounting studs
into the mounting lugs at the same time.
- The mounting studs should engage and lock into
the mounting lugs with a “click” sound.
Install the Water Dispenser Components (metal door models)