Do you have a question about the NORDRIVE RADIUS and is the answer not in the manual?
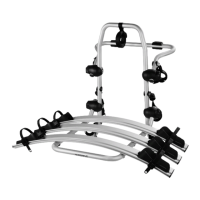
Details the RADIUS models, their bike capacities (2 or 3 bikes), and maximum weight limits.
Highlights TUV and GS certifications, indicating product safety and quality standards.
Instructions for unlocking the bicycle carrier's locking mechanism.
Guidance on adjusting the carrier arms to the correct position for use.
Procedure for securely fastening the bicycle carrier to the vehicle.
Detailed steps for integrating specific parts of the carrier during assembly.
Instructions for attaching additional components during the assembly process.
Guidance on the final tightening of components, including torque specifications.
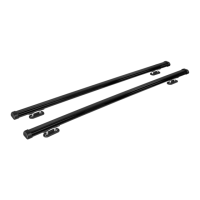
Instructions for attaching the carrier's support rails.
Details on operating the locking mechanism for the carrier arms.
Procedures for unlocking and making final adjustments to carrier components.
Instructions for the final step of securing the carrier assembly.
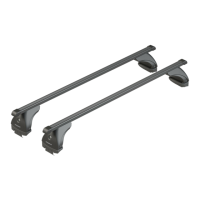
Overview of fitting the carrier to different vehicle types: Metal Fit and Plastic/Glass Fit.
Detailed instructions for attaching the carrier using the metal fitment method.
Detailed instructions for attaching the carrier using the plastic or glass fitment method.
Guide on replacing belts using a plastic adapter and securing them.
Final procedure for securely fastening all straps to the vehicle.
Information on using an alternative fixing point for the carrier, such as a towing eye.
Caution regarding contact between upper belts and vehicle spoilers to prevent damage.
Advice on correct placement of lower pads to avoid damaging vehicle surfaces.
Instructions for positioning the horizontal carrier arms at a specific upward angle.
Guidance on loading 2 or 3 bikes, alternating directions, and securing them.
Information on maximum weight capacities for 2 and 3 bike configurations.
Instructions on securely fastening bicycles to the carrier using supplied or additional straps.
Details on optional PAC-ARMS and standard components for bike support.
List of part numbers for various PAC-ARMS accessories (S, M, L, sets).
Recommended checks of the carrier at specific mileage intervals (100, 1000, 2000 Km).
Instructions and warnings regarding the use of safety straps for securing bikes.
Guidance on checking components for wear and tear before each use.
Ensuring all nuts, screws, and bolts are perfectly tightened before each use.
Recommendations for cleaning the carrier and storing it properly when not in use.
Important reminder to remove the carrier before using automatic car washes.
Illustrations showing the use of optional accessories for fitment.
Regulations regarding lateral bicycle protrusion from small vehicles and maximum width limits.
Information on when and how to use the approved protruding load sign (Art. 66102).
Regularly checking the fastening of straps and belts for security.
Caution against using the carrier on rough roads and paying attention to vehicle dimensions.
Strict prohibition on using elastic cords for securing bicycles.
| Brand | NORDRIVE |
|---|---|
| Model | RADIUS |
| Category | Automobile Accessories |
| Language | English |