Do you have a question about the Nordson EFD E3V and is the answer not in the manual?
Information on the extreme hazards of high pressure fluids and safety precautions.
Guidelines to prevent injury during operation and servicing of equipment.
Recommended checks for maintaining continuous trouble-free operation of the product.
Steps to take immediately if the system or any equipment malfunctions.
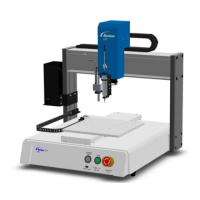
Procedure for positioning the robot and installing/connecting system components.
Ensuring correct installation of camera and dispenser to prevent damage.
Steps to power on the system after installation and verify its readiness.
Explains the structure of programs and the different types of commands used.
Defines offsets and explains their importance for system calibration and accuracy.
Describes how marks and fiducial marks are used for workpiece recognition and orientation.
Details the fields and settings available in the System Setup screen.
Explains the specific setup fields for the camera.
Procedure for viewing and changing system settings like model, speed, and acceleration.
Essential steps for system setup and calibration, critical for proper operation.
Ensuring the correct robot model and tip detector are selected in the software.
Step-by-step guide for setting up the tip detector for automatic offset updates.
Procedure for focusing the camera and ensuring a clear image for accurate dispensing.
Calibrating the camera scale to convert pixel measurements to actual distances.
Procedure for calibrating the distance between the camera and the dispensing tip.
Calibrating the Z clearance between the dispensing tip and the workpiece.
Verifying that the system setup and calibration procedures have been performed correctly.
Procedure for testing and configuring input/output connections for system control.
Steps to automatically update system offsets after component changes.
Basic steps for creating, testing, and running a dispensing program.
Guidance on creating dispensing patterns using sample programs and commands.
Procedure for creating marks used by the system for workpiece recognition.
Using Step & Repeat commands to dispense patterns on multiple workpieces.
Updating all points in a program using Point Offset when workpiece position changes.
Steps to power on the system, load a program, and begin dispensing.
Enables repeating dispensing patterns on identical workpieces in rows and columns.
Similar to Step & Repeat X, but prioritizes the Y axis for pattern repetition.
Step-by-step procedure for importing DXF files to create dispensing patterns.
Finalizing DXF import by updating XY locations to align with the actual workpiece.
Procedure for linking QR codes to specific dispensing programs for automated execution.
Calibrating camera-to-tip offsets for each dispenser in a multi-needle setup.
Completing the camera-to-tip offset calibration for the second dispenser.
Using the Multi Needle command to specify dispenser execution within a program.
Continuing the process of using the Multi Needle command for multiple dispensers.
Procedure for configuring and setting up the height sensor parameters.
Finalizing height sensor setup by capturing initial height and updating program values.
How to integrate the height sensor capability into dispensing programs for automatic Z-height adjustment.
Procedure for reconfiguring the system's input and output pin functions.
| Voltage | 24 VDC |
|---|---|
| Fluid Pressure | Up to 100 psi (6.9 bar) |
| Dispensing Pressure Range | Adjustable, up to 100 psi (6.9 bar) |
| Dispensing Time Range | 1 ms |
| Material Compatibility | Wide range of fluids |
| Power Requirements | 24 VDC |