EasyManua.ls Logo

NOTTINGHAM ANALOGUE STUDIO INTERSPACE JUNIOR User Manual

NOTTINGHAM ANALOGUE STUDIO INTERSPACE JUNIOR
3 pages
To Next Page IconTo Next Page
Page #1 background imageLoading...
Page #1 background image
NOTTINGHAM ANALOGUE
INTERSPACE JUNIOR
SET UP INSTRUCTIONS
CONGRATULATIONS ON PURCHASING YOUR NOTTINGHAM ANALOGUE TURNTABLE.
WE RECOMMEND THESE INSTRUCTIONS BE READ AT LEAST ONCE BEFORE SETUP
WITH CARE UNPACK THE COMPLETE CONTENTS OF BOX AND MAKE SURE ALL ITEMS ARE
PRESENT AS PER CHECK LIST ATTACHED.
SET UP AND ASSEMBLY
BEFORE STARTING SETUP, CHECK THE SURFACE YOU INTEND TO USE IS LEVEL AND STRONG
ENOUGH TO TAKE WEIGHT OF TURNTABLE.
STEP 1:- POSITION BASE PLINTH ONTO YOUR CHOICE OF FLAT SURFACE. LEVEL AS REQUIRED
USING THE FOUR ADJUSTABLE FEET. A SPIRIT LEVEL IS PROVIDED. (PHOTO 1)
STEP 2:- MOTOR SETUP GENTLY PRESS THE PULLEY ONTO MOTOR SPINDLE. PUSH ON CENTRALLY.
NOT AT AN ANGLE. YOU WILL FIND IT USEFUL TO SUPPORT THE UNDERSIDE OF MOTOR
WHILST DOING THIS. (PHOTO 2)
STEP 3:- POUR APPROX ½ A CAP (0.5ml) OF OIL INTO BEARING WELL. THE PIPPETTE SUPPLIED CAN
BE USED FOR EASE OF APPLICATION. (PHOTO 3)
STEP 4:- LOWER PLATTER ASSEMBLY INTO BEARING WELL AND ALLOW TO SETTLE. (PHOTO 4)
STEP 5:- ARM SET UP. REFER TO THE INSTRUCTIONS ENCLOSED WITH THE TONE ARM.
ADDITIONAL ARM INFORMATION FOR YOUR TURNTABLE, WE HAVE INCLUDED TWO SMALL FOAM
WEDGES. THESE CAN BE USED TO PREVENT THE PLATTER FROM MOVING DURING TONE ARM
SETUP. SIMPLY RAISE THE PLATTER SLIGHTLY OUT OF THE BEARING, INSERT THE WEDGES IN THE
GAP, LOWER PLATTER ONTO WEDGES AND COMPLETE ARM SETUP. (MAKE SURE PLATTER IS
SETTLED IN BEARING BEFORE COMPLETING ARM SETUP.) REMOVE FOAM WEDGES AFTER ARM
SETUP AND RETAIN FOR FUTURE USE. (PHOTO 5)
Question and Answer IconNeed help?

Do you have a question about the NOTTINGHAM ANALOGUE STUDIO INTERSPACE JUNIOR and is the answer not in the manual?

NOTTINGHAM ANALOGUE STUDIO INTERSPACE JUNIOR Specifications

General IconGeneral
BrandNOTTINGHAM ANALOGUE STUDIO
ModelINTERSPACE JUNIOR
CategoryTurntable
LanguageEnglish

Summary

SET UP AND ASSEMBLY

Position Base Plinth

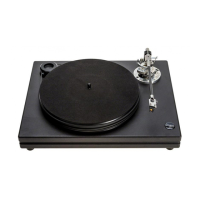
Place turntable base plinth on a level surface and adjust feet for leveling.

Motor Setup

Gently press the pulley onto the motor spindle centrally without an angle.

Add Bearing Oil

Pour approximately 0.5ml of oil into the bearing well using the pipette.

Lower Platter Assembly

Place the platter assembly into the bearing well and allow it to settle.

Tone Arm Setup

Refer to enclosed tone arm instructions; use foam wedges to stabilize.

DRIVE BELT AND MOTOR CONNECTION

Align Drive Belt and Pulley

Add damping rings and align drive belt grooves with platter and pulley.

Connect Motor and Start-Up

Connect motor to power; start turntable by turning platter clockwise.

CARE AND MAINTENANCE

Initial Running-In and Oil Change

Bed-in period noted; recommend oil change every 2 years for spindle/bearing.

Cleaning and Material Care

Use lint-free cloth for cleaning; avoid polish. Wash belt/rings in warm soapy water.

Usage Recommendations

Motor can stay on; do not leave platter spinning continually when not in use.

Stylus Cleaning and Earthing

Clean stylus front-to-back; provision for earthing the bearing is available.

Related product manuals