Checking Installation
Turn on the power to the HPC or HPC Plus. Make sure that power to the heat
pump unit and its control circuitry is on. If the executive module is operating
properly, the HPC or HPC Plus begins to control the heat pump in about 3
minutes (after performing a self-diagnostic check and establishing
communications with the executive module).
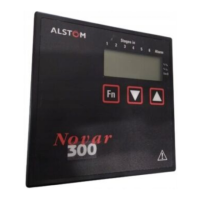
A schedule status indicator LED is located on the module’s case above the
terminal strip. If the module is communicating properly, this LED should be
flashing according to the scheduled mode.
§
When the HPC or HPC Plus is in scheduled off mode, the LED is off and
flashes on briefly when communicating.
§
When the module is in scheduled on mode, the LED is on and flashes off
briefly when communicating.
If a timed override switch has been installed and programmed, it can be tested for
proper operation by pressing it during a scheduled off mode. The LED flashes
rapidly until the override period ends.
The six relay output status LEDs indicate the status of each active digital output.
Verify that the LEDs are lit when the corresponding digital output is on.
If any faults or malfunctions still exist, they are picked up by the executive
module and announced by alarm messages.
Model and Part Numbers
Use the part numbers listed in Table 2 to order the necessary Novar Controls
parts.
Table 2. Novar Controls Part Numbers
PRODUCT MODEL NO. PART NO.
Heat Pump Controller HPC 738005000
Heat Pump Controller Plus HPC Plus 738025000
Futura Temperature Sensor for use with HPC FTS-3 732403000
Futura Temperature Sensor with temperature
adjustment potentiometer
FTS-3A 732401000
Remote Temperature Sensor for UVC RTS-UVC 736003000
UVC Wall-Mount Temperature Sensor WTS-UVC 736002000
Two conductor, shielded cable (Belden
8761equivalent
WIR-1010 709001000
DOC. #569062000 2/20/01 9
HPC/HPC Plus Installation Instructions