1.
UNPLUG THE UNIT
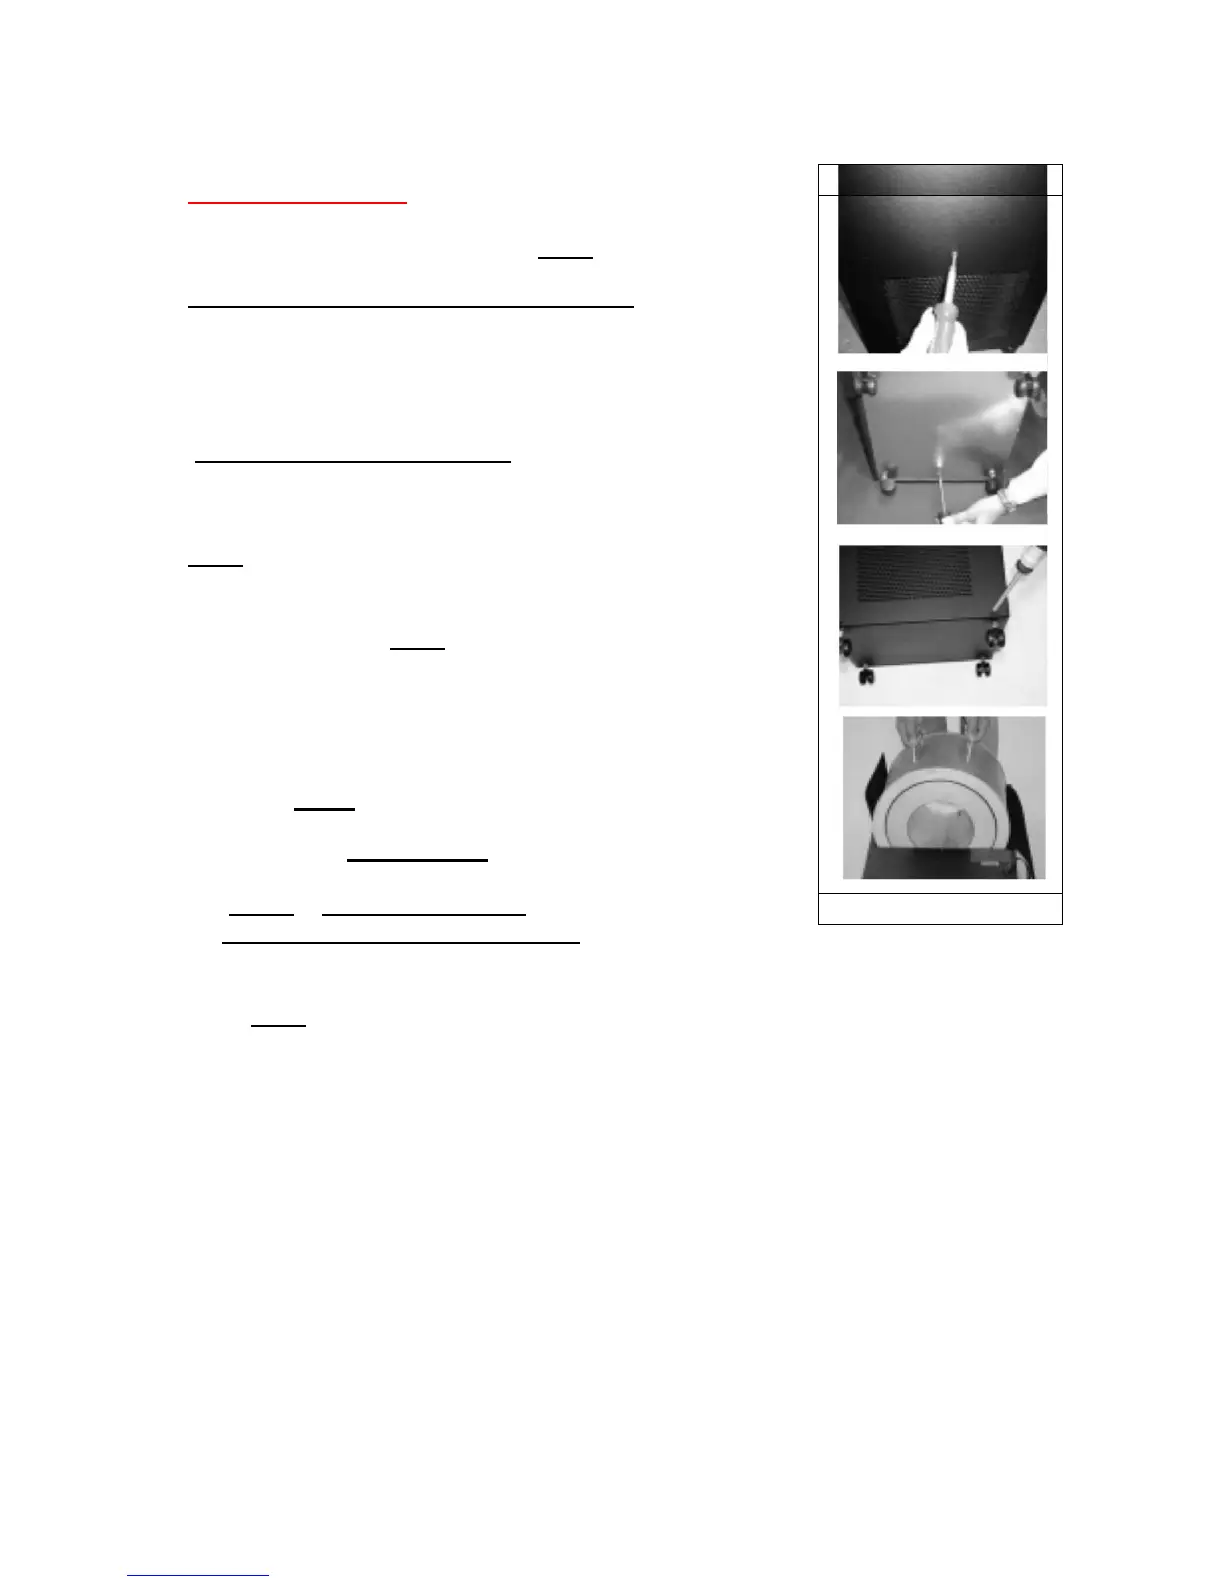
Remove (1) screw on each side and on the
back of the unit (3 screws total) FIG.1
DO NOT REPLACE SCREWS / SAVE THEM
The back screw on top of rear access
Fig 1
panel is a shipping screw and does not
need to be replaced.
2. Gently rest unit front face down on floor.
(
DO NOT REST ON WHEELS)
Remove the (2) shipping screws on the Fig 2
bottom of the unit. These screws are for
shipping and do not need to be replaced
FIG.2
3.
Remove (2) screws on the bottom of the
rear access panel. FIG.3
Pull off rear
access panel. Gently push shiny plate away from Filter
(Fan Deck Assembly).
4. Use plastic handle to lift out the pre-filter/
HEPA + carbon drum filter from the inner
chamber. FIG. 4
5. Remove outer
PRE-FILTER and vacuum
the pre-filter. Replace the pre-filter around
the HEPA + Carbon Drum Filter.
Or TO REPLACE THE PRE-FILTER
Discard the old pre-filter and wrap a new
pre-filter around the HEPA +carbon drum
filter. FIG.4
6.
Reinstall the HEPA + carbon drum with
the pre-filter around it. Lower the Filter all the way
back into the inner chamber. The seam of
the pre-filter should face you.
7. Replace rear access panel and only
replace the (2) screws at the bottom of
access panel.
PLUG INTO WALL OUTLET,
TURN UNIT TO DESIRED
SPEED
 Loading...