Do you have a question about the NRS Healthcare EasyFit Plus+ and is the answer not in the manual?
| Brand | NRS Healthcare |
|---|---|
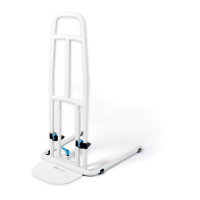
| Model | EasyFit Plus+ |
| Category | Mobility Aid |
| Language | English |
Read and implement safety instructions to avoid injury. Retain for future reference.
Provides stable support for clients getting into and out of bed, and for repositioning.
Suitable for most domestic beds; not for height-adjustable beds unless disabled.
Recommends Standard P11849 for beds up to 600mm, Tall P11838 for higher beds.
Position Bed Rail at least 320mm from headboard/footboard to avoid head entrapment.
Always ensure the Bed Rail is firmly clamped to the bed frame and check regularly.
Ensure mattress is close to Bed Rail to prevent client becoming wedged in-between.
Do not exceed the product's maximum user weight of 160kg (25st).
This product is not suitable for use by children.
Detach the handrail from the base before carrying or storing the product.
Do not use on electrically height adjustable beds unless the function is disabled.
Carefully unpack, check all parts are present, and inspect for damage before use.
Position the Handrail with Clamp Plates facing away from the Base Plate and towards the bed.
Align Handrail tubes with Base Rods and push down until Handrail touches the base.
Unlock Bed Clamps by opening Clamp Levers to allow them to slide down Handrail tubes.
Check floor is level and bed base is at least 30mm above floor, clear of obstructions.
Slide the Bed Rail under the bed into approximately the correct position.
Position for user reach from relaxed lying position, at least 320mm from headboard/footboard.
Slide Bed Clamps up until Clamp Plates contact underside of bed frame; faces flush with side of bed.
Lock the Bed Clamps by closing the Clamp Levers.
Turn Adjustment Lever clockwise until resistance is felt and rail is secure.
For divans, use release button and rotate lever anticlockwise for half turns.
Recommended to check Bed Rail is securely fixed at least monthly and re-tighten if necessary.
Turn Adjustment Lever anti-clockwise, then release the 2 Clamp Levers to remove.
Clean with neutral detergent and warm water. Dry thoroughly. Avoid abrasive cleaners.
Wipe with a dilute bleach solution and rinse thoroughly with water.
Inspect periodically for wear or damage. Report faults to supplier and cease use.
Lists spare parts available for both models, including clamp kits and parts kits.
Clean before disposal. Dispose of via local Household Waste or Recycling Centres.
12-month guarantee against faulty materials/workmanship. Excludes abuse and misuse.