21Page 12
QUICK GUIDECommission an Installed Sound Environment
On the MR-PRO, select GENERATOR from the main menu, click on WAV and select DELAY. Adjust
the gain of your system and the MR-PRO until the Delay signal can be heard at a decent level. On
the XL2, select Delay Time from the main menu.
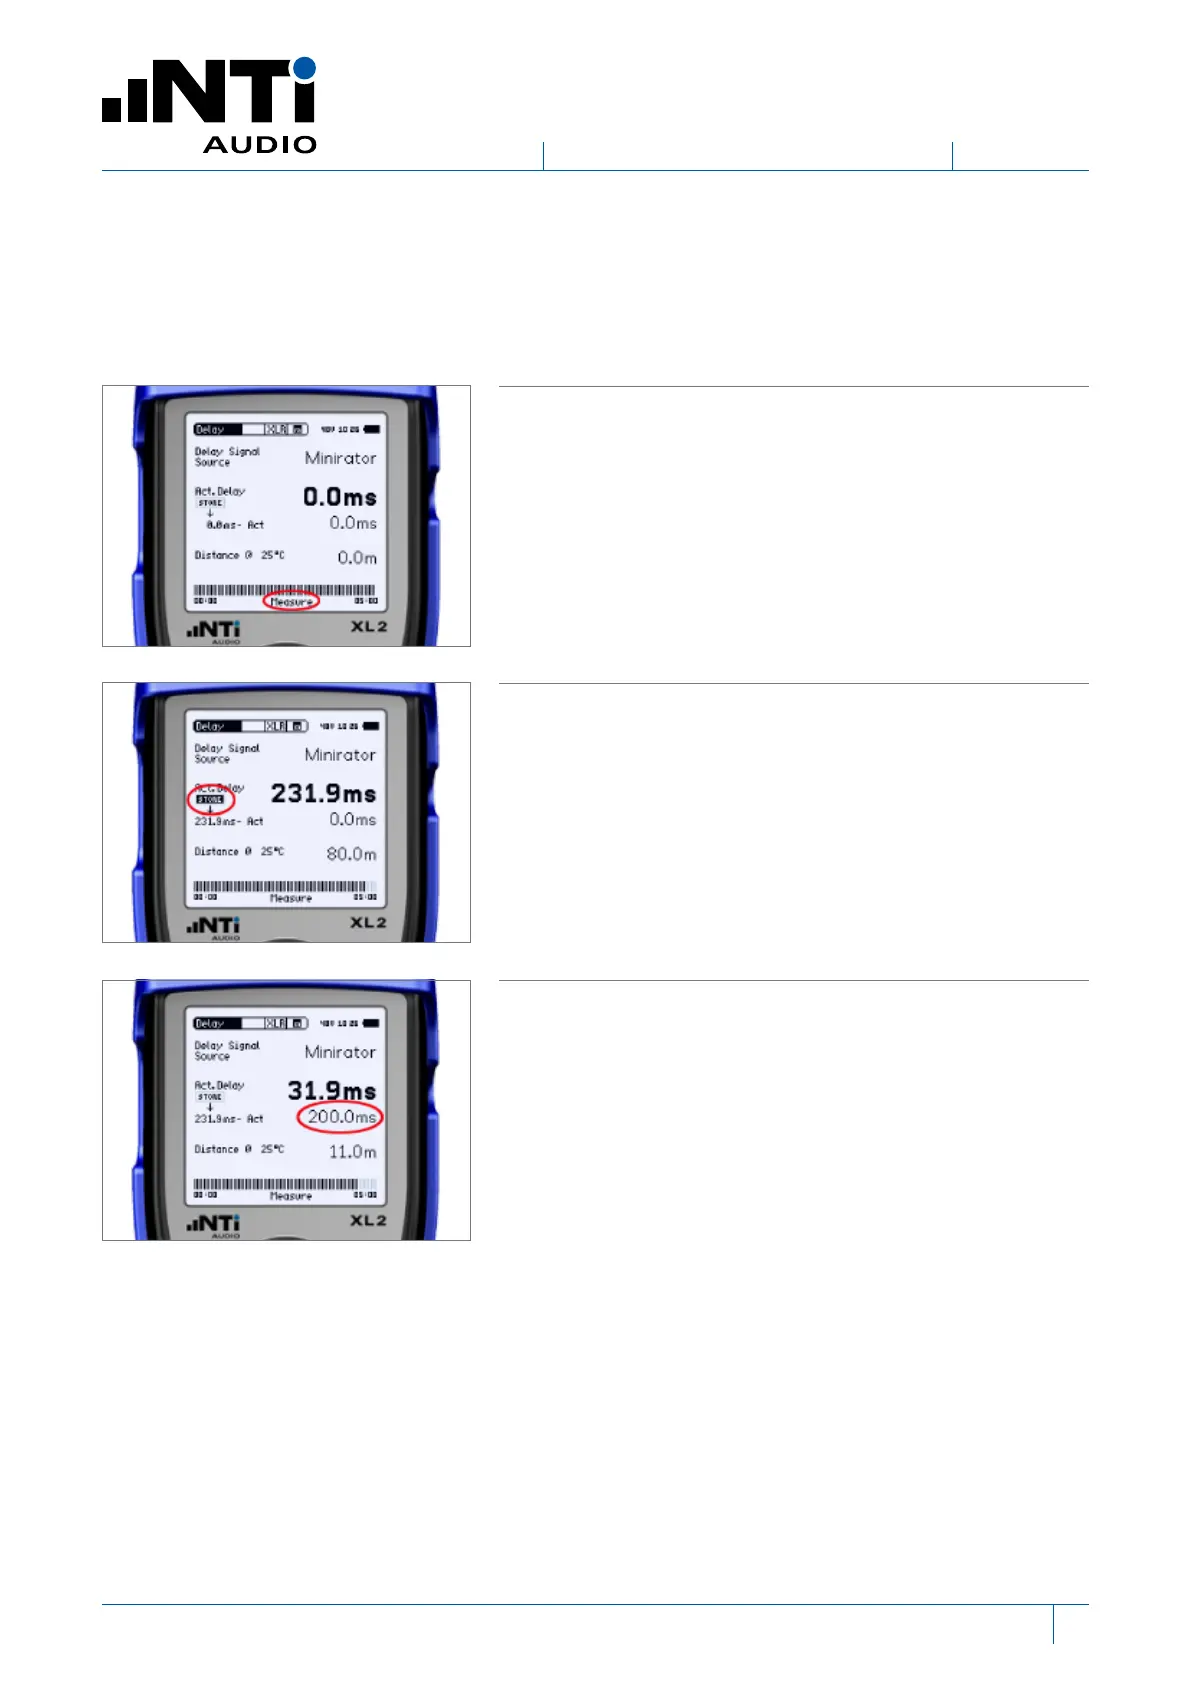
Connect the MR-PRO directly to the XL2 to synchronize the
clocks of the two devices.
The XL2 displays the message “Sychronizing” and the mes-
sage “Measure“ when the XL2 is ready to measure.
You now have 5 minutes to measure until a new clock sy-
chronization is required.
Connect the MR-PRO again to a line input of your system.
Play the MR-PRO signal through the front speaker only, and
STORE the result on the XL2.
In this example, the distance from the XL2 to the front
speaker is 80.0 meters, and sound takes 231.9 ms to travel
that distance through air with a temperature of 25°C.
Play the MR-PRO signal through the delay speaker only.
In this example, the distance from the XL2 to the delay
speaker is 11.0 meters, and sound takes 31.9 ms to travel
that distance through air with a temperature of 25°C.
The difference between the two speakers is 231.9 - 31.9 =
200.0 ms.
Adjust your system by adding a delay to the delay speaker of
15 ms more than the difference shown. (200 + 15 = 215 ms)
Why do we need delay speakers? - see Appendix B
www.nti-audio.com
 Loading...


