This document describes a swimming pool heat pump, detailing its functions, technical specifications, usage, and maintenance.
Function Description
The swimming pool heat pump unit is designed to heat swimming pool water and maintain a constant temperature. It operates by extracting heat from the ambient air and transferring it to the pool water. The unit offers both cooling and heating functions, and some models feature "Eco Heating," "Silent Heating," "Boost Heating," "Eco Cooling," "Silent Cooling," and "Auto" modes for varied operational needs. The heat pump is equipped with micro-computer controlling, allowing users to set all operation parameters and monitor the status via an LCD wire controller. A Wi-Fi module is available as an option for remote control via a mobile phone or web browser.
Important Technical Specifications
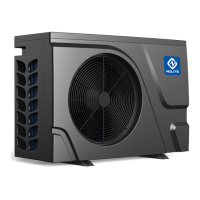
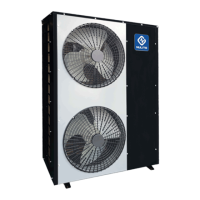
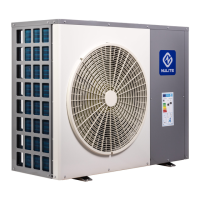
The heat pumps are available in several models, including NL-PB25Y/32, PB35Y/32, PB50Y/32, PB60Y/32, PB70Y/32, and PB80Y/32, all using R32 refrigerant.
General Specifications:
- Power Supply: 230V~/1Ph/50Hz
- Casing Type: ABS Plastic
- Color: White/Black
- Control: LCD digital display
- Operating Ambient Temperature: -12~43°C
- Compressor Type: Twin-rotary DC Inverter
- Condenser: Spiral titanium tube in PVC
- Evaporator: Hydrophilicaluminium fins & copper tubes
- Fan Type: DC motor fan - Horizontal
- Fan Quantity: 1
- Water Connection: 50 mm
Performance Data (Examples for different models):
| Model |
Advised Pool Volume (m³) |
Heating Capacity (KW) (Air 26°C/Water 26°C/Humidity 80%) |
Power Input (KW) (Air 26°C/Water 26°C/Humidity 80%) |
COP (Air 26°C/Water 26°C/Humidity 80%) |
Max Current (A) |
Circuit Breaker (A) |
Power Cord (mm²) |
Sound Pressure @1m (dB(A)) |
Sound Pressure @2m (dB(A)) |
Unit Dimensions (WDH) (mm) |
Net Weight (kg) |
| NL-PB25Y/32 |
15~40 |
7.3 |
0.13~1.05 |
16.16~6.98 |
8.0 |
9.0 |
3*2.5 |
36~46 |
20~26 |
832338586 |
33 |
| NL-PB50Y/32 |
35~70 |
16.4 |
0.32~2.65 |
14.50~6.19 |
18.0 |
16.0 |
3*4.0 |
41~50 |
23~31 |
935370656 |
56 |
| NL-PB80Y/32 |
50~100 |
25.2 |
0.48~3.98 |
14.62~6.33 |
26.0 |
28.0 |
3*6.0 |
44~55 |
26~37 |
1118415749 |
84 |
Heating Performance (Air 15°C/Water 26°C/Humidity 70%):
- NL-PB25Y/32: Capacity 5.2 KW, Power Input 0.14~5.63 KW, COP 7.62~5.63
- NL-PB50Y/32: Capacity 11.9 KW, Power Input 0.37~2.46 KW, COP 8.26~4.84
- NL-PB80Y/32: Capacity 25.2 KW, Power Input 0.58~3.87 KW, COP 8.27~4.81
Usage Features
- Installation Flexibility: The unit can be installed outdoors or indoors.
- Quiet Operation: Equipped with an efficient rotary/scroll compressor and a low-noise fan motor, ensuring quiet operation.
- Advanced Controlling: Micro-computer controlling allows setting all operation parameters. Operation status is displayed on an LCD wire controller.
- Initial Start-up: The filter pump must be running to circulate water through the heat exchanger. After turning on the electrical power and pressing the ON/OFF key, the unit should start within seconds. The air leaving the fan opening should be cooler (5-10°C). The unit will automatically shut off when the desired pool water temperature is reached and restart when the temperature drops more than 2°C below the set temperature.
- Time Delay: A 3-minute built-in solid-state restart delay protects control circuit components and prevents rapid cycling.
- Condensation Management: The unit cools air, causing water to condense on the evaporator fins. This condensation drains out through a barbed plastic fitting on the base pan. It is important not to mistake condensation for a water leak. A quick test for chlorine in the drain water can confirm if it's condensation.
- Display Interface: The wire controller features keys for ON/OFF, Set, Time, Up, Down, and displays for temperature, time, operating mode (Heating, Cooling, Automatic), fan status, and lock status.
- Key Lock: The keys and screen lock after 1 minute of inactivity. A long press of the "On/Off" key unlocks them.
- Mode Switching: In the main interface, the "Set" key cycles through different operating modes.
- Temperature Adjustment: The set temperature can be adjusted using the "Up" and "Down" keys. The new setting is confirmed automatically after 30 seconds of inactivity or by pressing the "Set" key.
- Time Adjustment: The real-time clock can be set by pressing the "Time" key. Hours and minutes can be adjusted using the "Up" and "Down" keys.
- Running Parameter Query: Parameters like exhaust gas temperature, return air temperature, inlet water temperature, water temperature, outdoor coil temperature, outdoor ambient temperature, actual frequency, and inverter compressor current can be queried.
- Timer Setting: The unit supports up to 3 timer groups for scheduled operation.
Maintenance Features
- Regular Checks:
- Water Inlet and Drainage: Ensure sufficient water and air inflow for optimal performance and reliability.
- Pool Filter: Clean regularly to prevent clogging and damage to the unit.
- Ventilation: Maintain a spacious and well-ventilated area around the unit for good heat exchange and energy saving.
- Heat Pump Sides: Clean regularly to maintain good heat exchange.
- Operational Processes: Check all unit processes, especially the refrigerant system pressure.
- Power Supply and Cable Connections: Inspect regularly.
- Troubleshooting: The unit displays error codes (e.g., E01, E05, P01, r01) to indicate protected or faulty states, with suggestions for troubleshooting provided in the manual.
- Winterizing: Drain all water from the heat pump and other systems to prevent frost damage if the unit will not be used for an extended period. Damage from freezing is not covered by the warranty.
- Repairs: Repairs must only be carried out by qualified personnel or an authorized dealer.
- Spare Parts: Use only genuine standard spare parts.
- Chemical Additions: Chemicals must be added through conduits located after the heat pump to prevent corrosion of the heat exchanger. A check valve is recommended to prevent back-flow.
- Bypass Installation: Install a bypass for easy maintenance.
- Electrical Wiring: Ensure adequate grounding and use a separate fuse (C-curve) and appropriate wiring. The pool circulation pump can be controlled by the heat pump, but separate power supplies are recommended for flexibility.