6
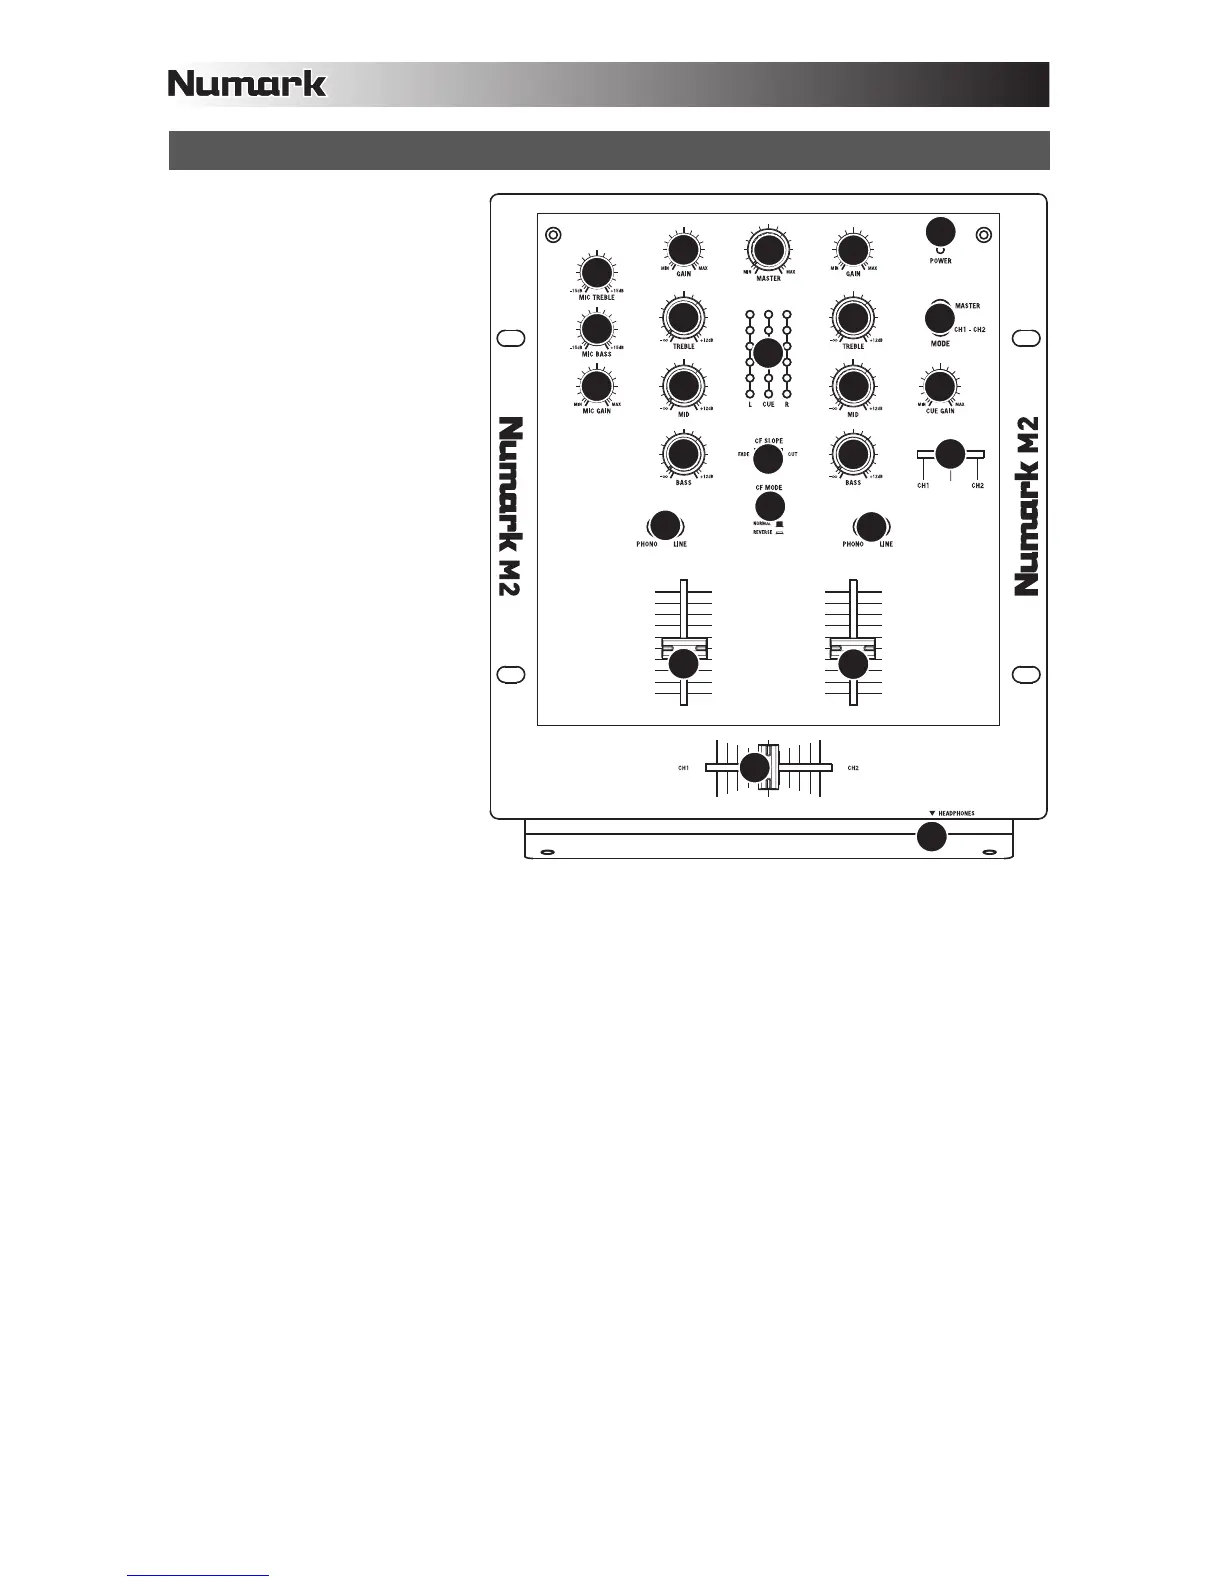
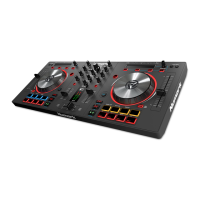
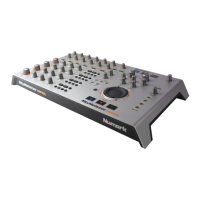
TOP & FRONT PANEL FEATURES
1. POWER LED – Illuminates
when the mixer is on.
2. MIC GAIN – Adjusts the audio
level of the microphone signal.
3. MIC BASS – Adjusts the low
(bass) frequencies of the
microphone channel.
4. MIC TREBLE – Adjusts the
high (treble) frequencies of the
microphone channel.
Tip: If you experience
feedback when using a
microphone at loud levels, try
turning down the high (treble)
frequencies.
5. CHANNEL GAIN – Adjusts
the channel audio gain level,
pre-fader and pre-EQ.
6. CHANNEL TREBLE – Adjusts
the high (treble) frequencies of
the corresponding channel.
7. CHANNEL MID – Adjusts the
mid-range frequencies of the
corresponding channel.
8. CHANNEL BASS – Adjusts
the low (bass) frequencies of
the corresponding channel.
9. INPUT SELECTOR – Selects
the input source to be routed
to the corresponding channel. Input jacks are located on the rear panel.
10. CHANNEL FADER – Adjusts the audio level sent to the Program mix.
11. CUE GAIN – Adjusts the audio level of the Cue channel in the headphones.
12. HEADPHONES OUTPUT – Connect your ¼” headphones to this output for cueing and mix monitoring.
Headphone output controls are located on the top panel.
13. CUE MODE SELECTOR – Selects the audio to be routed to the headphones. Switch it to “MASTER”
to hear the Program mix. Switch it to “CH1 CH2” to hear Channels 1 and 2 (see #14 above).
14. CUE SLIDER – When CUE MODE SELECTOR is set on “CH1 - CH2” (see #13), the cue slider blends
between Channel 1 & Channel 2 audio in the headphones. Move this slider to the left to hear Channel
1, or to the right to hear Channel 2.
15. CROSSFADER – Blends audio between Channels 1 and 2. Sliding the crossfader to the left plays
Channel 1. Sliding it to the right plays Channel 2.
Note: The crossfader is user-replaceable if it should ever wear out. Simply remove the facepanel, then
remove the screws holding it in position. Replace the fader with a quality authorized replacement from
your local Numark retailer only.
16. CROSSFADER (CF) MODE – Press this button to reverse crossfader assignment of Channels 1 and 2.
17. CROSSFADER (CF) SLOPE – Adjusts the slope of the crossfader curve. Flip switch to the left for a
smooth fade (mixing) or to the right for a sharp cut (scratching).
18. LEVEL INDICATORS – Monitors the audio level of the Program mix (L&R) and the pre-fader audio
levels of Channels 1 and 2 (CUE).
19. MASTER FADER – Adjusts the output volume of the Program mix.
4
3
2
5
6
7
8
9
10
5
6
7
8
9
10
15
14
11
13
1
12
16
17
18
19