3
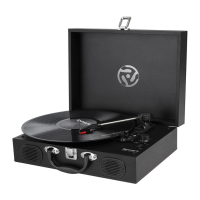
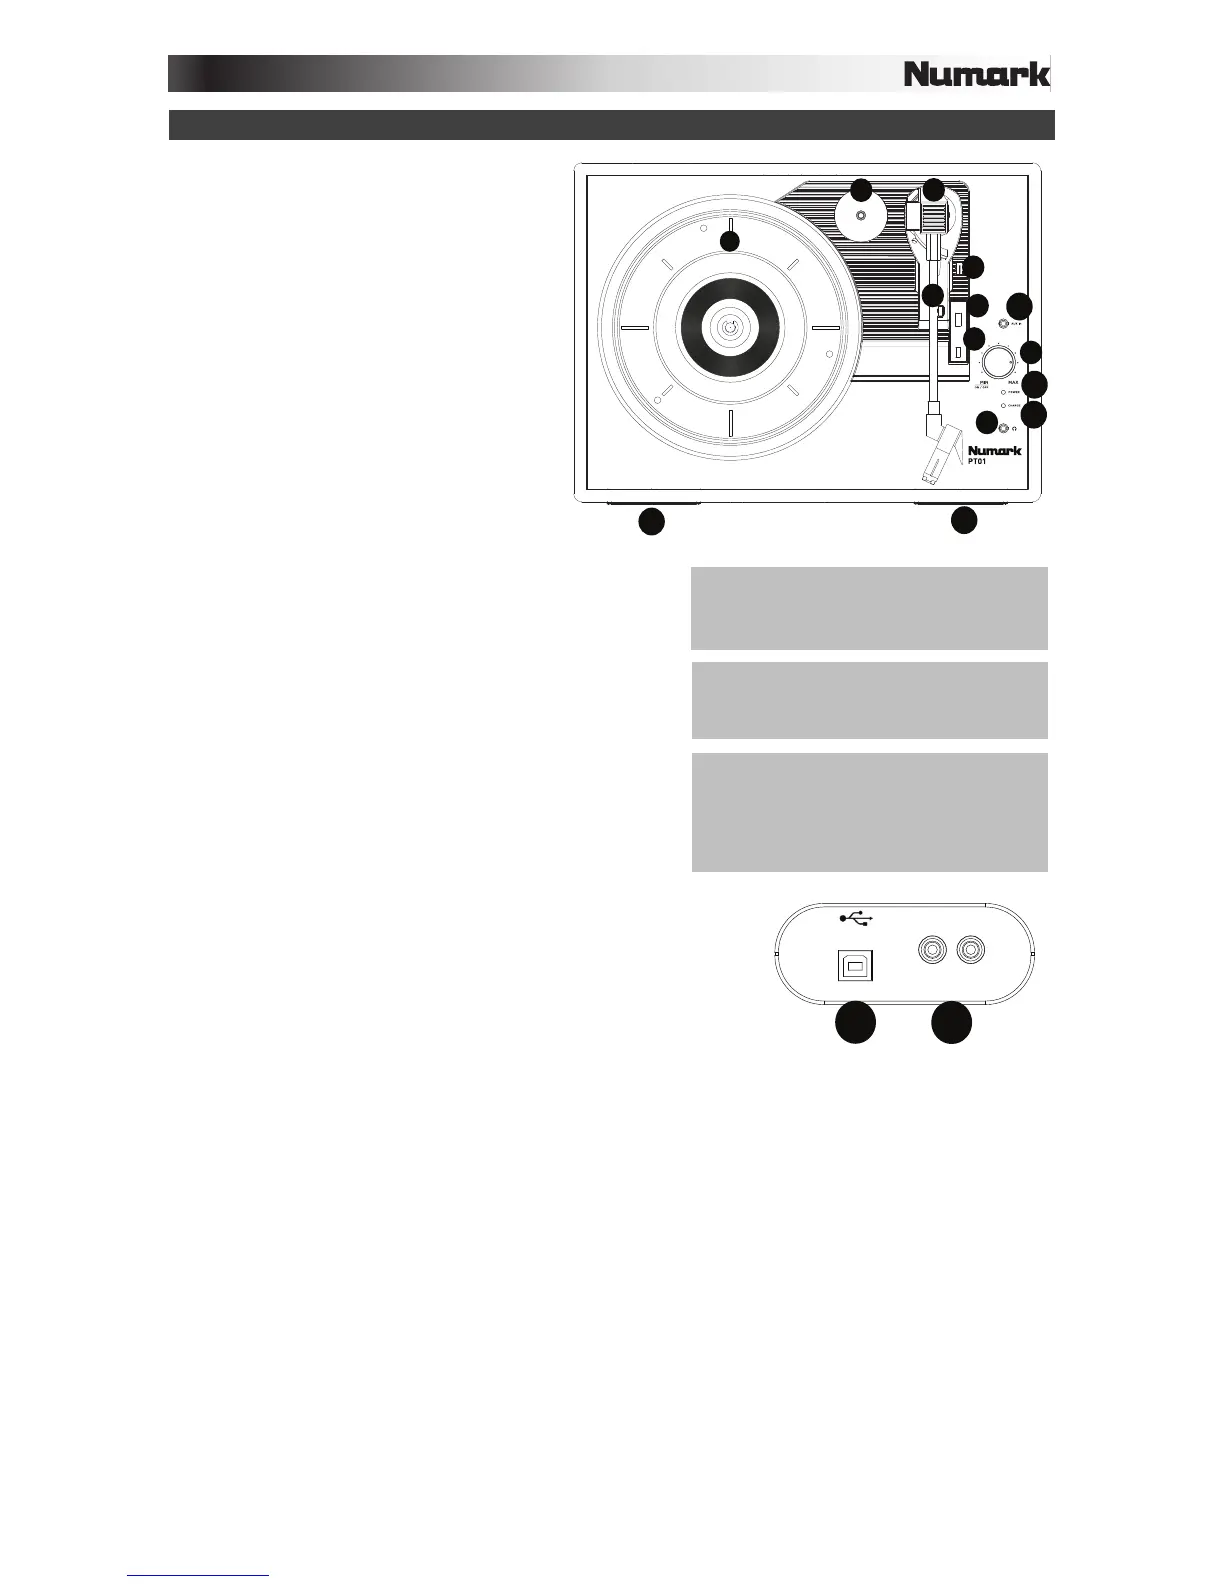
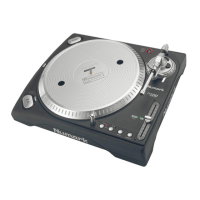
Features
1. Platter – Place your record here.
2. 45 RPM Adapter Holder – Holds the
included 45 RPM adapter. When not
using the adapter, please place it in
this holder.
3. Tonearm – The fixed tonearm can be
raised and lowered by hand, or by
pressing the raise / lower lever.
4. Arm Clip – This specially designed arm
clip secures the tonearm while at rest
or when not in use. The arm clip has
been designed to remain in the up
position while unlocked.
5. Raise / Lower Lever – Raises and
lowers the tonearm.
6. 33 / 45 / 78 Switch – This switch
controls the RPM of the turntable platter.
Note: For best results when playing 78 RPM vinyl
records, use a 78 stylus (sold separately). Only use a
78 stylus with 78 RPM vinyl records.
7. Autostop switch – This switch turns autostop on or
off. When autostop is on, the platter will start spinning
when the tonearm is placed over the record and stop
spinning when the record has reached the end. (When
autostop is off, the platter will always spin regardless of
the position of the tonearm.)
Note: If your vinyl record stops before it reaches the
end of the music, turn Autostop to the off position for
this particular record. This is generally recommended
for 45 RPM records.
8. Volume/Power Knob – To power on PT01 Touring,
turn this knob clockwise until it clicks. When powered on, use
this knob to adjust the volume. To turn off PT01 Touring, turn
this knob counterclockwise until it clicks.
9. Headphone Output – Connect headphones here (sold
separately) to listen to your vinyl.
10. Battery Charging Indicator – The LED will illuminate when
charging the battery. The LED will turn off once the battery is
fully charged.
11. Power Indicator – This LED illuminates when the power is on and goes out when the battery power is
depleted.
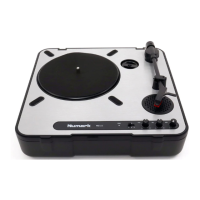
12. Speaker – The record's audio will be played through this built-in speaker.
13. Aux Input – Connect a CD player, digital media player, or other audio source to this 1/8” stereo
auxiliary input.
14. RCA Output* – The audio from a playing vinyl record is sent to this line-level coaxial audio output. This
must not be connected to phono level devices.
15. USB Port – Use the included USB cable to connect your turntable to your computer. The USB
connection will send audio from the turntable to your computer. Please see the Using PT01 Touring
With Your Computer section of this manual for information. Also, use the included USB cable to
connect PT01 Touring to a USB power adapter connected to a power outlet or your computer.
IMPORTANT: Remove the plastic cartridge
cover (needle cover) before operating the
turntable.
*WARNING: The RCA outputs are LINE
level. Please only connect these to LINE
level inputs. You may damage your receiver
if you plug in a LINE level device into a
PHONO level input.
IMPORTANT: Place the included felt slipmat
on the platter; then place your record on the
felt slipmat to carefully hold your records.