NEW CONSTRUCTION
NuTone Model: 105T (16 volt, 15 watt) transformer must
be purchased separately.
Comply with local and national wiring codes. Bell wire
and pushbuttons(s) will also be needed to complete your
installation. Position the door chime on a wall at eye level.
Handle the chime carefully as you would any precision
i n s t r u m e n t .
W I R I N G
NOTE: Turn the house power off before wiring the
transformer to the junction box.
1. Mount the transformer to a convenient junction box (attic
location is not recommended) or to a circuit breaker box.
Connect the house power leads to the transformer leads -
black to black and white to white.
2. Run two conductor, 18 gauge wire from the transformer
and the pushbutton(s) to the Musical Chime location.
NOTE: When fastening the wiring to the wall studs
and ceiling joists, avoid short circuits that can result
in staples or clips cut through the wiring insulation.
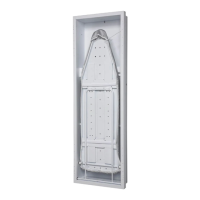
3. Refer to Figure 2. Bring the wires through one of the
large openings in the Musical Chime's baseplate. Fasten
the baseplate to the wall with screws. If the chime is
to be mounted vertically, use the two (2) slotted holes
with T-shaped slots on the top.
4. Refer to Figure 1. Connect the transformer and
pushbutton wires to the Musical Chime's terminal board.
5. If you plan to use the Musical Chime with a NuTo n e
Radio-Intercom System or an external speaker, follow
the instructions that are provided on page 4 of this sheet
before proceeding with the installation.
6. Carefully attach the blue, yellow and green wires from
the chime's housing to the lugs marked FRONT, TRANS
and REAR respectively on the terminal block.
7. When the wiring has been completed, snap the chime's
cover onto the baseplate.
8. Reconnect power to the door chime.
TO REGISTER THIS PRODUCT, VISIT WWW.NUTONE.COM
INSTALLATION INSTRUCTIONS
READ AND SAVE THESES INSTRUCTIONS!
Model: LA-52 Series
The chime may be used with lighted or unlighted
pushbuttons. If two lighted pushbuttons are used, use only
pushbuttons that are sold by NuTo n e .
A NuTone Model: 105T (16 volt, 15 watt) transformer must
be purchased separately. N o t e : If desired, an equivalent
transformer may be purchased locally.
NOTE: The Musical Chime features terminals for one-
or two-door operation but cannot be used in multiple
chime installations. Installation of the Chime is
performed in two steps: (1) at the chime site, and (2) at
the front door pushbutton.
EXISTING CONSTRUCTION
If needed, purchase NuTone Model 105T (16 volt, 15 watt)
transformer separately.
Handle the Musical Chime carefully as you would any
precision instrument. Disconnect power to the existing door
c h i m e .
1. Remove the cover from the existing door chime.
2. Disconnect the wires from the terminal strip of the existing
door chime. Mark each wire as it is removed - front,
transformer and rear.
Refer to Figure 1. If any additional wires (i.e. - side
door) are present which are not required by the
wiring diagram, cap these wires individually with a
wire nut and electrical tape.
3. Remove the existing chime base from the wall.
4. Refer to Figure 2. Determine whether the Musical Chime
will be hung vertically or horizontally. Pull the remaining
wires through one of the large holes in the baseplate.
5. Using the proper mounting screws, mount the baseplate
to the wall.
NOTE: If the Musical Chime is replacing a door chime
that was mounted horizontally, the two small round
holes in the base should align with the holes used to
mount the base of the old chime. If the Musical
Chime is replacing a door chime that was mounted
vertically, use the two slotted holes that have
T-shaped slots at the top.
6. Attach wires to the respective screw terminals (FRONT,
TRANS, REAR) that are located on the baseplate's
terminal block.
7. While holding the Musical Chime's housing in one hand,
attach the blue, yellow and green wires from the chime's
housing to the lugs marked FRONT, TRANS and REAR
respectively on the terminal block.
8. If the Musical Chime is to be used with a NuTo n e
Radio-Intercom System or an external speaker, follow
the instructions that are provided on page 3 of this sheet
before proceeding with the installation.
9. When the wiring has been completed, snap the chime's
cover onto the baseplate.
10. Reconnect power to the door chime.
FRONT DOOR
P U S H B U T T O N
18 GA. INSULATED
2 CONDUCTOR WIRE
NUTONE
MODEL 105T
T R A N S F O R M E R
REAR DOOR
P U S H B U T T O N
M U S I C A L
C H I M E
T E R M I N A L
B O A R D
F R O N T
T R A N S
R E A R
FIGURE 1
COMMON WIRES
Musical Door Chime