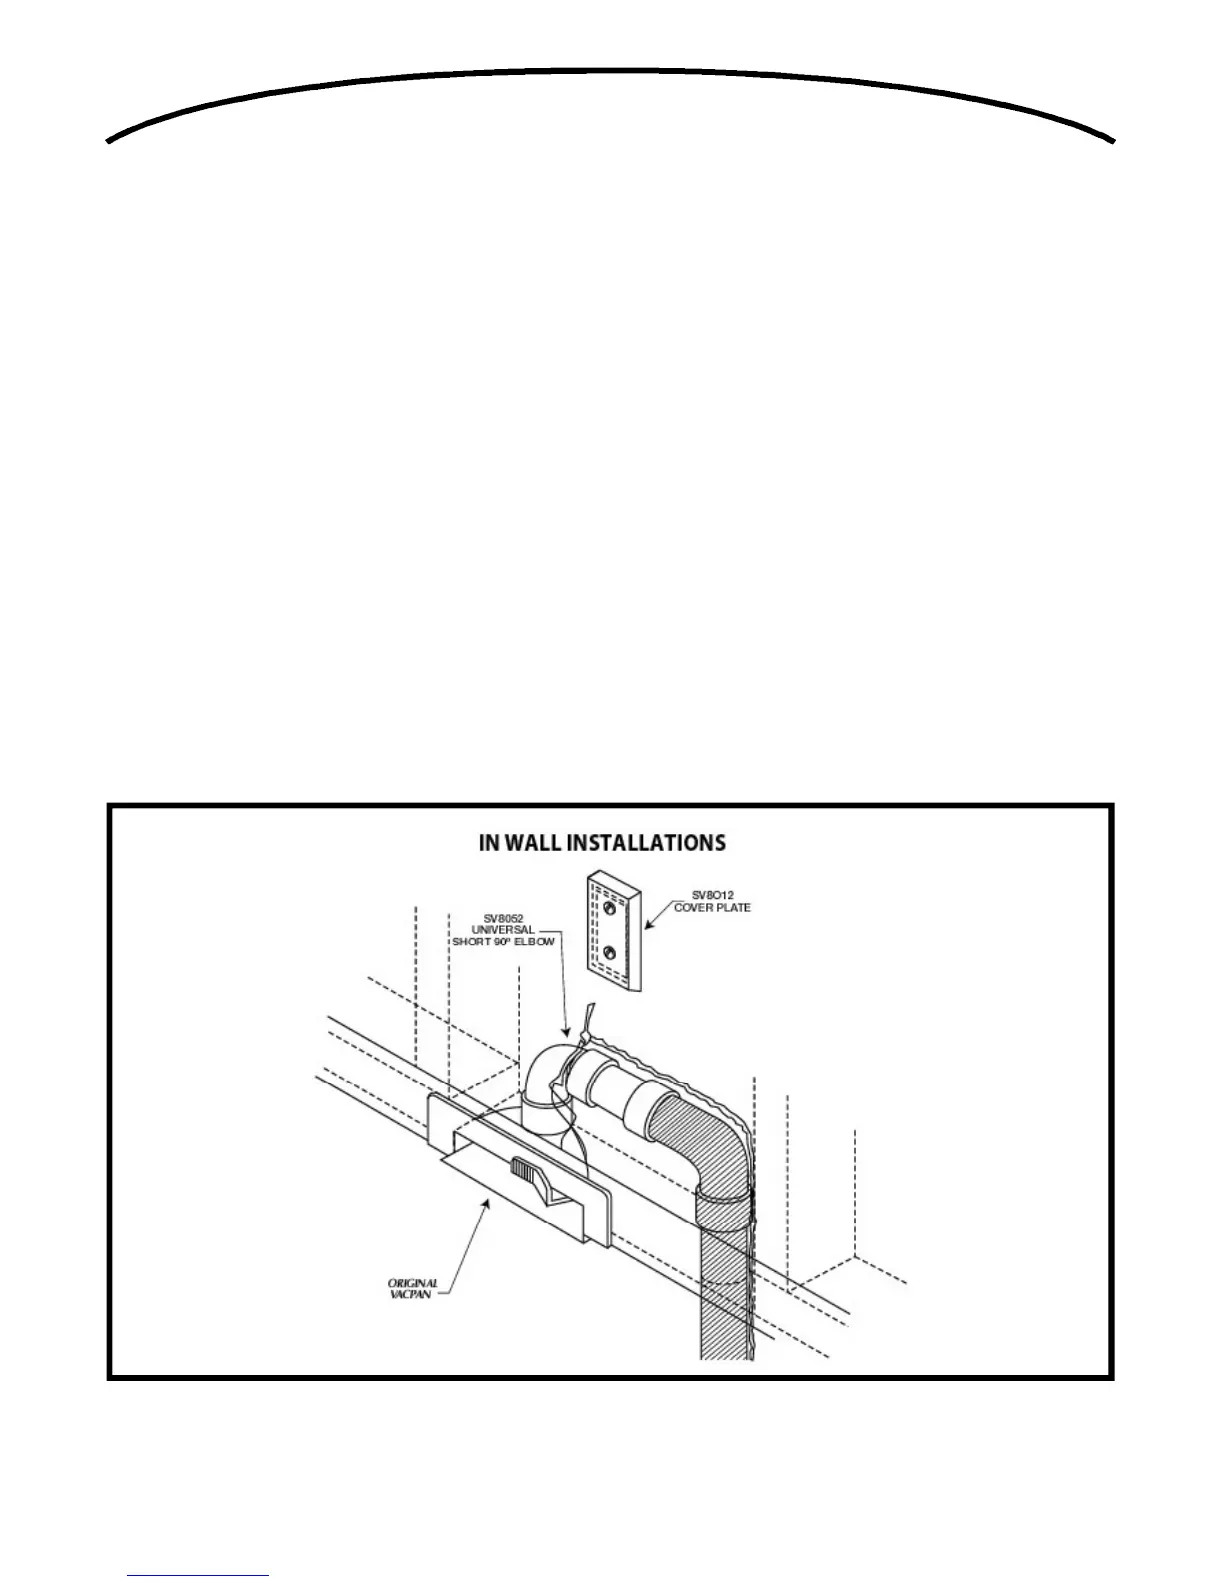
In Wall Installations
Refer to Figure 47.
• ORIGINAL VACPAN can be installed between wall
studs in side walls.
• ORIGINAL VACPAN should be located tight to one
side in stud space.
• Once the ORIGINAL VA C P A N location is determined,
cut a 6 3/4” long x 1 3/4” high slot in the wall and
baseboard to accept the ORIGINAL VACPAN.
• The 2x4 wall bottom plate between the two studs
must be removed. This can be achieved from below
using a hole saw.
• In new home construction, the bottom wall plate can
be removed directly. A 6 3/4” length of 2x4
can be used as a temporary rough in block, that will
force all trades to finish around, leaving a slot for the
ORIGINAL VACPAN.
• Floor contractor must run flooring under block.
• Run vacuum tube piping and low voltage wire from
the main line to ORIGINAL VACPAN location.
• Access for final piping connections must be made.
Access From Below
If access is available from below, cut an access
hole through the subfloor underneath the wall
between the studs, positioned so that final piping
connect i o n s can be made by reaching through
the access hole.
Access Through Wall
Access can be made through the finished wall. Cut
a 2 3/4” x 3 1/2” access hole, positioned so that final
piping connections can be made by reaching
through the access hole. Plastiflex part #SV8012
Cover Plate can be used to cover the hole after
installation.
• Attach low voltage wires to ORIGINAL VACPAN
terminal connections marked “low voltage only”.
• Slide ORIGINAL VACPAN into mounting slot and
secure to wall using two #6 screws provided.
• Reach through access hole and make final fitting
connections.
22
FIGURE 47
 Loading...