6
Making A Joint
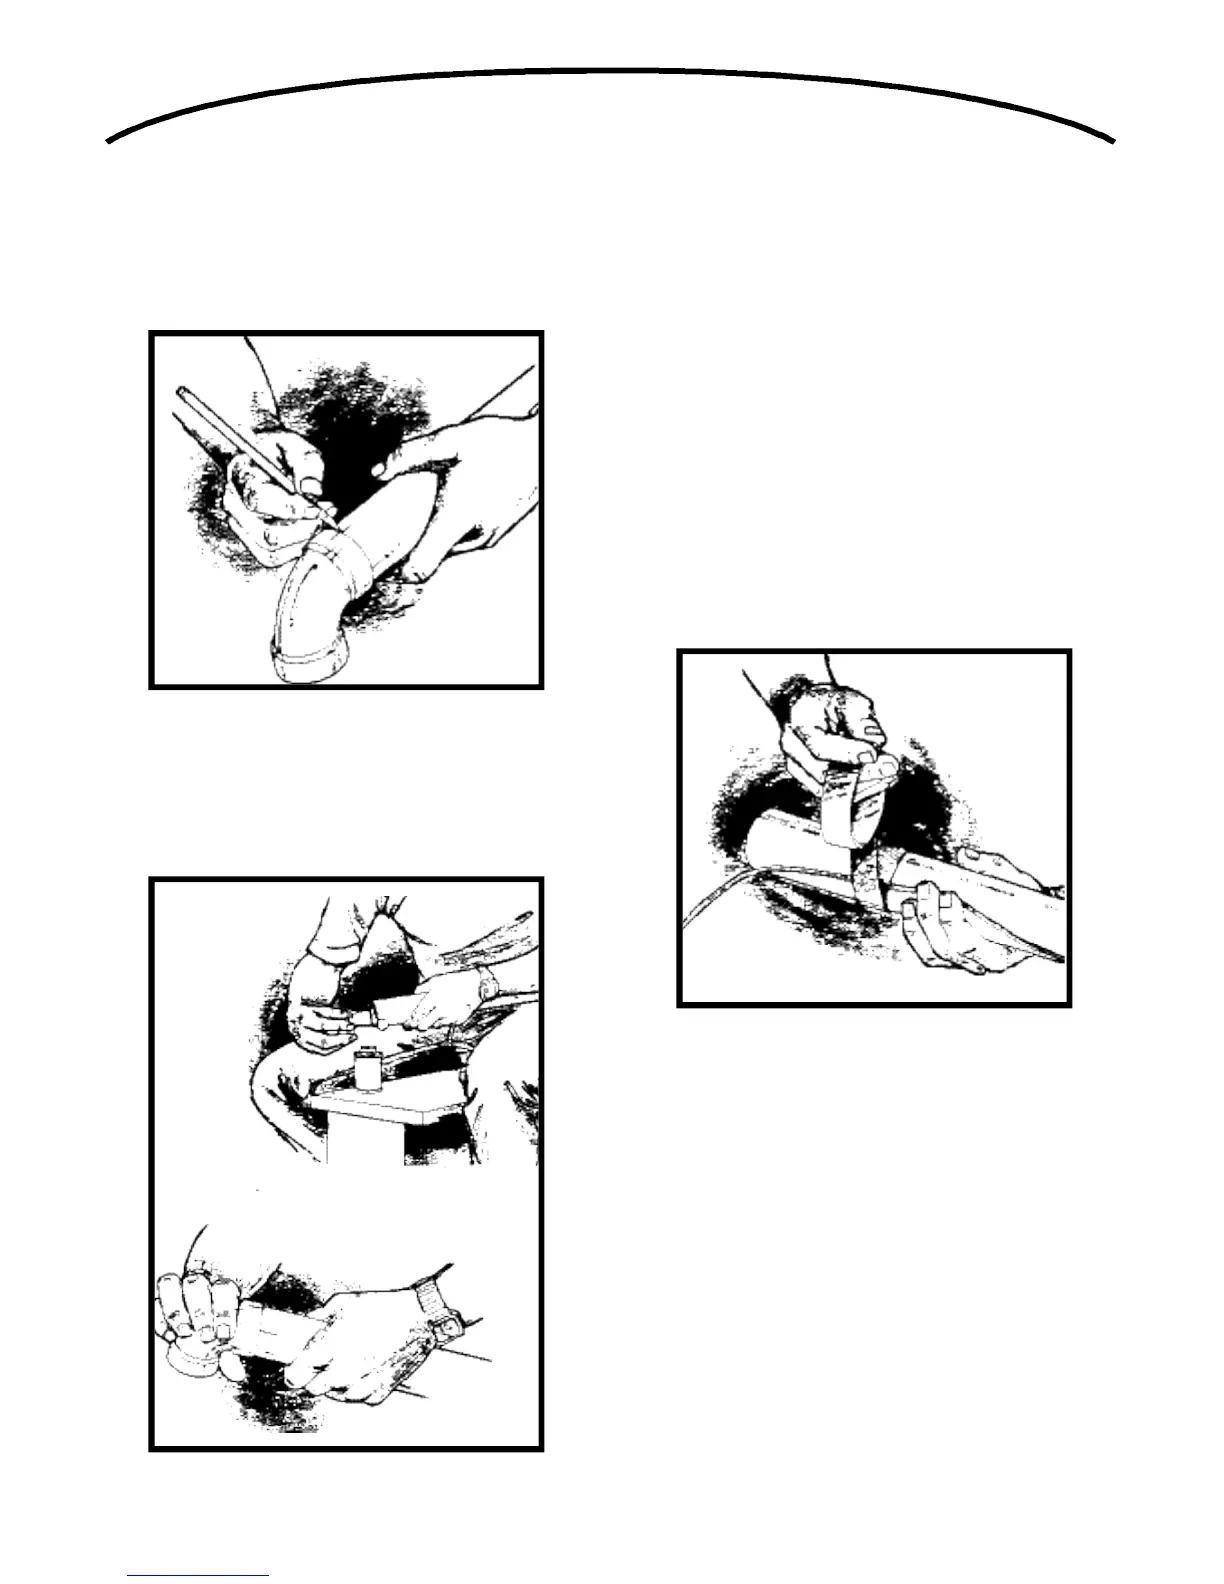
Insert The tube into the fitting, aligning the two parts as
they will be installed. Mark the tube and the fitting so that
you can quickly realign the joint. See Figure 7.
Apply cement only to the outside of the tube. Dab the
cement generously in an inch-wide band. Insert the tube
into the fitting with the alignment marks a quarter turn
apart, and then quickly push and turn the fitting to align
the marks and spread the cement. Allow one minute for
the joint to dry. You may also use electrical tape or duct
tape to further seal the joint. See Figure 8.
Cementing Flexible Tubing
Make sure the ends of the flexible tubing are even - trim
if necessary. When you join flexible tubing to plastic
tubing or to an inlet mounting plate, apply cement to both
the inside of the flexible tubing and the outside of the
plastic tubing or mounting plate tubing ring. Twist the two
pieces as you join them to evenly spread the glue. Allow
five minutes for the cement to set in flexible tubing. You
may also use electrical tape or duct tape to further seal
the joint.
Secure Wire To Tubing
The low-voltage power wiring is run along with the
tubing. To make that the wire is secure and will not hang-
up in a wall, use electrical tape to attach the wire to the
tubing. Tape the wire approximately every 12-18 inches.
See Figure 9.
FIGURE 7
FIGURE 8
FIGURE 9
 Loading...