XN110HL Installation Guide
Page 10
2
1
4
5
6
3
Retrofit Installation
11
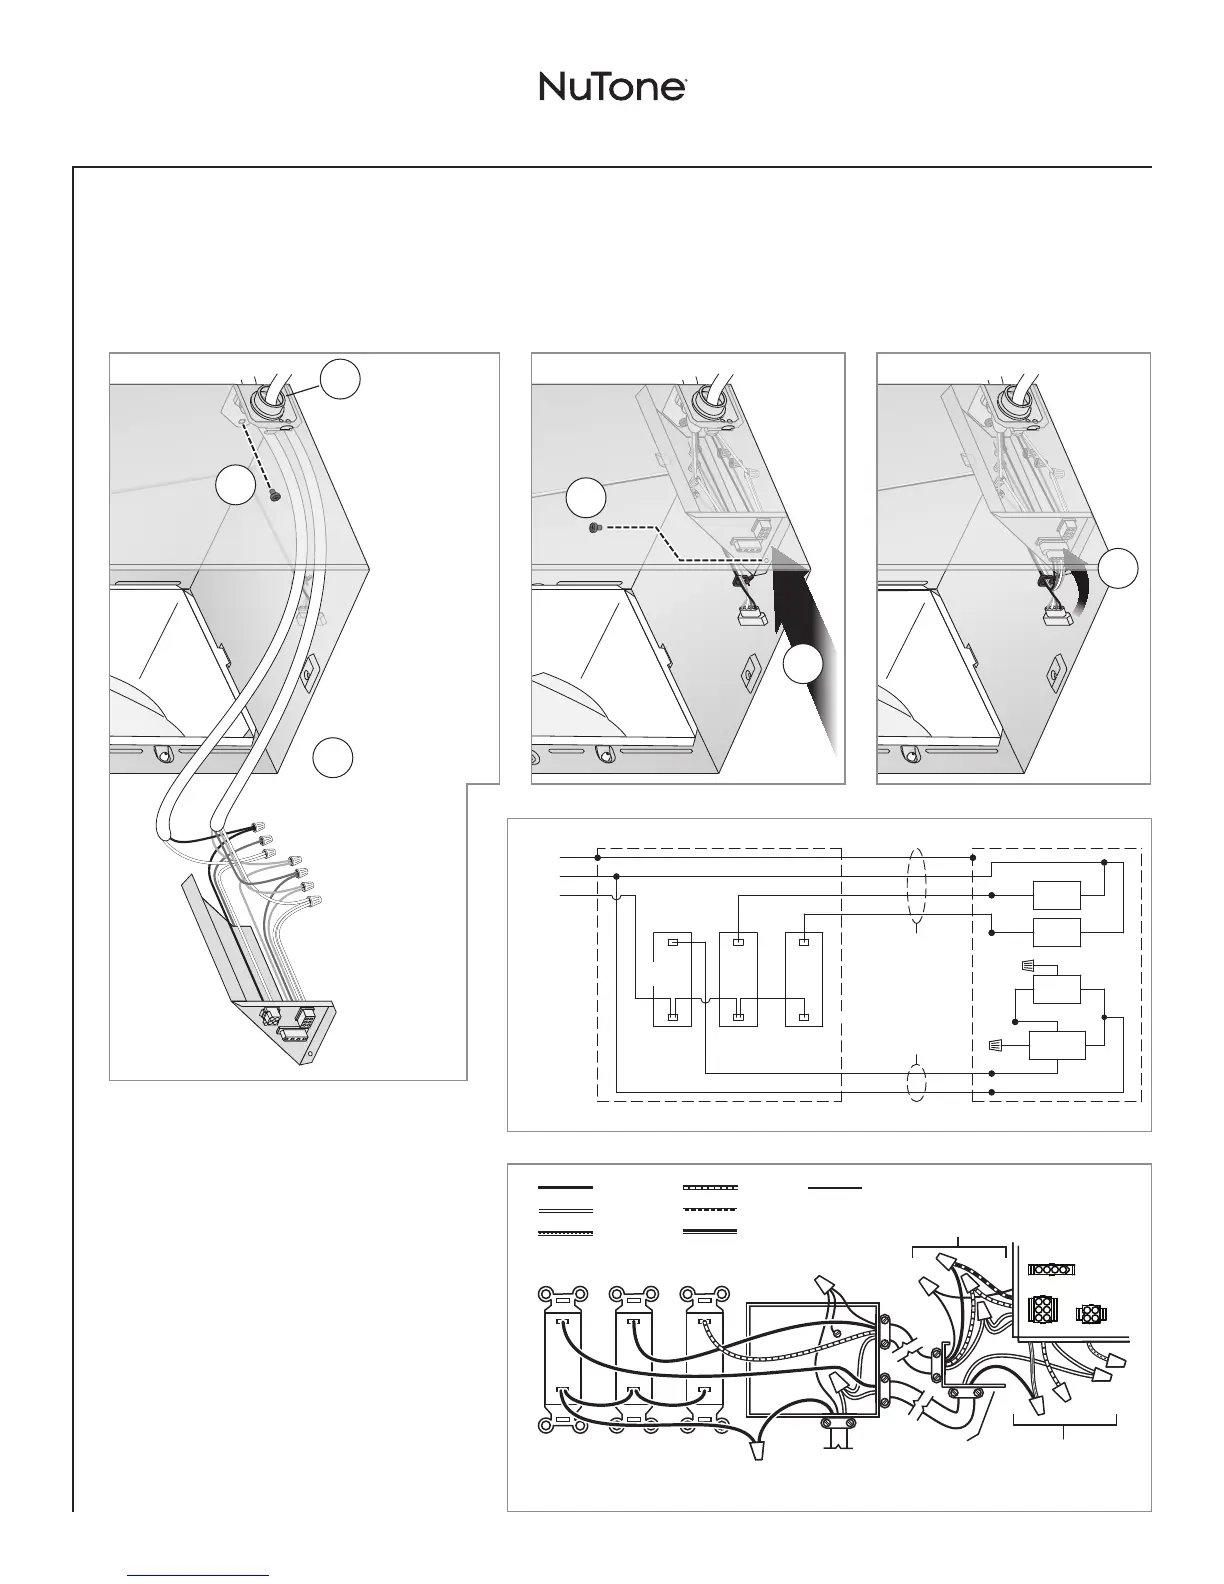
Install Knockout Plate, Connect Wires and Install Wiring Panel
Screw from
Parts Bag
Connect wires
Fan
Light
Screw set
aside in
Step 6
• Use proper UL-approved connectors to secure wiring to the Knockout Plate provided in Parts Bag.
• Connect wires as shown in wiring diagram.
• Do not use a dimmer switch to operate the light.
Attach cable
clamps to
Knockout Plate.
Knockout Plate
mounts to inside of
Housing and may
be oriented
as desired.
14/3
14/2
LIGHT
WHT
BLU
NIGHT
LIGHT
RED
FAN
SENSOR/
CONTROL
BLK
WHT
BRN
BLK
RED
ORG
SENSOR /
CONTROL
NIGHT
LIGHT
GRD
WHT
BLK
120 VAC
LINE IN
STANDARD OR
MULTI-FUNCTION
WALL SWITCHES
LIGHT
GRD
WHT
BLK
RED
WHT
BLK
KNOCKOUT
PLATE
LIGHT RECEPTACLE WIRES
FAN RECEPTACLE
WIRES
STANDARD OR
MULTI-FUNCTION
WALL CONTROLS
(purchase separately)
120 VAC
LINE IN
SENSOR /
CONTROL
SWITCH
BOX
LIGHT
NIGHT
LIGHT
RECEPTACLES
BLACK
WHITE
ORANGE
RED
BLUE
GROUND
(green or bare)
BROWN
• See OPERATION section on page 12 for
details.
• SENSOR/CONTROL switch allows humidity
control to be turned on for automatic
operation and off for fan cleaning and
maintenance purposes.
• Toggle mode can be used to manually turn
fan on.
• SENSOR/CONTROL switch may be located
where it is not easily accessed for everyday
usage; it may need to be labeled and located
where it can’t be turned on without being
seen from fan to comply with local and
national codes.
 Loading...