16
3
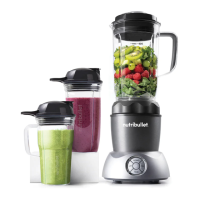
Pitcher assembly
& use
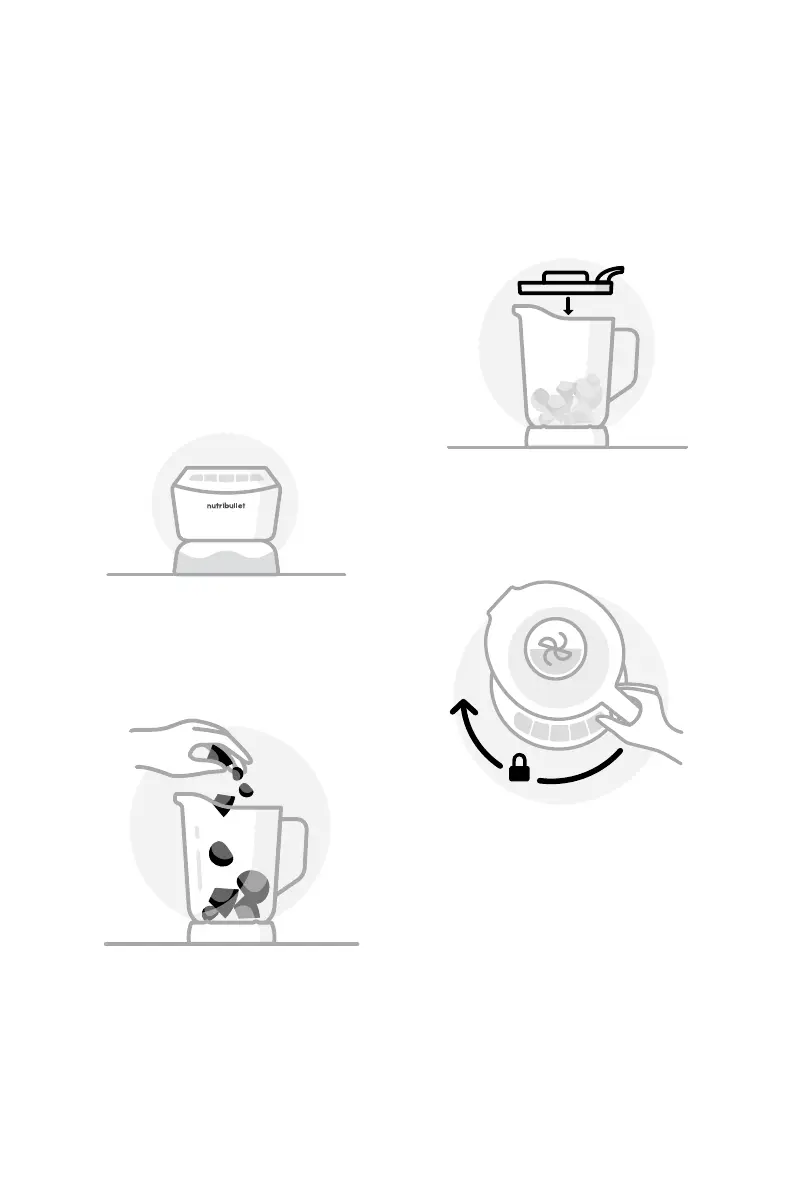
Place the pitcher onto the
motor base — handle facing
to the right of the blending
control panel, never towards
the back — and gently twist
clockwise so it locks in place.
When you hear the click, it’s
locked and ready to blend.
NOTE: If you are left-handed, place
the handle facing towards the center
of the blending control panel and
twist clockwise.
5
3
Place the pitcher on a
clean, dry, level surface.
Add the ingredients to the
pitcher, making sure they do
not exceed the MAX line.
1 Review all warning and
caution statements in the
Important Safeguards
section (pg 2-10) and
on the previous page before
proceeding to Step 2.
Place the motor base on
a clean, dry, level surface
such as a counter or table.
4
Place the pitcher lid with
vented lid cap attached on
the pitcher, making sure it’s
aligned to the handle.
NOTE: The blending pitcher is
marked with two MAX lines:
one for solid ingredients
(higher line) and one for
liquids (lower line). When filling
the blender, make sure your
ingredients do not exceed their
respective MAX lines.
2
 Loading...