4
THE FIRST TIME YOU USE YOUR NUTRIMILL
Take the hopper extension ring out of the fl our bowl. Mill at least 2 cups of wheat
or other hard grain, then discard the fl our and clean the bowl. This will eliminate any
contaminates the mill may have obtained in the manufacturing process. Make sure you
use clean grain. Your warranty does not cover foreign object damage from plastics,
metals, rocks or any other materials that could get into and damage the milling heads.
Proper care of your mill will ensure a reliable milling experience for many years to come.
KNOW YOUR NUTRIMILL
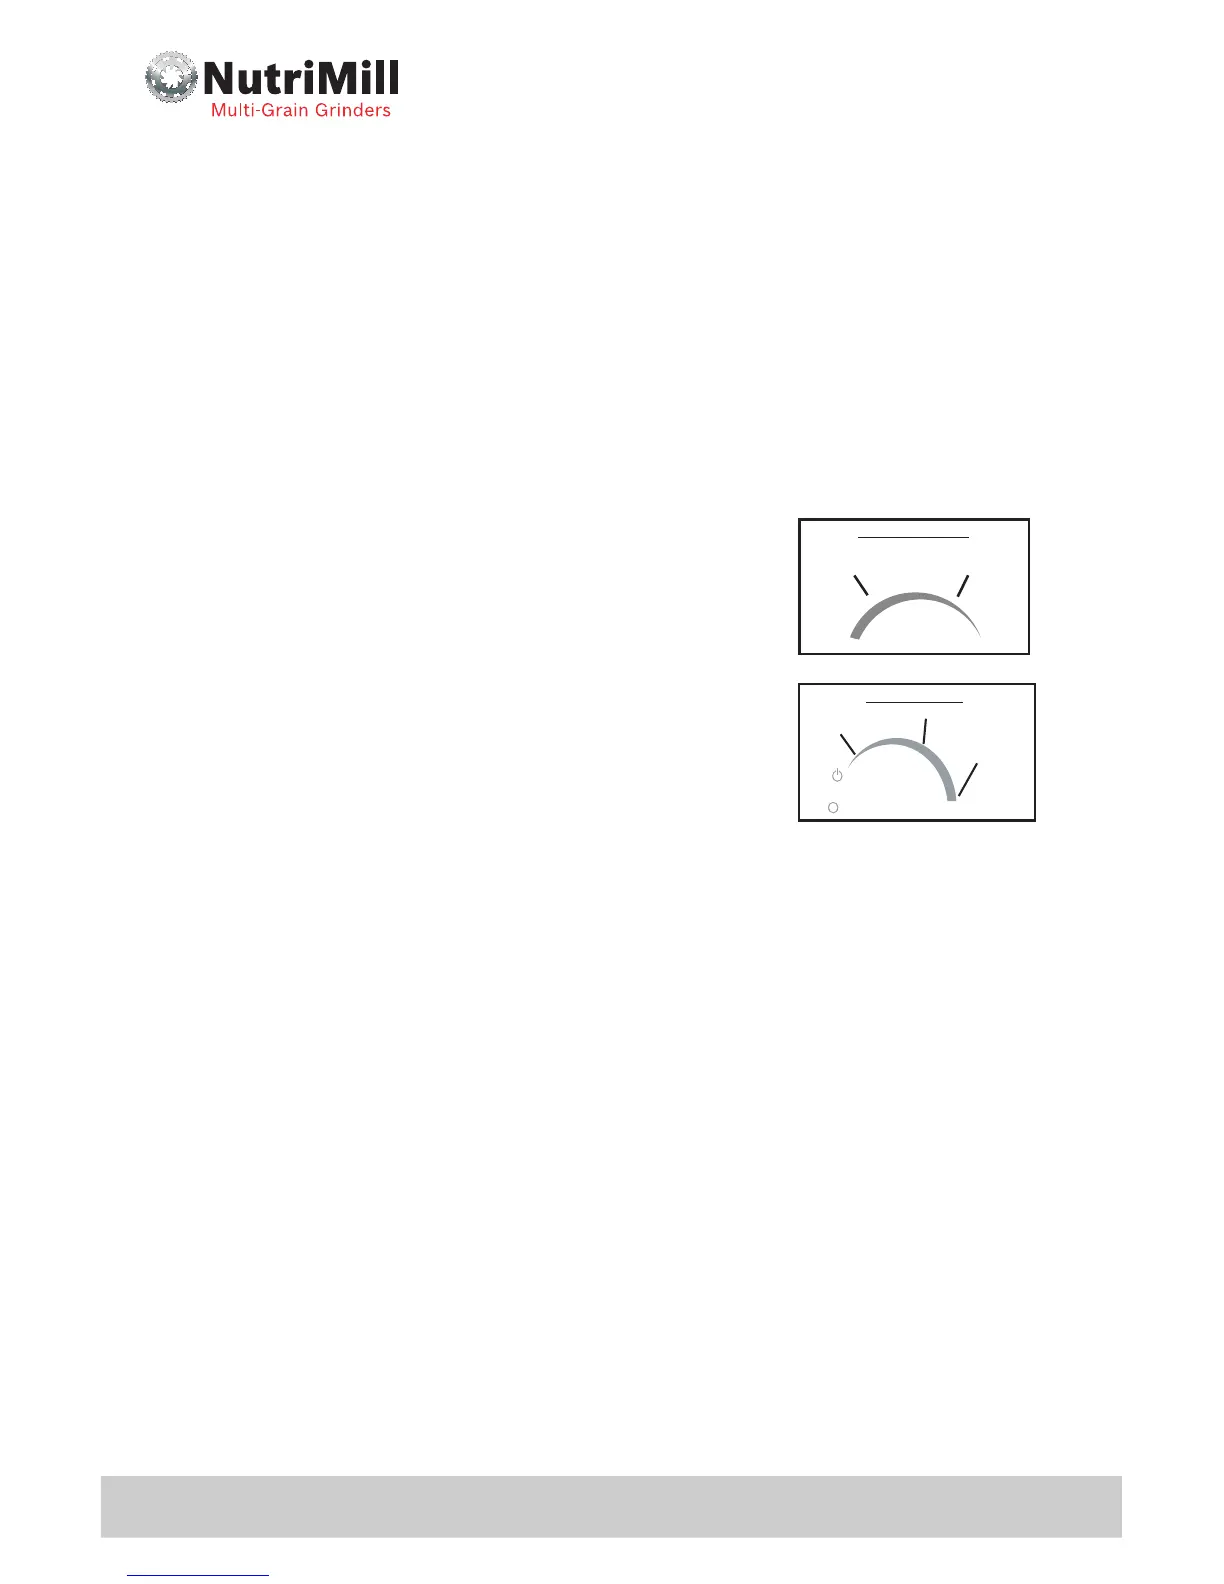
The upper knob controls motor speed. This allows you
to have greater control of the texture. For most grains leave the knob turned all the way
to the left, (high speed). For coarse fl our, start running the mill with the knob turned
all the way to the left for 15-20, then turn the knob all the way to the right. Turning the
knob to the right slows motor speed.
The lower knob controls grain feed/fl ow and turns the
mill on and off. Turning all the way to the right will allow the larger
grains to start fl owing freely. You may then turn the knob to your
desired setting. The feed rate will affect the fi neness of the grind.
Turning the knob to the right will feed grain faster and produce
coarser fl our.* Turning the feed rate knob all the way left will
turn the machine off. (See Page 7 for more instructions)
To better understand how your mill works follow these simple
steps:
1. Unplug mill so motor does not turn on while adjusting grain
feed (lower) knob.
2. With hopper empty, look under grain inlet cover (located at bottom of hopper). A
fl ashlight may be helpful. Do not touch or disassemble the inlet cover.
3. When knob is set to OFF, most grains cannot fl ow through the inlet.
4. Turn lower knob back and forth. You will see the size of the opening into the milling
chamber gradually changing.
5. As you turn the knob further to the right, inlet size increases. This allows grain to
feed and fl ow more rapidly.
6. Depending on size of grain in the hopper, knob setting has a point at which grain
begins to fl ow. (For example, barley or millet will begin to fl ow into the mill at a
setting much further to the left than corn or beans because they are smaller in
size.)
7. When you fi nd the point where grain begins to fl ow, turn the knob another 1/4” to
the right.
* NOTE - At the very fi nest setting (the point where grain fi rst begins to fl ow), the fl ow may fl uctuate -
this is normal. Turn the knob a little further to the right for a steady fl ow. The point where grain begins
to fl ow will vary depending on grain kernel size.
High
Motor
Low
Motor Speed
Feed Rate
Grain Feed
Fine
Bread Flour
Coarse/Meal
Texture
See Page 7 For More Knob Information
5
Classic
Locking Pin
• This knob at the back of the
mill fi rmly holds the mill unit
to the base
• It can be removed with a twist
to separate sections for storage,
cleaning, or for use with the NutriMill
Classic optional Flour Bagger
accessory.
Hopper Lid
• Use during milling for quiet
operation
Hopper Extension Ring
• Comes packed inside the fl our
bowl
• Must always be removed from
bowl before milling
• Increases grain capacity
• Not necessary to use when
milling small amounts of grain
Grain Inlet Cover
Hopper
Circuit Reset Button (Red)
• Located at the bottom of the
Milling Module Unit
Separator Cup
• Must be attached when
milling
• For air fi ltration
• Prevents Flour Leakage
Flour Bowl (Canister)
• Large 20 cup capacity
• Large easy grip handles
Air Filter*
• Must be dry and in place
when milling
• Helps air fl ow
• Prevents fl our leakage during
milling
Base
• Yes/No bowl position indicator
on front of base helps
position bowl into place
• Bowl must be pushed in far
enough to reveal “YES” line on
the base.
Milling Module Unit
Variable Motor Speed Control
Knob
Variable Texture Control
Knob
*Inlet Grommet*
*Inlet grommet and fi lter should be replaced every 2 years or as needed.