4 5
Setting Up Your Tablet
Follow these step-by-step instructions to set up your NUU Tab 8.
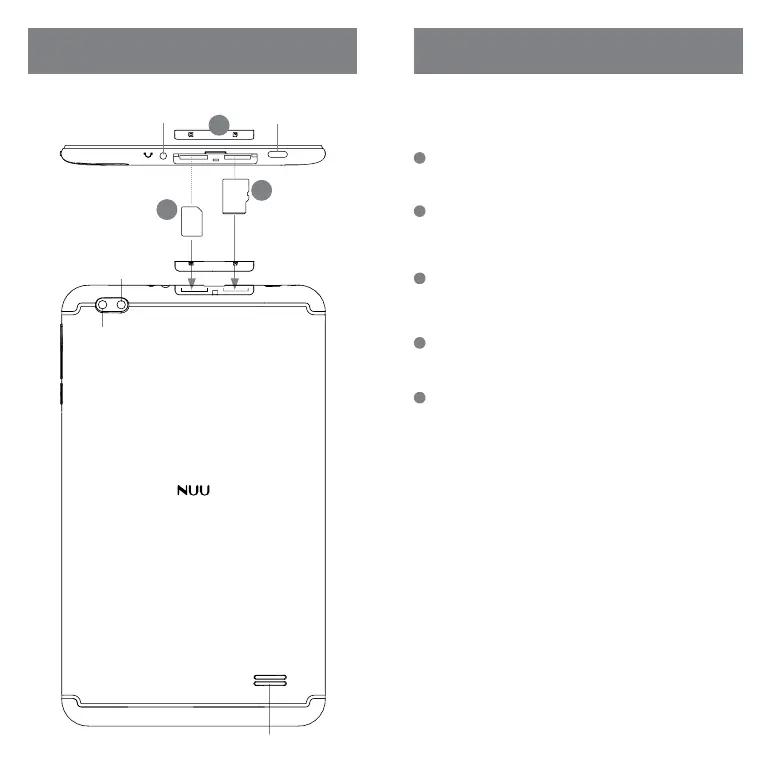
Power off the tablet before inserting any cards!
Warning:
SIM and microSD cards are small enough to become a choking
hazard, so please keep them away from children & pets. SIM and
microSD cards are also quite delicate. Please be careful when
handling them.
Back
Top
Rear
camera
flash
AUX-In/
Headset jack
USB Type-C
connector
Speaker
1
Micro
SIM
MicroSD
3
2
Remove SIM Tray
• Remove the SIM tray located at the top edge of the Tab 8. This can be
done by hand; no tool is needed.
Configuration 2: microSD™ Card (optional)
• Orient your microSD card to match the layout on the tray, and place
it within.
• The NUU Tab 8 supports microSD cards up to 128GB.
Configuration 1: SIM Card
• Orient your SIM card to match the layout on the tray, and place it within.
• The NUU Tab 8 accepts compatible SIM cards to enable 2G, 3G, and
4G-LTE connections.
Replace SIM Tray
• After placing the SIM and/or microSD card in the tray, slide it back into
its slot. It will click and hold in place.
Charge/Sync
• Plug in the USB Type-C connector to charge the tablet or transfer data.
1
3
2
4
5