5
OPERATING INSTRUCTIONS:
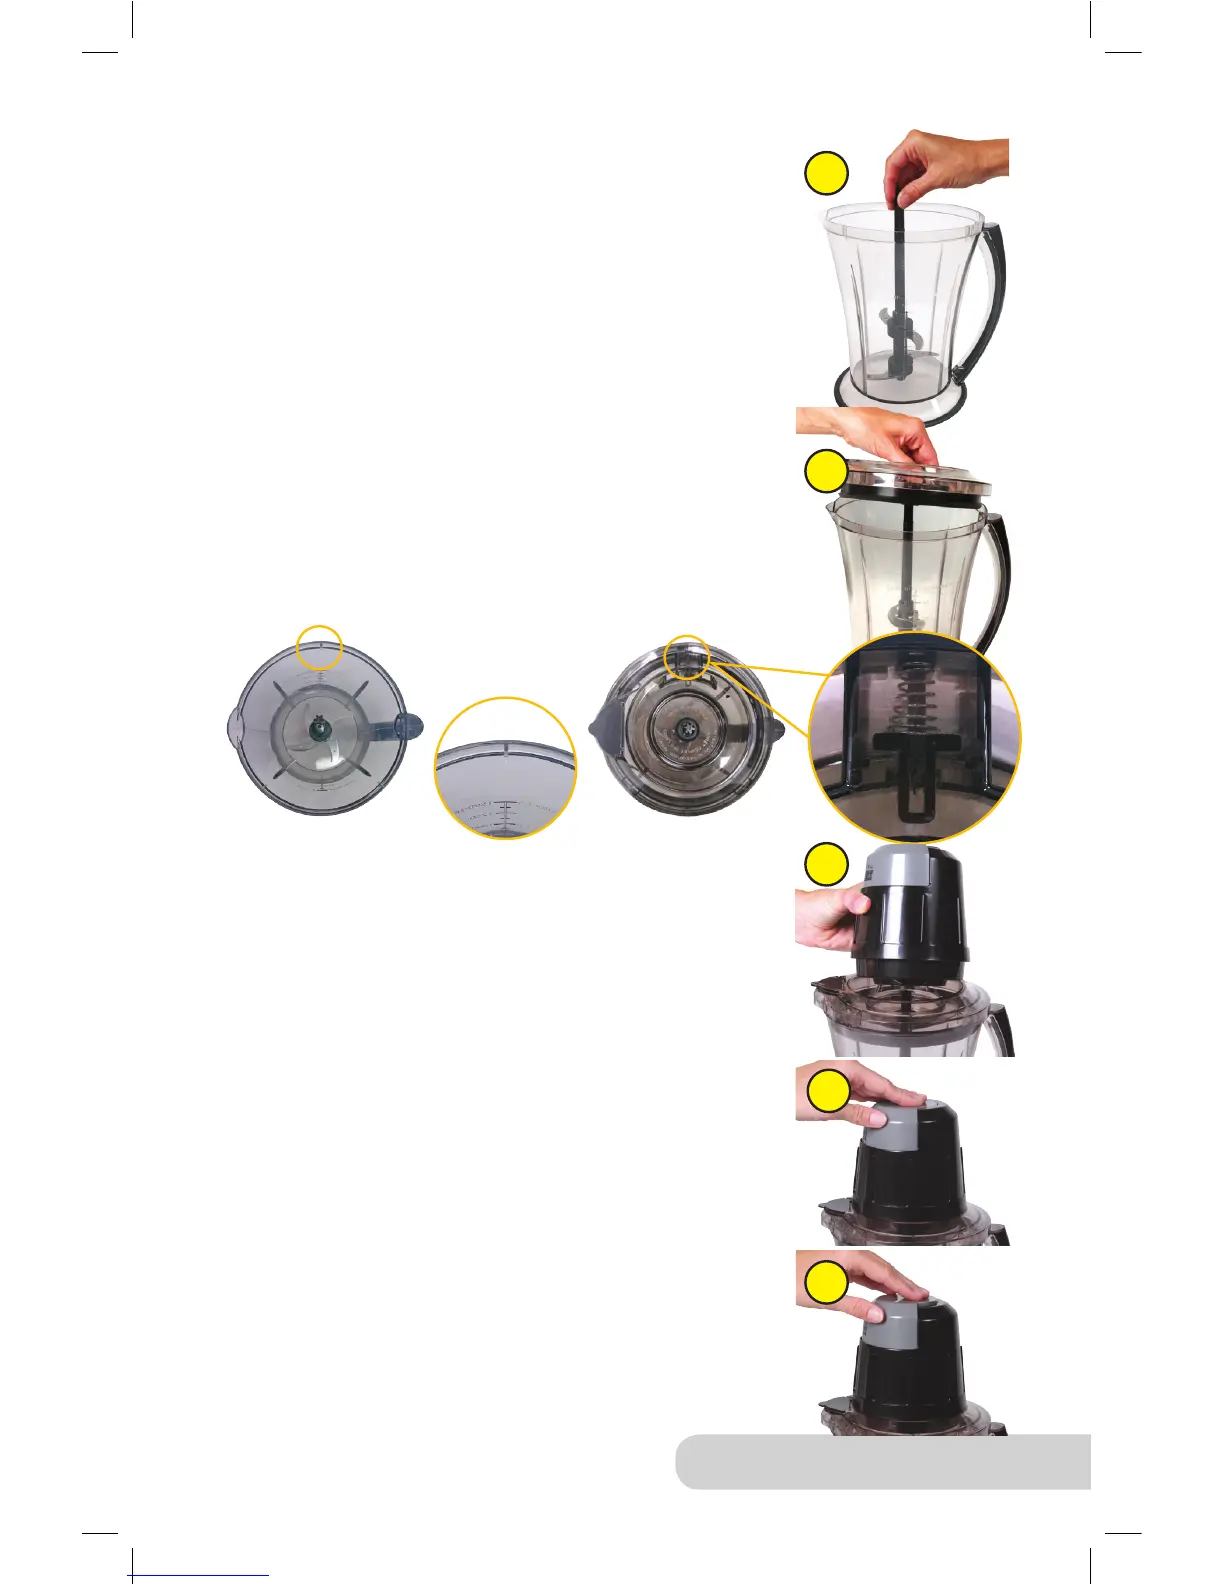
Step 1:
Place the cover guard onto the top of the pitcher.
The guard’s pouring spout and spring mechanism must be
aligned properly to the pitcher. Press the cover guard down
rmly, this will allow the spring to activate the safety switch
inside. This safety switch must be in place for the power
head to work.
Step 2:
Place the cover guard onto the top of the pitcher. The guard’s
spring mechanism must be aligned properly to the pitcher.
Press the cover guard down rmly, this will allow the spring to
activate the safety switch inside. This safety switch must be
in place for the power head to work.
Step 3:
Place the power head on top of the cover guard making sure
that it is securely in place. The “NuWave” logo on the power
head should be centered above the pour spout.
Do not attempt to operate the mixer without this in place.
Step 4:
To start processing, press on the On/Off Pulse button
located on the top of the power head. To stop processing,
remove your ngers from the On/Off Pulse button.
Step 5:
Hold the pitcher rmly while depressing the On/Off Pulse
button to ensure the unit stays in place. Make sure that the
blades have stopped completely before removing the power
head and cover guard.
Step 6:
Remove the blade assembly by its shaft before you pour
with the pitcher.
Pitcher Cover Guard
1
2
Align the spring
mechanism to
the plastic tab.
Operating Instructions
Spring
Mechanism
3
5
4