- 4 -
▪ Stereo I/O Bracket included with NVIDIA Quadro K5000, K4000, and 4000
▪ SPDIF audio interface cable provided with NVS 295
▪ Auxiliary power connector cable(s) – provided with any Quadro board requiring them
▪ DVD-ROM with driver software for Windows 8, 7, Vista or XP SP3 (64- or 32-bit)
Hardware Installation
Follow the steps listed in the order given to successfully install your new NVIDIA Quadro or NVIDIA NVS
professional graphics board.
Important
Static electricity can severely damage electronic components. Take the following precautions when
installing your new graphics board:
▪ Before touching any electronic parts, discharge the static electricity from your body by touching the
internal metal frame of your system while it is unplugged
▪ Don’t remove your card from the packaging clamshell until you are ready to install it. Whenever you
remove a card from your system, always place it back in the clamshell
▪ Never let any clothing or jewelry touch any electronic parts
▪ When handling your card, hold it by its edges, and avoid touching any circuitry or the PCIe connector
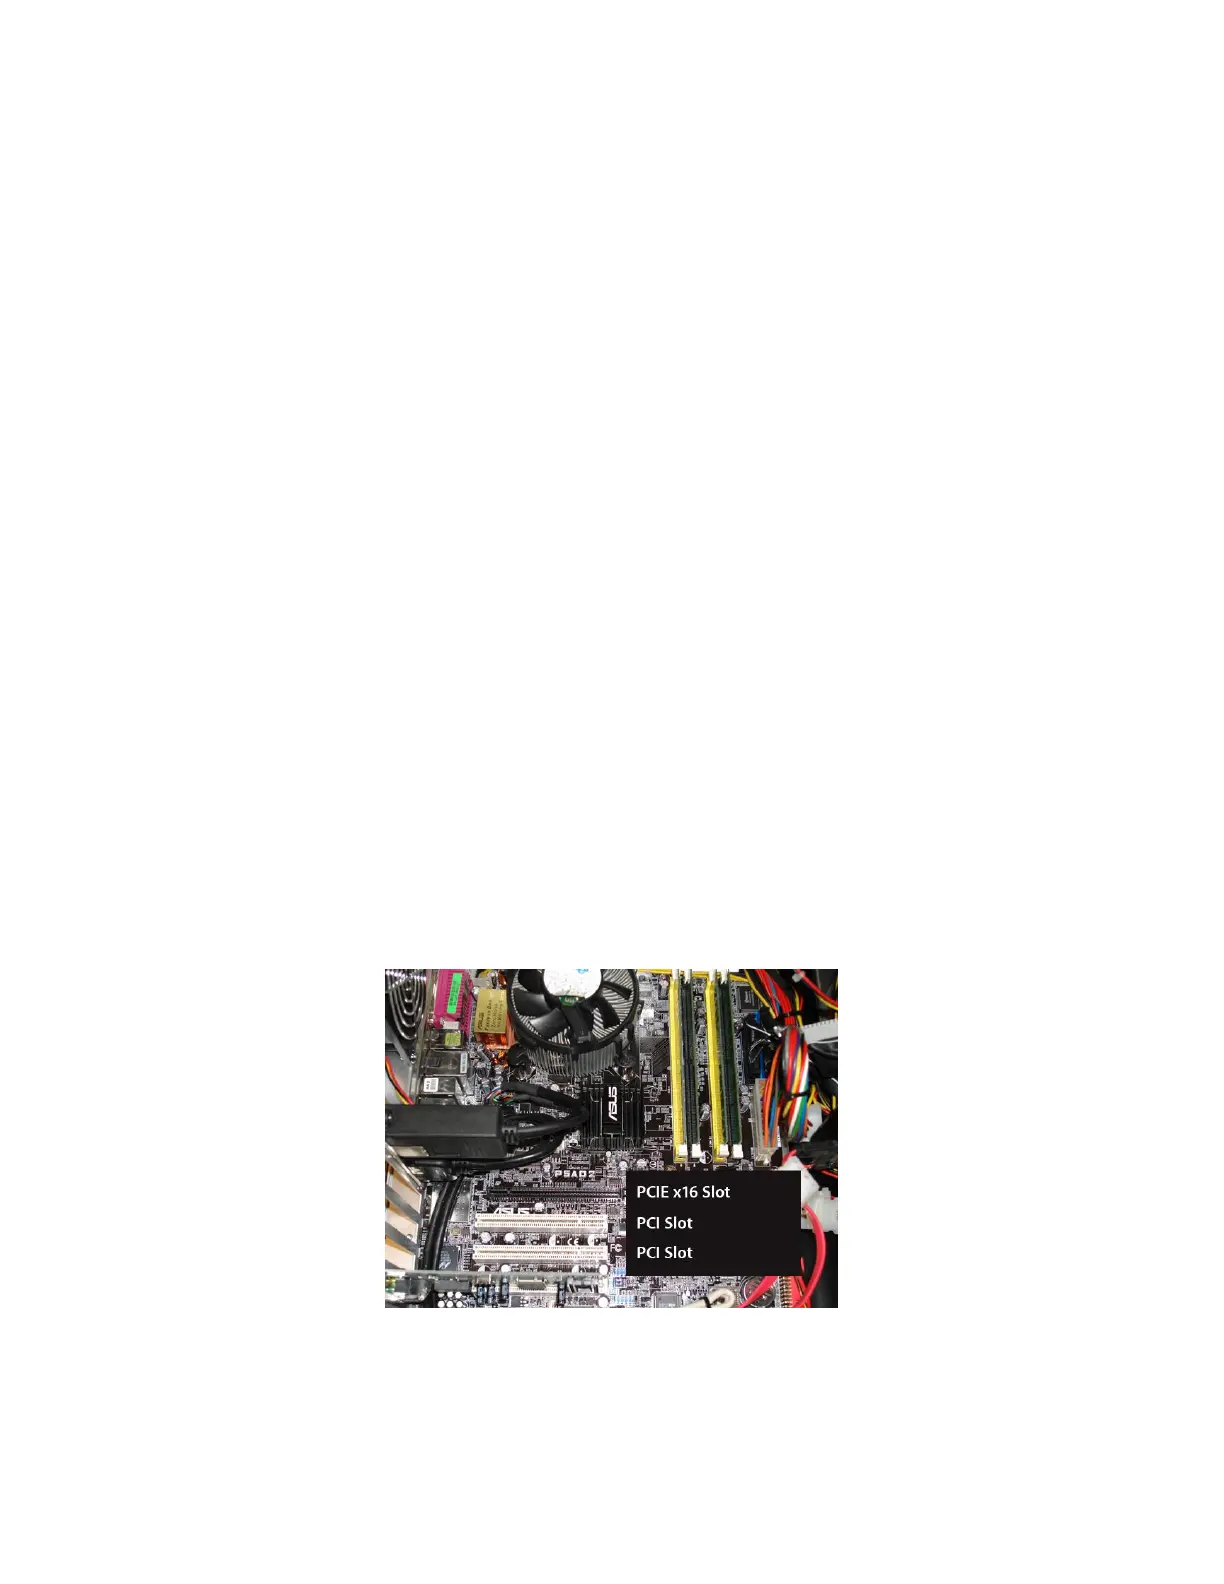
Selecting the Correct Expansion Slot
PCI Express motherboards have a combination of PCI Express and PCI slots. Slots may look similar at first;
however you will notice differences once you examine them closely. PCI Express x16 slots on the
motherboard are usually closest to the CPU. PCI Express x1 slots are smaller and should be labeled as
such. If you are unsure which connectors are PCI Express x16 or x1 consult your system manual to identify
the appropriate slot. Plugging a graphics card into the incorrect slot could damage the card, your system, or
both. Never force a card into a slot that does not easily accommodate it.
Typical motherboard showing PCIe x16 and PCI slots