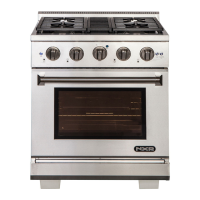
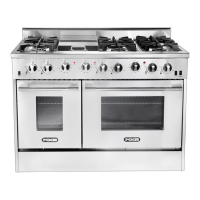
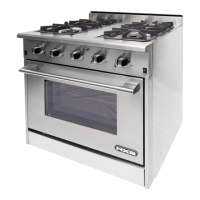
This document serves as a comprehensive manual for the NXR Gas Range, manufactured by Duro Corporation, covering its installation, care, and maintenance. It emphasizes safety precautions and proper operational procedures to ensure a long and efficient lifespan for the appliance.
The manual begins with crucial safety instructions, highlighting the importance of reading the entire manual before operating the range for the first time. It includes a "WARNING" section that addresses potential hazards such as fire or explosion due to improper use of flammable materials or gas leaks. Users are advised on immediate actions to take if they smell gas, including not attempting to light any appliance, avoiding electrical switches, not using phones in the residence, and immediately contacting their gas supplier or the fire department. It is explicitly stated that installation and service must be performed by a licensed installer, approved service agency, or gas supplier. The document also includes a "CA PROPOSITION 65" warning regarding chemical by-products from gas cooking fuel and the need for proper ventilation.
A significant safety feature detailed is the anti-tip bracket, which is essential to prevent the appliance from tipping over, a hazard that could cause serious injury or death. The manual provides clear instructions on how to install and engage this bracket, emphasizing that the range should not be operated without it.
Unpacking and handling instructions stress the appliance's weight and the need for proper equipment and manpower to avoid personal injury or damage. A specific warning is given: "DO NOT lift range by the oven door handles!!"
Further safety instructions reiterate warnings against storing or using flammable vapors and liquids near the appliance. It also advises against using the range for space heating, as this can lead to carbon monoxide poisoning and overheating. The manual also warns against using the appliance doors or drawers as steps, as leaning or setting on them may result in hazards and injuries.
Electrical grounding instructions are provided, stating that the appliance is equipped with a three-prong (grounding) plug for protection against shock hazards and must be plugged into a properly grounded three-pronged receptacle. Users are warned not to cut or remove the grounding prong.
Installation instructions cover dimensions and clearances, gas supply requirements, and electrical power supply requirements. It specifies minimum distances from combustible sidewalls and the maximum depth for cabinets installed above the cooking top. The manual outlines the necessary gas supply pressure for both LP gas and natural gas, and the regulator settings. It also details the process for connecting the range to the gas supply, including installing shut-off valves and adapters, and leak testing using soap water. The importance of correct electrical polarity is stressed, as reverse polarity can cause continuous sparking.
The manual includes a section on "Hood/Composite Overlay Install," which provides dimensions for proper hood placement above the range to ensure safe and efficient operation. After installation, users are instructed to check the ignition of cooktop and oven burners, air shutter adjustment for proper flame, and all gas connections for leaks.
The "Cooktop Operation" section explains surface burner ignition, advising users to push and turn the control knob to "Hi" to ignite the burner, and then adjust the flame size. It notes that all burners will spark when one is turned to "Hi." A table provides recommended heat settings for various cooking tasks, from simmering to boiling. In case of a power failure, instructions are given for manually lighting the surface burners. Cooktop maintenance includes cleaning after each use to prevent discoloration and staining, and cleaning the sealed burners.
"Oven Operation" covers various cooking functions:
- Natural Airflow Bake: Heat is transferred from the bake burners at the bottom of the oven cavity and circulated by natural airflow.
- Infrared Broil: The top broiler burner heats a metal screen to produce infrared heat for searing and sealing in juices. The manual specifies that the oven door must be closed during broiling.
- Convection Bake: A motorized fan circulates heated air for more even heat distribution, allowing for multiple rack use and faster cooking at lower temperatures.
- Convection Roast: The fan circulates heated air over and around food for moist and tender results with a golden-brown exterior. The use of a broiler pan with a cover is recommended to catch grease spills.
- Preheating: Users are advised to preheat the oven to the recipe's specified temperature, which typically takes 15-20 minutes.
- Convection Defrost: The motorized fan circulates air without heat to accelerate defrosting.
- Convection Dehydrate: Warm air is circulated at 175°F to remove water from food, inhibiting microbial growth.
Instructions for removing and installing oven racks are provided with clear steps. A "WARNING" before baking or broiling advises users to turn on the oven and broiler to burn off manufacturing oils, recommending 450°F (230°C) for 20-30 minutes, and to use a ventilator during this process.
The "Griddle Operation" section details how to prepare and use the griddle, including cleaning it before first use, removing the stainless steel cover, and positioning the grease tray. It explains how to turn on the griddle and preheat it, and warns that the griddle surface will be hot after use.
"Care and Cleaning" provides detailed instructions for maintaining various parts of the range:
- Cooktop: Emphasizes turning off controls and ensuring the cooktop is cool before cleaning, avoiding harsh or abrasive cleaners, and using soft cloths or sponges.
- Control Panel, Door Handle, Control Housing: Clean with mild detergent and warm water, avoiding abrasive cleaners.
- Oven Window: Clean glass surfaces with mild detergent and hot water, or a mild glass cleaner.
- Porcelain Surfaces: Clean oven interior and inner door liners with mild detergent and warm water, avoiding abrasives.
- Stainless Steel Surfaces: Do not use chlorine bleach, steel-wool pads, or abrasive cleaners. Use a hot, damp cloth with mild detergent.
- Metal Finishes: Wash with soap and water, glass cleaner, or mild liquid sprays.
- Plastic Finishes: Clean with soap and water, rinse, and dry.
- Oven Racks: Clean with detergent and hot water, using a scouring pad for heavy soil.
- Oven Frame: Clean with hot water and soap-filled steel-wool pads.
- Oven Gasket: Do not clean the gasket, as its fiberglass material cannot withstand abrasion, and it must remain intact.
- Replacing the Oven Light: Instructions include turning off power, removing the lens cover, and ensuring the oven and bulb are cool.
- Outer Oven Door: Clean with soap and water or glass cleaner, avoiding oven cleaners or harsh abrasives.
- Inner Oven Door: Avoid excess water in holes or slots, and ensure no soap is left on the liner.
The "Troubleshooting" section offers a table of potential problems, possible causes, and remedies, such as issues with burners not lighting, flames being too large or yellow, sparking, or the oven not heating. This section encourages users to review these solutions before calling for service.
Finally, the "Manufacture's Limited Warranty" section outlines the terms of the 2-year full warranty for parts and labor, covering defects due to materials and workmanship. It specifies what Duro Corporation will pay for (repair labor and replacement parts) and what it will not pay for (service by unauthorized agencies, installation correction, cosmetic damage after 30 days, damage from misuse, etc.). The warranty applies to products purchased and located in the United States for personal, family, or household use. A "Warranty and Product Registration" form is included for users to record their appliance's model number, serial number, purchase date, installation date, and purchase location, emphasizing the need for proof of purchase or installation date for in-warranty service.