6
Cleaning
The oven was cleaned at the factory, but not sterilized. Remove all interior parts,
including shelves and shelf clips if assembled and clean the inside of the chamber
thoroughly with a disinfectant that is appropriate for your application. DO NOT
USE chlorine-based bleaches or abrasive cleaners, as they will damage the ovens
interior surfaces. DO NOT USE spray cleaners that might leak through openings
and cracks and get on electrical parts or that may contain solvents that will harm
coatings. A regular periodic cleaning is recommended.
WARNING: Never clean the unit with alcohol or flammable cleaners with the unit
connected to the electrical supply. Always disconnect the unit from the electrical
service when cleaning and assure all volatile or flammable cleaners are evaporated
and dry before reattaching the unit to the power supply.
Shelves
Place shelves in the chamber at desired position. See Figure 1.
7
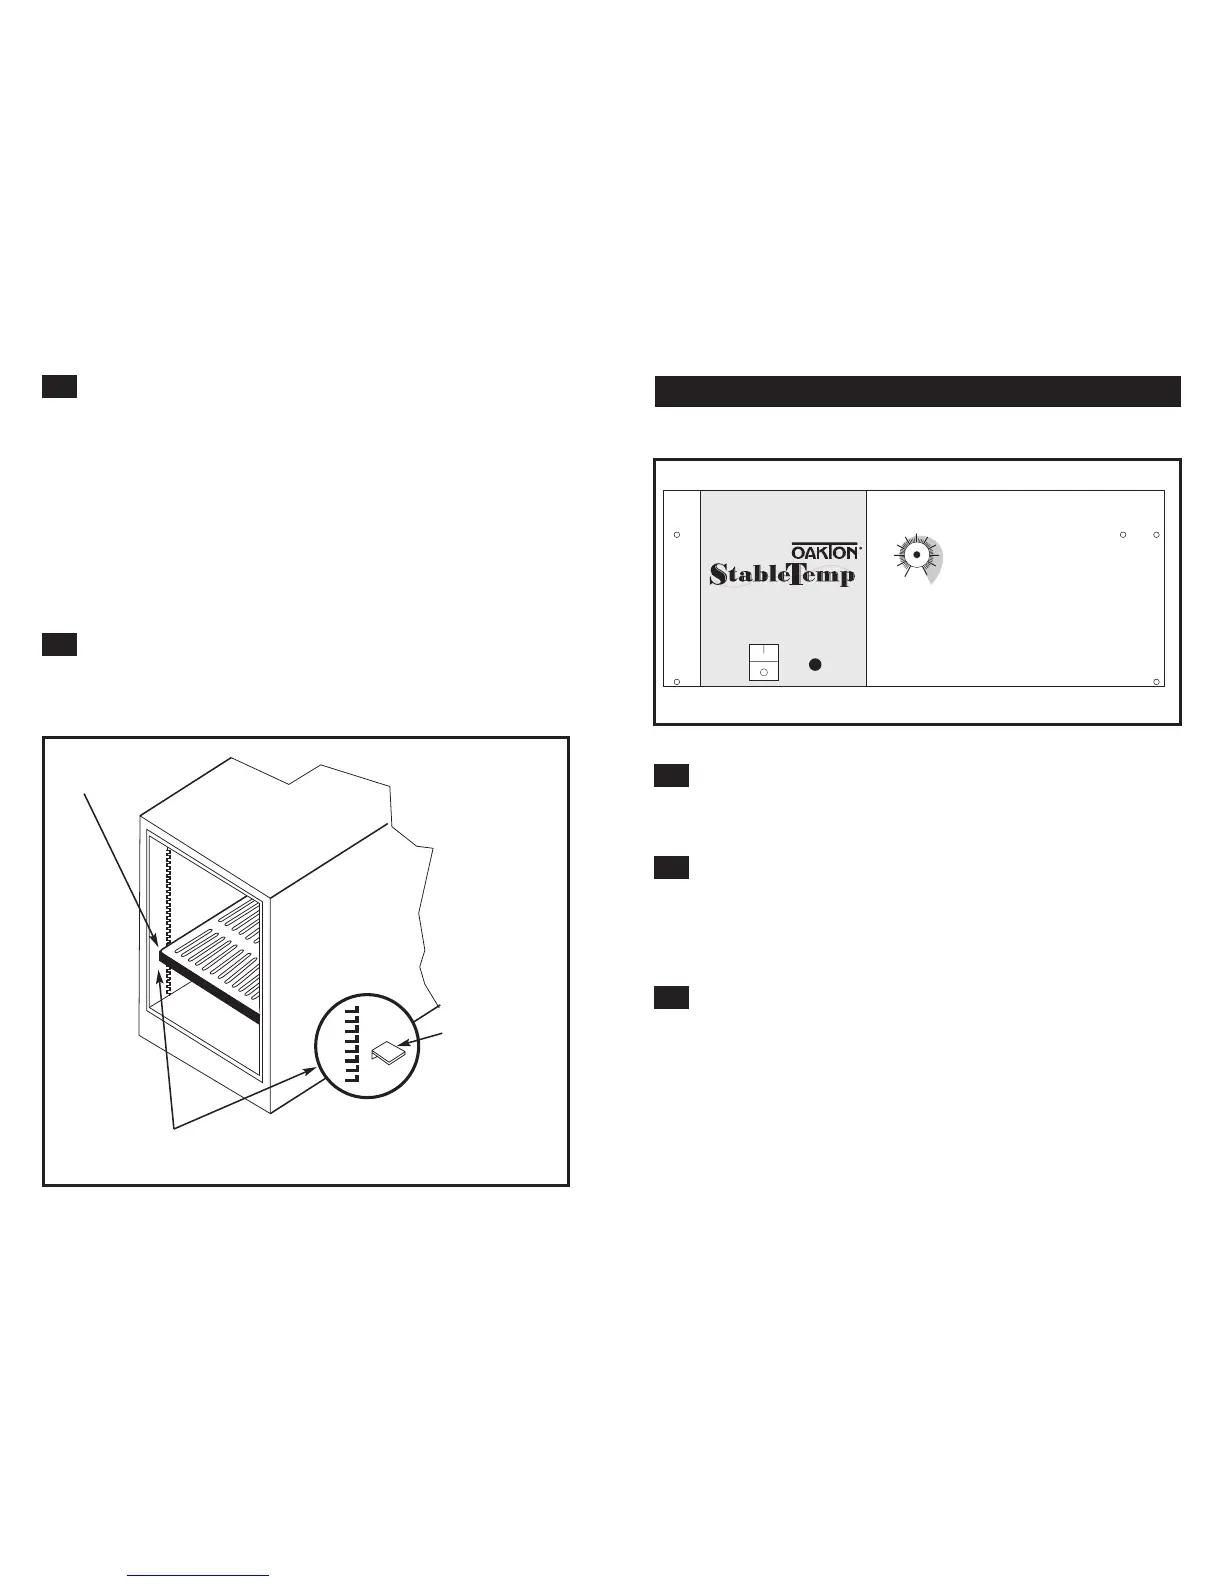
4.0 Control Panel Overview
Power
The main power I/O (on/off) switch controls all power to the oven. It must be in
the I, or ON position, and illuminated before any systems are operational.
Temperature Controller
Marked Set Temperature, this control is equipped with an adjustment knob and a
graduated dial. The graduated dial is marked with 10 major increments and 50
minor increments. The increments can be used as index points for setting and
returning to set point temperatures.
Heating Lamp
A green pilot light marked Heat Activated illuminates when the heating element has
been activated and is heating. When set point is reached the pilot light will cycle on
and off as the elements maintain the set temperature.
3.5
3.6
4.1
4.2
4.3
Figure 1:
Figure 2: Control Panel
Squeeze clip and insert
into slots. Clip will have
to be tipped into the
top slot and then rolled
into the bottom slot
Clip/Shelf interface (4) clips per shelf.
Install clips at same elevation for each clip
Shelf location where desired.
(2) provided.