10
11
7.0 Maintenance
Note: Prior to any maintenance or service on this unit, disconnect service cord from
the electrical supply source.
Cleaning
Clean the oven interior on a regular basis. When washing interior of unit, handle
gasket carefully so as not to impair the positive seal. Clean the inside of the cham-
ber thoroughly with a disinfectant that is appropriate for your application. Make
sure to rinse the cleaned surface with a damp cloth. DO NOT USE chlorine-based
bleaches or abrasive cleaners, as they will damage the oven chamber. DO NOT USE
spray cleaners that might leak through openings and cracks and get on electrical
parts or that may contain solvents that will harm coatings.
WARNING: Never clean the unit with alcohol or flammable cleaners with the
unit connected to the electrical supply. Always disconnect the unit from the electri-
cal service when cleaning and assure all volatile or flammable cleaners are evaporat-
ed and dry before reattaching the unit to the power supply.
Storage
If the unit is to be shut down for an extended period of time, wipe the chamber
clean and let dry before closing door to eliminate possibility of contamination. If the
unit is to be transported, remove shelving and trays, clasp the door shut and discon-
nect the power supply. Please refer to Section 3.3, Lifting / Handling for further
direction.
No maintenance is required on the electrical components. If oven fails to operate as
specified please review Section 8.0, Troubleshooting, prior to calling customer
service.
7.1
7.2
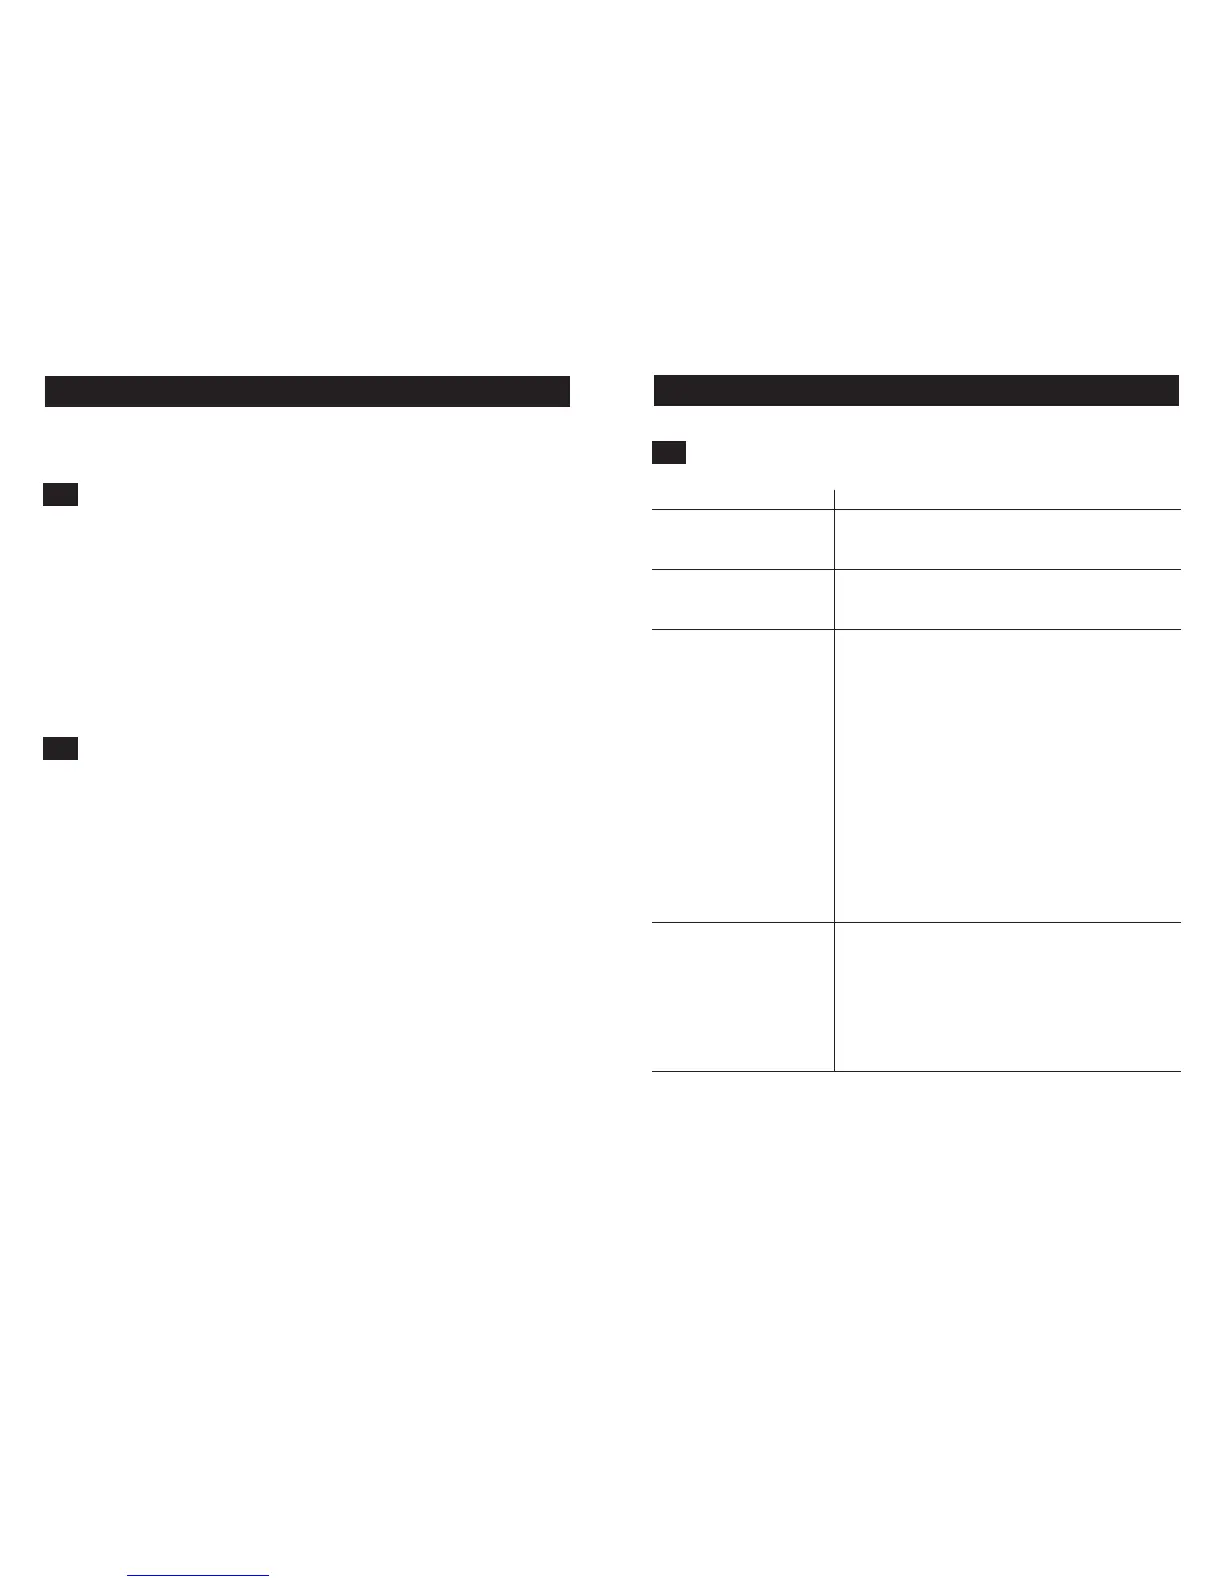
Problem Solution
Temperature too high 1) Controller set too high
2) Controller failed on – call Customer Service.
3) Wiring error – call Customer Service.
Chamber temp spikes over Recalibrate
set point and then settles
to set point
Temperature too low 1) Thermostat set too low
2) Controller set too low
3) Unit not recovered from door opening – wait
for heating indicator to turn off
4) Unit not recovered from power failure or being
turned off – oven will need 1 hour to warm
up and stabilize
5) Element failure – see if heating indicator is on;
compare current draw to data plate
6) Controller failure – confirm with front panel light
that controller is calling for heat
7) Thermostat failure – confirm with front panel
light that it is operating correctly
8) Wiring problem – check all functions and
compare wiring to schematic in section 11.0 -
especially around any areas recently worked on
9) Loose connection – call customer service
Unit will not heat over 1) Confirm that amperage and voltage match
a temperature that is data plate.
below set point 2) Confirm that set point is set high enough–turn
Thermostat all the way clockwise and see if
heating light or safety light comes on
3) Check connections to sensor
4) Check calibration – using independent
thermometer, follow instructions in section 6.2
8.0 Troubleshooting
Temperature
8.1