9
- GB -
− Ensure that the power connection cable cross section is not smaller than that of the rubber sheath with the identifi-
cation H05RN-F. Extension cables must meet DIN VDE 0620.
− Protect the plug connections from moisture.
− Only plug the unit into a correctly fitted socket.
Safe operation
− Never operate the unit if either the electrical cables or the housing are defective!
− Do not carry or pull the unit by its electrical cable.
− Route all cables such that damage is excluded and nobody can trip over them.
− Never open the unit housing or its attendant components, unless this is explicitly required in the operating instruc-
tions.
− Only use original spare parts and accessories for the unit.
− Never carry out technical modifications to the unit.
− Only have repairs carried out by customer service points authorised by OASE.
− The power connection cables cannot be replaced. When the cable is damaged, the unit or the component needs to
be disposed of.
− Only operate the unit if no persons are in the water!
− The unit, the connections and plugs are not water-proof and must not be routed or installed in water.
− Only operate the unit with the supplied transformer.
− Keep the socket and power plug dry.
− Ensure that the filter will not overflow. Danger of emptying the pond.
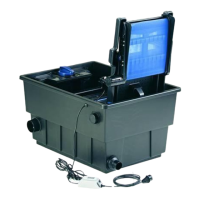
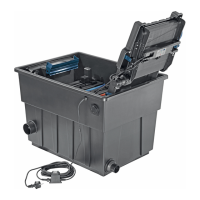
Installation (A)
Lay the outlet pipes for the water outlet into the pond and for the drain outlet into the sewage system or flower bed with
a sufficient gravity. Ensure that the unit is placed at a flood protected place and on firm ground (A1). When installing an
OASE UVC pre-clarifying unit (e.g. Bitron), place the unit at a minimum distance of 2 m from the pond edge (A1). Place
the transformer at a minimum distance of 2 m from the pond edge at a flood protected place (A1). Ensure unrestricted
access to the cover to be able to carry out work on the unit. Push (A2) or turn the hose onto the stepped hose nozzle
and secure with a hose clip. Push the flat sealing ring on the stepped hose connection, insert the stepped hose con-
nection into the inlet opening of the filter housing, and screw-tighten the water inlet socket from inside (A2). Close the
second water inlet with the closed hose nozzle (except when fitting a OASE UVC pre-clarifying unit, e.g. Bitron). Lay
the hose such that it will not deform when walked on, avoid kinks and connect it to the pump.
Fitting the DN 110 outlet (BioTec Screenmatic 36)
How to proceed:
− Fit the O ring onto the outlet.
− Fit the outlet into the respective hole of the container wall from the outside.
Ensure that the raised marking is at the top and aligned in relation to the hole pattern.
− Fasten the outlet from the inside with oval head screws.
− Tighten all screws diagonally using the cordless screwdriver to ensure that the sealing ring is uniformly applied.
Further tighten the screws using a Phillips screwdriver.
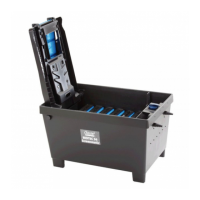
Start-up (B)
Switch on the pump, open the unit cover, set the water jet using regulator at the water distributor (B2) such that it hits
the first third of the screen. Close the cover, connect the motor connection cable to the transformer, connect power
plug (B1). The unit functions automatically, cleaning is every 30 minutes. Note: The Biotec filter is a biological filter
system and requires several weeks after its first installation to reach its full biological effect.
 Loading...