Do you have a question about the Oasis POU1RRK and is the answer not in the manual?
Inspect condenser for dirt every three months. Clean with a non-wire brush for adequate air circulation.
Clean the cone shaped strainer in the mechanical float valve. Flush clean and replace it.
The compressor motor has an automatic reset protector that disconnects it during an overload.
This unit features a hermetically sealed compressor requiring no additional lubrication.
Position cooler minimum 2" from wall for adequate condenser air circulation.
Connect 1/4" OD copper tube to the "inlet" fitting and connect to cold water supply.
Install a pressure regulator (e.g., Slow Flow) if water pressure exceeds 100psig.
Verify electrical service matches the cooler data plate.
Ensure hot tank switch is OFF, fill reservoir, then activate. Failure to fill can damage the unit.
Check connections for leaks, then open faucets to flush the system.
Prevents overfilling if fill float fails. Press blue reset button to restart water flow.
Avoid hard impact or jarring while filling, as it may trip the safety float.
Turn off hot tank switch, disconnect power, shut off water supply.
Drain reservoir via cold faucet. Drain hot tank using valve or tube.
Always drain all water before freezing temperatures or shipping.
Drain cooler, remove top, float cap, faucets, and lift reservoir upward.
Align reservoir with probe, press down gently. Do not touch inside.
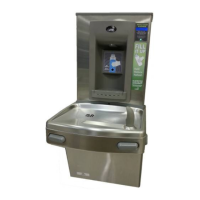
Available safer faucets deter accidental dispensing by toddlers.
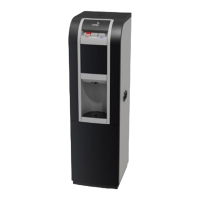
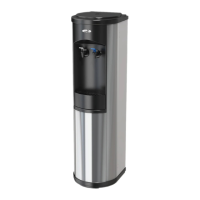
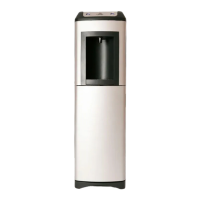
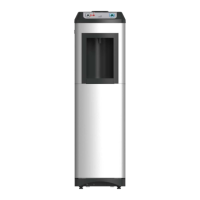
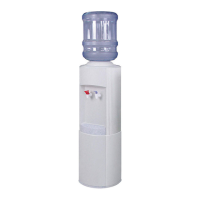
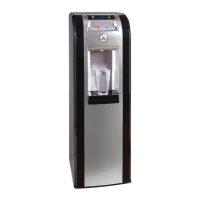
The OASIS® Water Cooler, available in models POU1RRK, POU1RRHS, POU1SRK, and POU1SRHS, is designed to provide convenient access to chilled and, in some models, hot water. This device is intended for indoor use and requires a stable water supply and electrical connection for operation.
The primary function of the OASIS® Water Cooler is to dispense potable water at desired temperatures. Cold water is achieved through a refrigeration system that cools water stored in a reservoir. For models equipped with a hot tank, an internal heating element provides hot water. The unit is designed to be connected directly to a cold water supply line, eliminating the need for bottled water. Water flow to the reservoir is controlled by a mechanical float valve, which ensures the reservoir remains filled to the appropriate level. A safety float mechanism is integrated to prevent overfilling in the event of a primary float valve failure, automatically shutting off water flow if the level rises too high.
Before initial use, the water cooler requires a simple setup process. It should be positioned at least 2 inches (51mm) from a wall to ensure adequate air circulation for the condenser. If external filters are to be used, they should be installed according to the manufacturer's instructions. The unit connects to a cold water supply via a ¼" OD copper tube inserted into the "inlet" fitting on the back. A critical safety measure is the requirement for a pressure regulator (such as a Slow Flow regulator) if the incoming water pressure, including any potential spikes, could exceed 100psig (690kpg). Once connected to the water supply, the reservoir must be allowed to fill completely before plugging in the unit. For models with a hot tank, the hot tank switch, located on the condenser at the rear of the cooler, must be in the "OFF" position during the initial fill to prevent damage. After filling and checking for leaks, all faucets should be opened until water flows freely. Only then should the unit be plugged into an electrical receptacle, ensuring the power supply matches the cooler's data plate. For hot tank models, the hot tank can then be activated by depressing the switch towards the "RESET" position. A crucial warning is provided regarding the hot faucet, as the dispensed water can cause scalding.
The safety float mechanism is a key user feature, designed to prevent spills from overfilling. If activated, the water flow to the reservoir will cease. To reset it, the user needs to press the blue reset button on the reservoir cap until a water flow restart is heard, then contact a service representative. Users are cautioned that a hard impact or jarring of the unit while it is filling may inadvertently trip the safety float.
To discontinue use, especially when freezing temperatures are anticipated or before shipping, the cooler must be completely drained. For hot tank models, the hot tank switch should be turned "OFF," and water drawn from the hot faucet until cool. The power supply cord should be disconnected, and the water supply to the cooler shut off. The reservoir is drained via the cold faucet. Hot tank models have an additional black drain valve on the condenser; a container can be placed underneath, or a 3/8" OD tube can be inserted into the valve opening to direct water into a container for draining.
The reservoir is removable for cleaning or replacement. To remove it, the cooler must first be drained. The top is lifted from the rear, followed by the float cap assembly. Any ice bank around the cooling probe can be melted with warm water. The faucets are unscrewed counterclockwise. Finally, the reservoir is grasped around the opening and pulled straight upward. When installing a new reservoir, it must be aligned with the probe and pressed downward, touching only the outer rim, ensuring no contact with the inside of the reservoir with bare hands to maintain sanitation. The faucets are then reattached, ensuring gaskets are properly in place.
An alternate faucet option is available, designed to deter accidental dispensing by toddlers. This "safer faucet" offers ease of use with one hand while adding an extra layer of protection.
Regular maintenance is essential for the efficient and economical operation of the OASIS® Water Cooler. The condenser, located at the rear of the unit, should be inspected for dirt and lint every three months. If cleaning is necessary, the power supply cord must first be disconnected. The condenser can then be cleaned with a small, stiff, non-wire brush. This ensures adequate air circulation, which is vital for the refrigeration system's performance.
Another maintenance point is the cone-shaped strainer located in the tube leading into the mechanical float valve on the reservoir cap. This strainer can be removed and flushed clean, and it is important to replace it securely in the tube after cleaning.
The compressor motor is equipped with an automatic reset protector. This feature acts as an overload protection, automatically disconnecting the motor from the power line if an overload condition occurs. This is a self-resetting mechanism, requiring no manual intervention from the user for typical overload events. The unit utilizes a hermetically sealed compressor, which means it does not require any additional lubrication throughout its lifespan, simplifying maintenance requirements.
| Water Temperature Settings | Hot, Cold, Room Temperature |
|---|---|
| Power Source | Electric |
| Dispensing Options | Push Button |
| Energy Saving Mode | Yes |
| Material | Plastic |
| Dispense Height | 150 mm |
| Capacity | 3 liters |
| Child Safety Lock | Yes |
| Color | Black |