8.ENGINE
8-15
The installation is the opposite of the
removal procedure.
NOTICE To prevent leaking ,take care that
the gasket is exactly in groove when you
reinstall the water pump housing.
Tighten screws of water pump housing in a
criss cross sequence to specification.
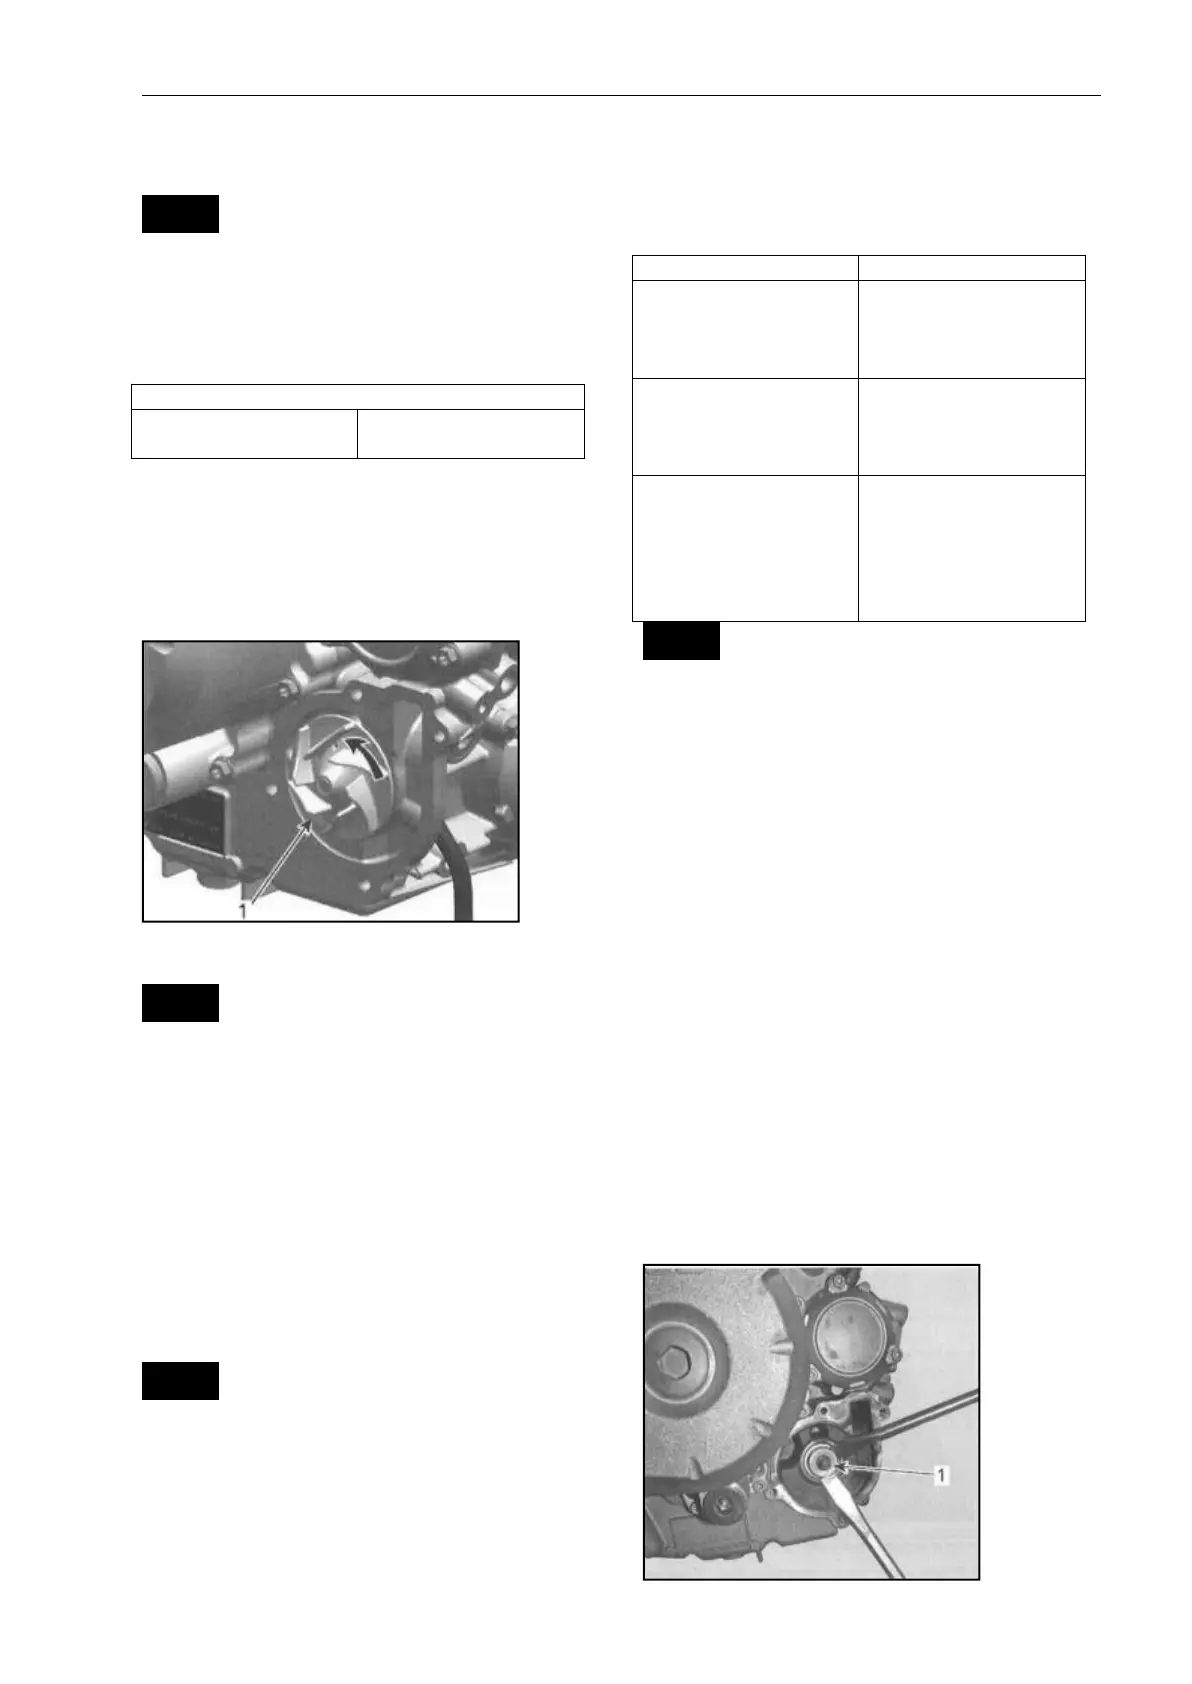
WATER PUMP IMPELLER
Removing theWater Pump Lmpeller
Remove water pump housing.
Unscrew impeller.
1. Turn counterclockwise unscrew
NOTICE Water pump shaft and impeller
have right-hand threads. Remove by
turning counterclockwise and install by
turning clockwise.
Water Pump Impeller Inspection
Check impeller for cracks or other damage.
Re- place impeller if damaged.
Water Pump Impeller Installation
The installation is the opposite of the
removal procedure.
NOTICE Be careful not to damage impeller
fins during installation.
WATER PUMP SHAFT AND
SEALS
Use these guidelines to service these parts
Replace:
- Rotary seal
- Oil seal
( assembled engine )
Replace:
-Rotary seal
- Oil seal
( assembled engine )
Replace:
- Water pump
shaft assembly
(including rotary seal)
- Oil seal
(engine disassembled)
NOTICE Rotary seal must be replaced if
water pump shaft is to be replaced.
Water Pump Seals Replacement
(Assembled Engine)
NOTE: Read and thoroughly understand the
en- tire procedure before starting it.
Removing theSeals
Remove water pump housing, refer to
WATER PUMP HOUSING in this subsection.
1. Remove the following parts, see
procedure in
this subsection.
- WATER PUMP HOUSING
- WATER PUMP IMPELLER
Carefully pry out inner part of the rotary
seal
using2screwdrivers.