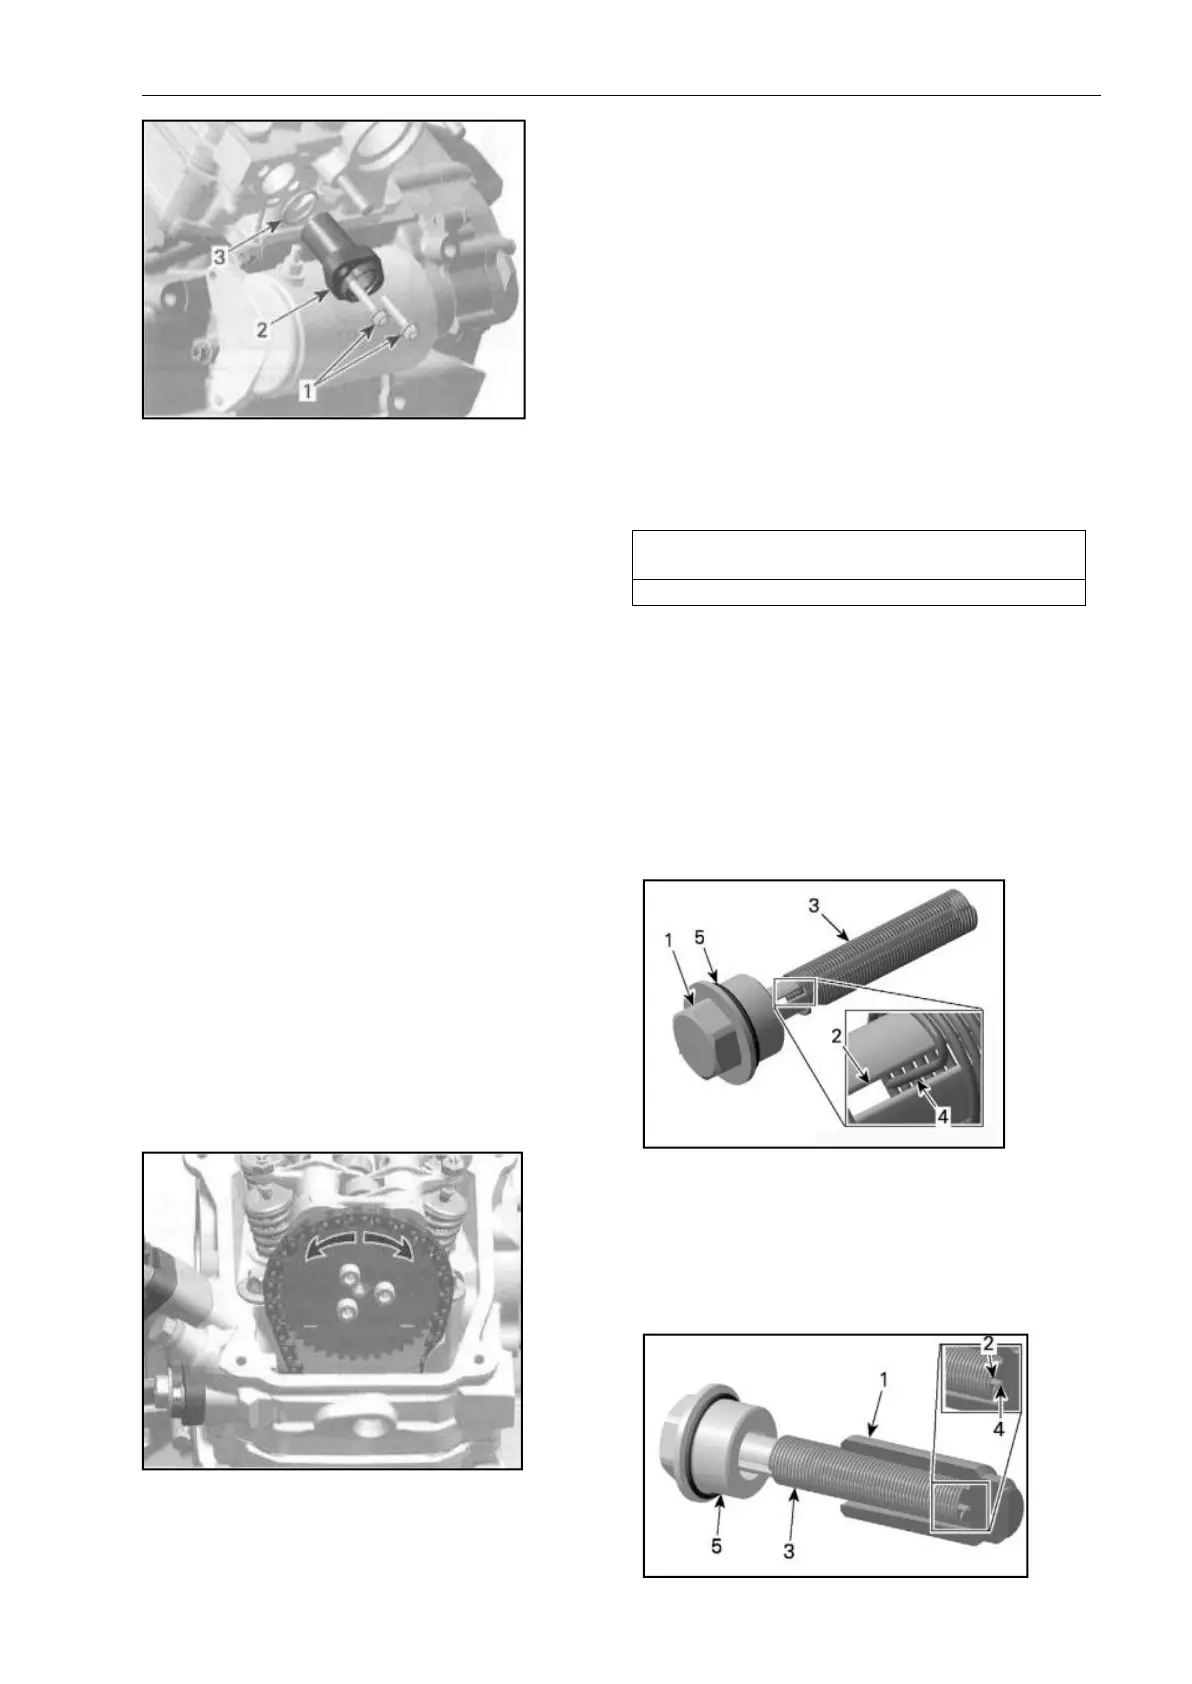
1. Screws
2. Chain tensioner housing
3. O-ring,
Inspecting theTiming Chain Tensioner
Check the chain tensioner housing and
plug for cracks or other damages.
Replace if necessary.
Check chain tensioner plunger for free
movement and/or scoring.
Check if 0-rings are brittle, cracked or
hard. Replace if necessary.
Check spring condition. Replace if bent,
broken or worn.
Timing Chain Tensioner Installation
1. For installation, reverse the removal
procedure.
However, pay attention to the following.
NOTE: Before installing the chain
tensioner make sure, that the camshaft
timing gear can be moved back and
forth.
MOVE GEAR BACK AND FORTH
2. Apply engine oil on the plunger
before insta1lation.
3. Slightly turn the camshaft timing gear
in order to get the timing chain play on
the tensioner side.
4. Slightly screw the plunger in until the
timing chain allows no more back and
forth movement of the camshaft timing
gear.
5. Screw the plunger in an additional 1/8
turn to reach the required specified
torque.
NOTICE: Improper adjustment of the
timing chain will lead to severe engine
damage.
6.Pace the O-ring on chain tensioner
screw plug.
7.Fit the spring on one side into the slot
of the plug.
1. Plug
2. Slot
3. Spring
4. Spring end
5. O-ring
8.Fit the spring on other side into the
slot of the plug.