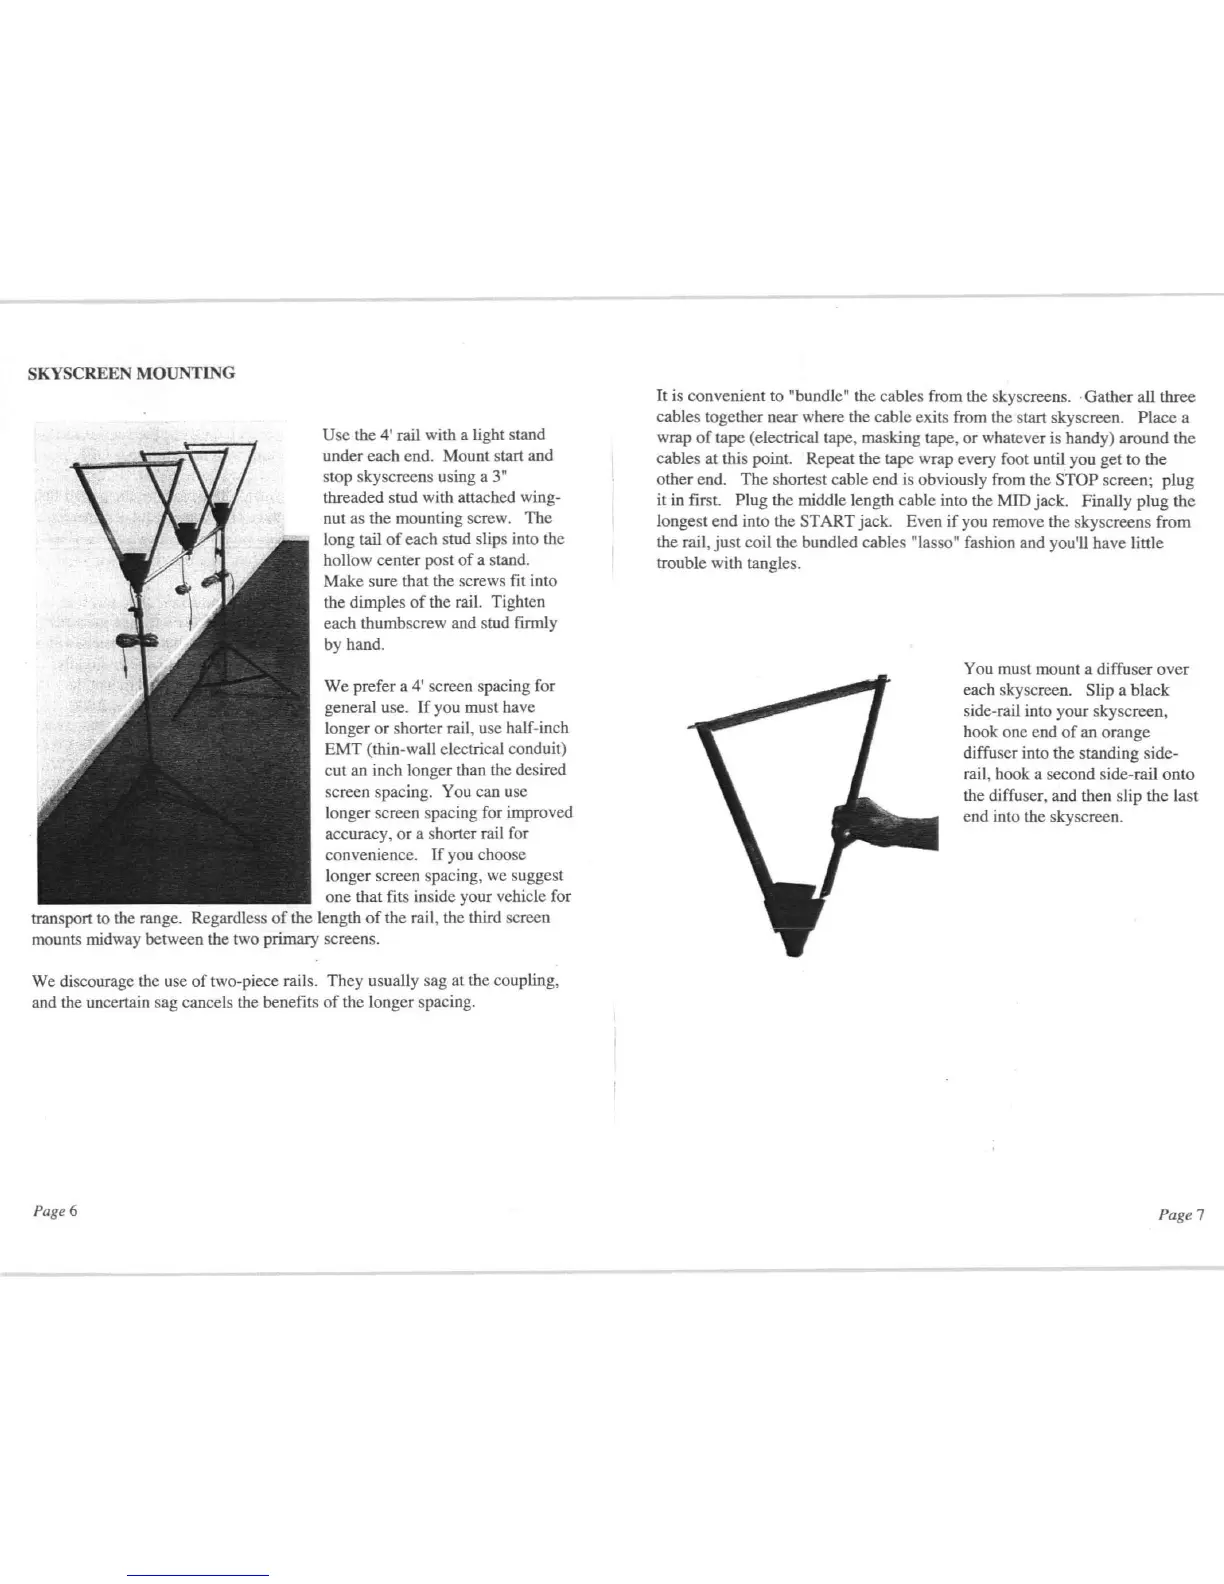
SKYSCREEN MOUNTING
Use the 4' rail with a light stand
under each end. Mount start and
stop skyscreens using a 3"
threaded stud with attached wing-
nut as the mounting screw.
The
long tail
of
each stud slips into the
hollow center post
of
a stand.
Make
sure that the screws fit into
the dimples
of
the rail. Tighten
each thumbscrew and stud
firmly
by hand.
We
prefer a 4' screen spacing for
general use.
If
you must have
longer
or
shorter rail, use half-inch
EMT
(thin-wall electrical conduit)
cut
an inch longer than the desired
screen spacing. You can use
longer screen spacing for improved
accuracy,
or
a shorter rail for
convenience.
If
you choose
longer screen spacing, we suggest
one that fits inside your vehicle for
transport to the range. Regardless
of
the length
of
the rail, the third screen
mounts midway between the two primary screens.
We discourage the use
of
two-piece rails.
They
usually sag
at
the coupling,
and the uncertain sag cancels the benefits
of
the longer spacing.
Page 6
It is convenient to "bundle" the cables from the sky screens . .
Gather
all three
cables together near where the cable exits from the start skyscreen. Place a
wrap
of
tape (electrical tape, masking tape, or whatever is handy)
around
the
cables at this point. Repeat the tape wrap every foot until you get
to
the
other end.
The
shortest cable end is obviously from the
STOP
screen;
plug
it in first. Plug the middle length cable into the MrD jack. Finally plug the
longest
end
into the
START
jack. Even
if
you remove the skyscreens
from
the rail,
ju
st coil the bundled cables
'lasso"
fashion and you'll have little
trouble with tangles.
You must mount a diffuser
over
each skyscreen. Slip a
black
side-rail into your skyscreen,
hook one end
of
an
orange
diffuser into the standing side-
rail, hook a second side-rail
onto
the diffuser, and then slip the last
end into the skyscreen.
Page 7
 Loading...