4
Operating Instructions and Parts Manual 24359
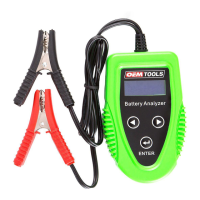
DIGITAL BATTERY ANALYZER
4/18
2018 OEMTOOLS
™
Always wear safety glasses and gloves!
OPERATING INSTRUCTIONS
BATTERY TEST
1. Before you test a battery in a vehicle, turn off the
ignition, all accessories and loads. Close all the
vehicle doors and the trunk lid.
2. Determine which post of the battery is grounded
(connected) to the chassis. Connect NEGATIVE
(black) clip to vehicle chassis or engine block away
from the battery. Connect POSITIVE (red) clip from
battery tester to POSITIVE (POS, P, +) ungrounded
post of battery. Do not connect clip to carburetor,
fuel lines, or sheet metal body parts. Connect to
a heavy gauge metal part of the frame or engine
block.
NOTE: When disconnecting, remove clip from
vehicle chassis FIRST, then remove the clip from
the battery terminal.
3. Connect the tester to a vehicle battery, the screen
will come on and display “BATTERY TEST”. The
battery voltage will also be displayed with “XX.XX
V”. Press the “Enter” button to go to the next step.
4. The screen will show “BATTERY TYPE” selection.
Press the “◀ ◀” button to select the battery type:
REGULAR LIQUID, AGM BATTERY or VRLA/GEL
BATTERY. Press “Enter” button to confirm choice.
5. The screen will show “RATING STANDARD”. Press
the “◀ ◀” button to select the battery standard:
SAE◀DIN◀IEC◀EN or CA (MCA)
SAE: United States Standard
EN: European Standard
DIN: German Standard
IEC: International electrical science and
technology association
CA (MCA): Normal starting current or maritime
starting current
Press the “Enter” button to confirm the choice and
go to next step.
6. The screen will show “RATING CAPACITY”. Press
the “◀ ◀” button to select the battery capacity of
CCA. With each press of the button, the value will
increase or decrease 5 units
This tester’s testing range:
SAE:◀40◀ 1200CCA
EN: ◀40◀ 1150CCA
DIN:◀25◀ 675CCA
IEC:◀30◀ 775CCA
Press the “Enter” button to confirm the input value
of the battery capacity and begin the test.
7. The screen will show the message, “TESTING”.
The test result will display after 2 seconds.
8. If the display reads “BATTERY CHARGED?” press
the “◀ ◀” button to select “YES” or “NO”. Press the
“Enter” button to confirm your choice and proceed
to the next step.
NOTE: the Tester will judge the battery status &
decide whether to show this Step or not, it doesn’t
appear every time.
9. When the test is completed, the display shows the
actual available CCA. Press the “◀ ◀” button to see
the SOH (STATE OF HEALTH) as a percentage. The
test results are as following:
a. “GOOD PASS”
The battery is good and capable of holding a
charge.
b. “GOOD RECHARGE”
The battery is good but needs to be recharged.
c. “RECHARGE RETEST”
Battery is discharged, the battery condition cannot
be determined until it is fully charged. Recharge
and retest the battery.
d. “BAD REPLACE”
The battery will not hold a charge. It should be
replaced immediately.
e. “TEST ERROR”
The tested battery is bigger than 1200CCA. Or
the clamps are not connected properly. Please
fully charge the battery and retest after excluding
both previous reasons. If reading is the same, the
battery should be replaced immediately.
10. Press “ENTER” return to step 4 to continue
testing or remove the test clamps from the battery
terminal to end test.
STARTING SYSTEM TEST
1. Connect the tester to a vehicle battery; the tester
will be in default “BATTERY TEST” mode. Press
the “◀ ” button once to enter “SYSTEM TEST “.
The voltage, “XX.XX V” will appear on the screen.
Press the “Enter” button to go to next step. The
screen will show “TURN OFF LOADS START
ENGINE”.
2. Turn off all vehicle accessory loads such as lights,
air conditioning, radio, etc. and then start the
engine. Wait for the tester to detect the cranking
voltage.
3. When the engine is started and test complete, one
of the three results will be displayed along with the
actual voltage reading measured.
WARNING
 Loading...