FREESTANDING TABLE
INSTALLATION INSTRUCTIONS
IMPULSE G2/PULSE
INSTRUCTIONS
Required Tools:
Cordless Screwdriver
5mm Allen Wrench
Level
FREESTANDING TABLE
ASSEMBLY
Attach mounting hardware to
•
top of columns.
Use (4) M6 x 16MM flat head
•
cap screws, per column ,to
attach mounting plate to top
of column.
Place work surface bottom side
•
up on a non-marring surface.
Align holes on mounting plate
•
with pre-drilled holes on bottom
side of work surface.
Fasten mounting hardware to
•
worksurface using (8) #12 X 1"
truss head screws per column.
Align bolt holes in feet with
•
threaded holes in the
bottom of columns.
Attach feet to columns using
•
(4) M6 x 20MM socket head
cap screws per column.
Rev:
Dwg:
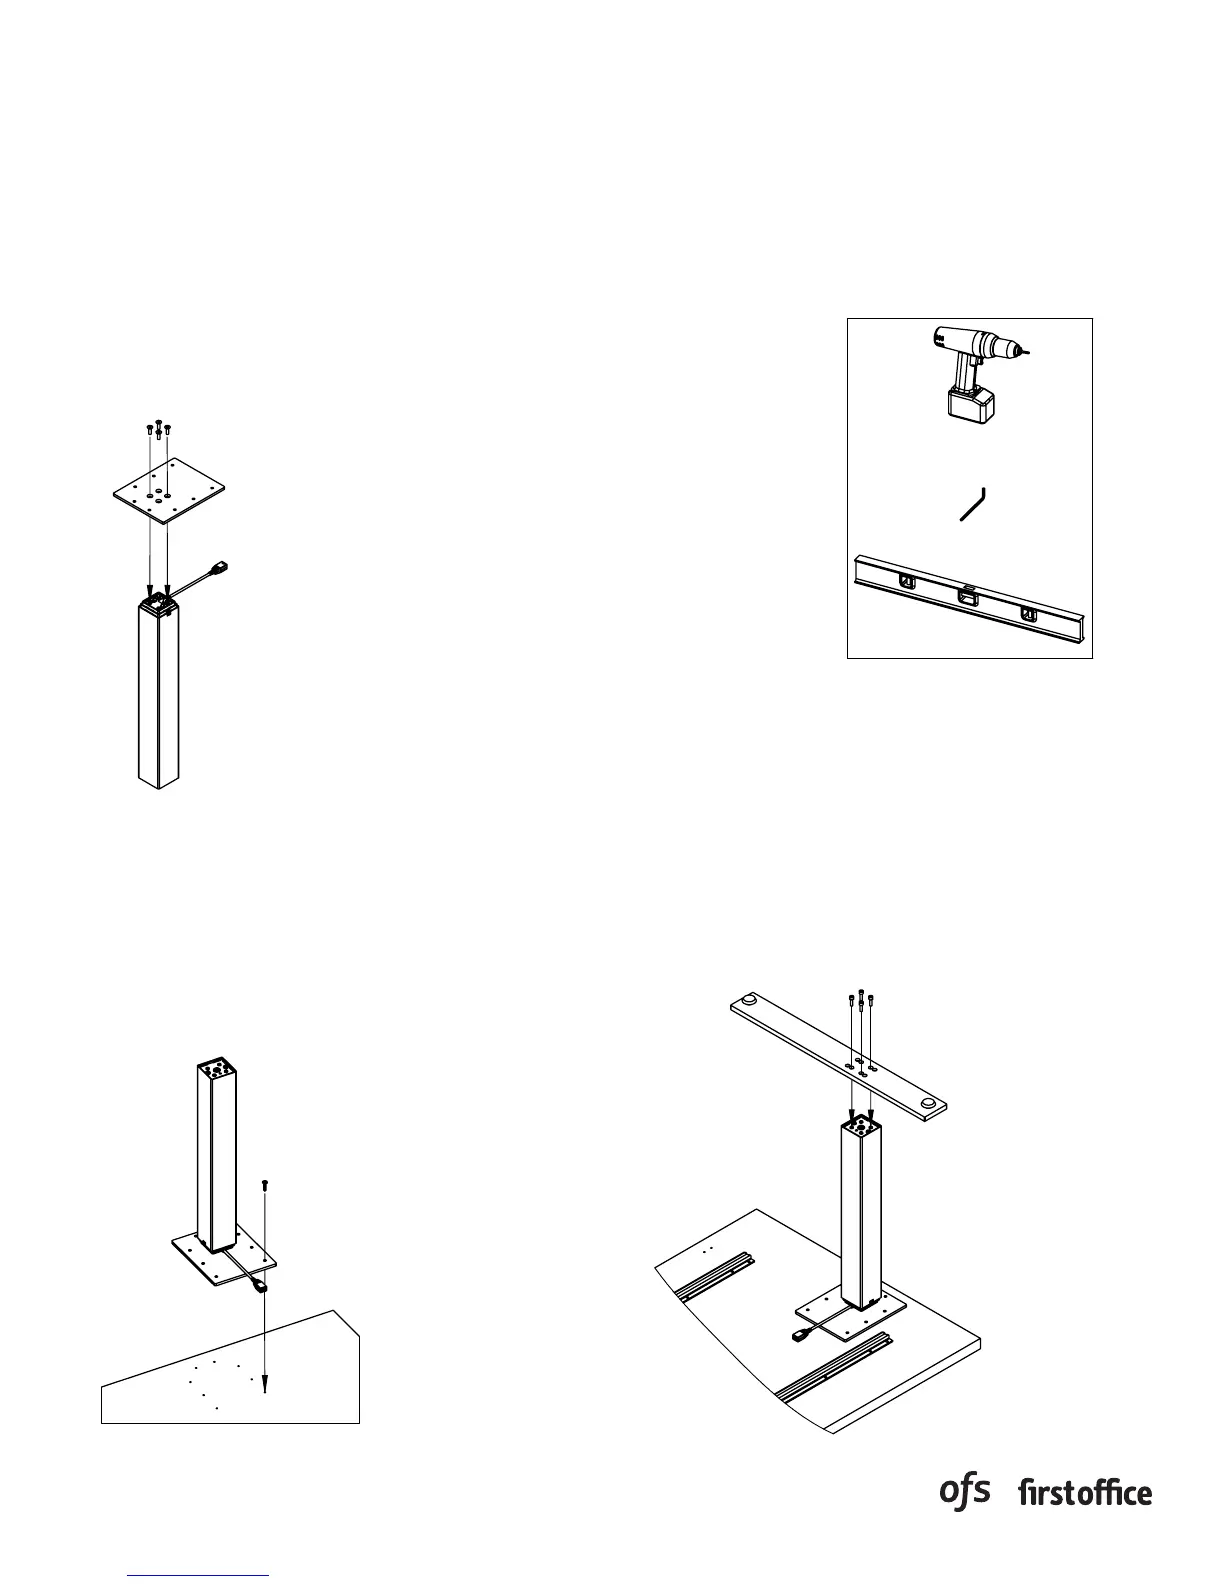
Cordless Screwdriver
5mm Allen Wrench
Level
Tools Required:
1. Attach mounting hardware to top of columns.
2. Use (4) M6 x 16MM flat head cap screws, per
column, to attach mounting plate to top of
column.
3. Place work surface bottom side up on a non-
marring surface.
4. Align holes on mounting plate with pre-
drilled holes on bottom side of worksurface.
5. Fasten mounting hardware to worksurface
using (8) #12 X 1" truss head screws per
column.
6. Align bolt holes in feet with threaded holes in
the bottom of columns.
7. Attach feet to columns using (4) M6 x 20MM
socket head cap screws per column.
PAGE 1 OF 3
PART # 1608995
 Loading...