47
AURORA
EN
CLEANING
> > Blade disassembly/assembly
• Itisadvisedtoperiodicallyaccuratelycleantherearpartoftheblade.
• Makesurethattheplugisdisconnectedfromthemainsoutlet.
• Rotatetheknob(12)to«0». (Fig. M)
• Removethefoodpusher(7)andtheslidingcarriage(6)(togetherwiththefinger
guard “8”) (Fig. N)
• Useacointorotatethescrew(4)clockwiseandremoveit.(Fig. P)
• Removetheblade(3)inordertocleanit.(Fig. P)
• Forreassembly,positionthebladeandblockitbyrotatingthescrew(4)anticlock-
wise.
Protect your hands with gloves and hold on tightly to the blade.
Danger of cutting!
Never perform the cleaning of the moving blade.
The blade is very sharp, manipulate it carefully.
• Correctlyreassembletheblade(3)aftercleaning.
Make sure the wheel (4) is correctly hooked.
Do not over tighten the wheel (4).
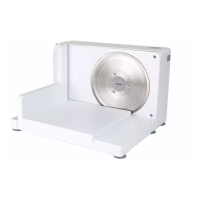
RESTORE THE SLICER
• Disconnecttheplugfromthepowersocket.
• Rotatetheknob(12)to«0». (Fig. M)
• Removethefoodpusher(7)andtheslidingcarriage(6)(togetherwiththefinger
guard “8”) (Fig. N)
• Closethesurface(5)onthemotorbody(2).(Fig. Q)
• Wrapthepowercordinitsspecicseatunderthemotorbody(2).(Fig. Q)
• Pressonthengerguard(8)sidesandthenraiseittoreleaseitfromtheslidingcar-
riage (6). (Fig. R)
• Foldthengerguard(8)ontheslidingcarriage(6)toreduceitssizeandstoreit.
(Fig. R)