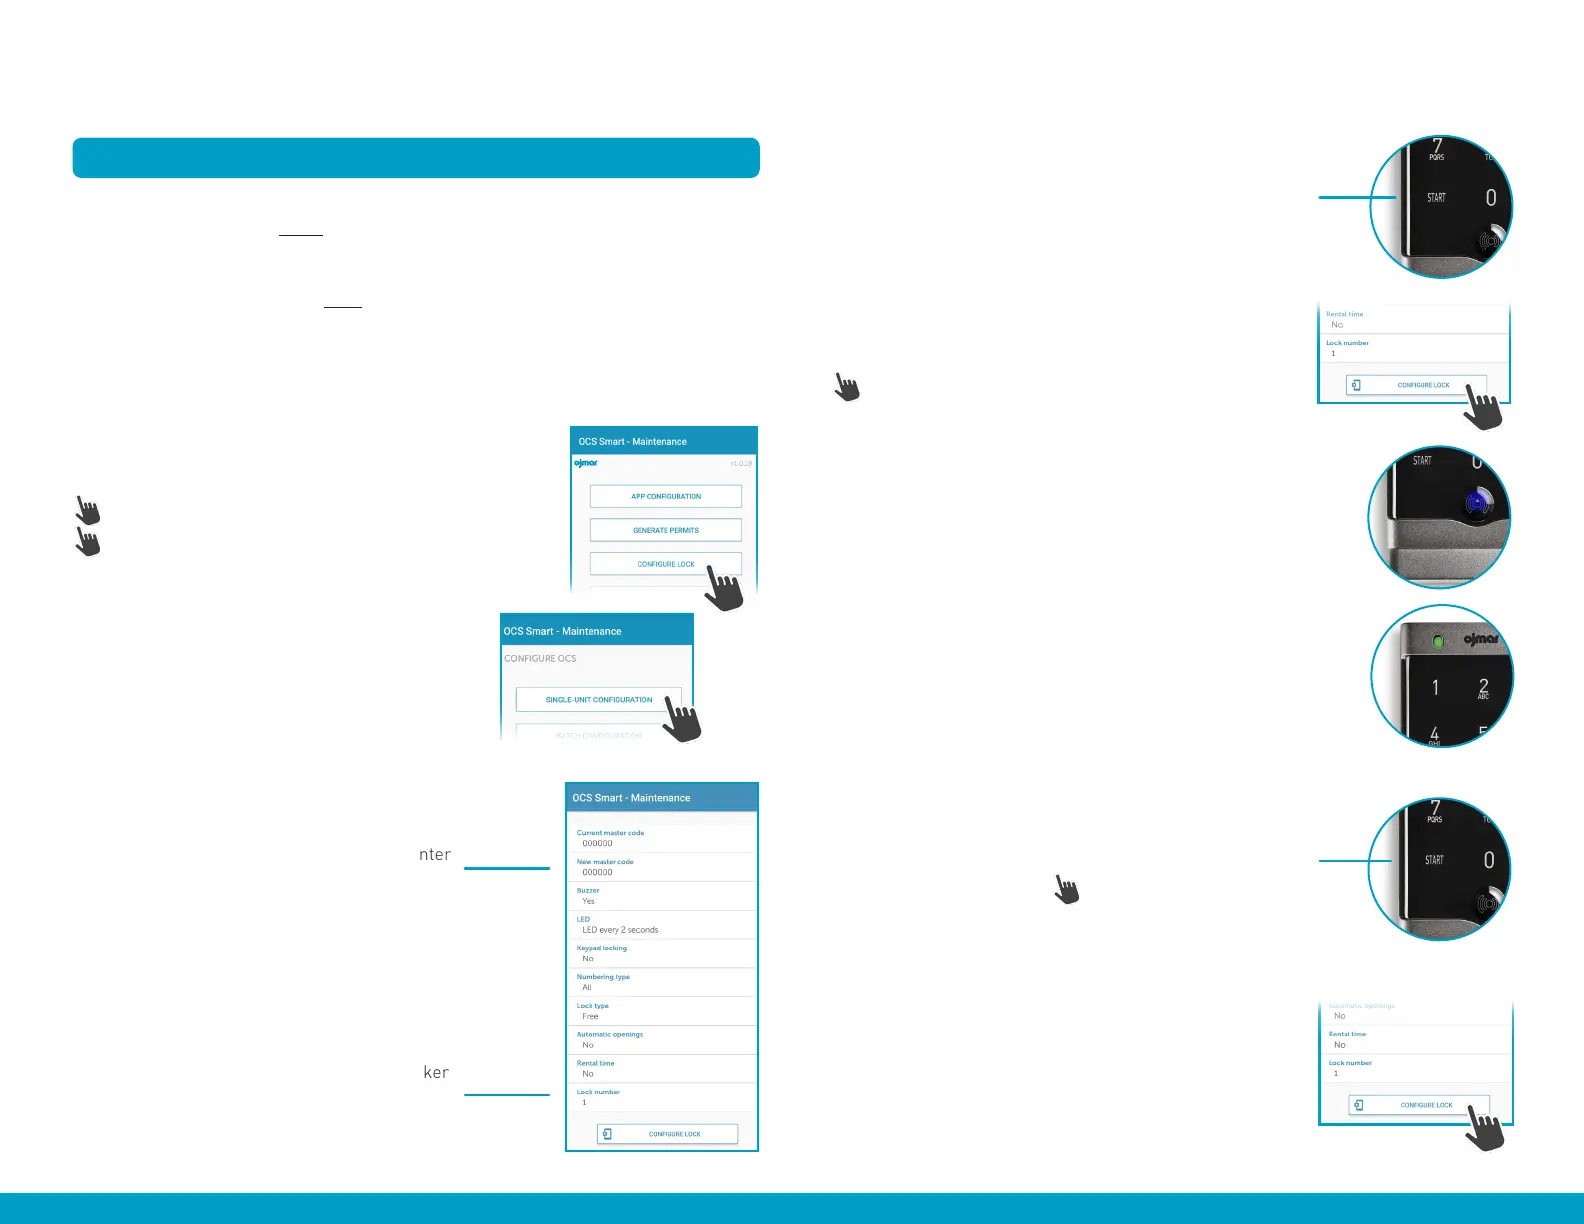
Step 4
On the lock, press the START button once.
Step 5
On the OCS
®
SMART Maintenance App press:
“CONFIGURE LOCK” button.
During the configuration the lock’s LED will illuminate blue.
When configuration is complete, the green LED on the top of
the lock will flash twice.
Step 6
To copy settings to
next
lock, simply press the START button
on next lock, followed by the “CONFIGURE LOCK” button
on the App.
IMPORTANT NOTE: the lock number will automatically
change sequentially 1 to 2,3,4, etc. in the App until all locks
have been configured. PLEASE ENSURE LOCK NUMBER IS
MATCHED WITH LOCKER NUMBER (i.e.
Lock 1
configured
with
Locker numbered 1, Lock 2
configured with
Locker
numbered 2,
and so on).
OCS
®
SMART
Recommended first-time
Basic Configuration
of installed locks
NOTE: should additional configuration be required (i.e. change from “free” to
“assigned” mode), please do so
after
step 3 below.
Once installed, the OCS
®
SMART locks need to be configured to work with the
Maintenance App by following these steps:
CONFIGURING LOCKS >
Step 2
Select the “New Master Code” setting and enter
a new 6-digit master code.
Step 3
Select the lock number that matches the locker
number. (i.e.
Lock 1
for
Locker 1
).
OCS
®
SMART
QUICK START GUIDE | MANAGER
(i)
Step 1
On the OCS
®
SMART Maintenance App home screen press:
(i) “CONFIGURE LOCK,” then on the next screen press
(ii) “SINGLE UNIT CONFIGURATION”.
This will take you to the configure OCS screen.
(ii)
 Loading...