EasyManua.ls Logo

Oki 40834406 - User Manual

Oki 40834406
2 pages
Print Icon
To Next Page IconTo Next Page
Loading...
© 2004 Oki Data Americas, Inc. 58366302
Install the Tray
1. Unpack the tray and remove the
shipping materials.
2. Turn off the printer and unplug the
power cord.
3. Remove the interface cable.
4. Note the location of the pins (1),
connector (2) and tray opening (3).
5. Pull down the printer’s manual feed
tray.
6. Lower the printer onto the auxiliary
tray, aligning the holes/plug on the
bottom of the printer on the pins/
connector on the tray. You should
feel the printer seating and locking
in place.
7. Attach the connection cable.
8. Reattach the interface cable.
9. Plug in the power cord and turn on
the printer.
10.Verify installation
Models with Operator Panel:
a. Press the Menu button one or
more times until
INFO. MENU
appears on the display.
b. Press
SELECT twice.
The MenuMap prints.
Models with Control Button:
a. Press the Control Button to take
the printer off-line.
b. Press and hold down the control
button for at least 2 seconds, but
less than 5 seconds. The
MenuMap prints.
11. Look for TRAY2 on the first page
of the MenuMap under the
MEDIA MENU listing. If it isn’t
there, check to be sure that the
connection between the printer
and Tray 2 is secure, then reprint
and recheck the MenuMap.
12. Check the MEDIA MENU
settings shown on the MenuMap
and make any needed changes for
TRAY2 PAPERSIZE
TRAY2 MEDIATYPE
TRAY2 MEDIAWEIGHT
to match the print media you will
normally use in Tray 2. (If you need
help with this, see “Operator
Panels” in your on-line User’s
Guide.
Load Paper
1. Pull out the tray.
2. Position the paper guides in the
tray.
2
nd
Paper Tray
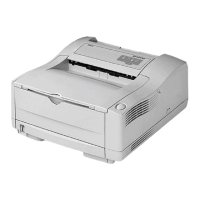
Oki PN-40834406 - 500 Sheet Second Paper Tray
Installation Instructions
(continued on back)

Questions and Answers

  • A
    Amy HarrellSep 12, 2025
    Why do pages curl excessively from Oki Printer?
    • D
      dana61Sep 12, 2025
      Excessive curling of pages from your Oki Printer can be due to several reasons: you might be printing on the wrong side of the paper, so turn the paper over in the tray, installing it print side down. Moisture in the paper or improper storage can also cause this, so avoid storing paper in areas of excessive temperature and humidity and keep it in protective wrapping. High humidity can also be a factor; the recommended operating humidity is 20-80%.
  • C
    cmooreSep 9, 2025
    Why is my Oki Printer printing darker than usual?
    • M
      matthewdoughertySep 10, 2025
      If your Oki Printer's print is darker than usual, the darkness setting is likely too high. Change the darkness setting to a lower level.
  • J
    jesseraymondSep 8, 2025
    Why are bold characters smeared on my Oki Printer?
    • C
      Cynthia RoySep 8, 2025
      If bold characters and dark lines are smeared on your Oki Printer's output, it's likely that the toner is low. Install a new toner cartridge to resolve this.
  • R
    robyn90Sep 7, 2025
    How to fix distorted print on Oki Printer?
    • K
      Kathleen DavisSep 7, 2025
      Distorted print from your Oki Printer may be due to a paper path, lamp assembly, or fusing unit problem. Generate a cleaning page. Contact service.
  • S
    Sandy ReynoldsAug 23, 2025
    How to fix Oki Printer input jam?
    • J
      Jennifer JonesAug 23, 2025
      To resolve an input jam on your Oki Printer: start by removing the paper tray, then remove any crumpled or folded paper. Also, check and remove any paper from the underside of the printer. Finally, replace the paper tray. After removing the damaged paper, the printer should resume printing.
  • J
    Jose AlexanderSep 5, 2025
    What causes vertical white streaking on Oki Printer?
    • J
      Julia HuffmanSep 5, 2025
      Vertical white streaking or faint areas on pages printed by your Oki Printer can occur when the toner is low and does not distribute properly, or the drum is worn out. Replace the toner cartridge. Check the drum and replace it if necessary. Contact service.
  • F
    Frederick HensleySep 4, 2025
    How to fix oblong area of faint print on Oki Printer?
    • K
      Kyle SmithSep 4, 2025
      An oblong area of faint print on each page from your Oki Printer is likely due to using paper exposed to high humidity. Try changing paper stocks, checking the paper storage environment, or using a dehumidifier; also, check the toner level.
  • K
    Katherine BarkerSep 3, 2025
    What causes repetitive marks on Oki Printer pages?
    • L
      Lauren MelendezSep 3, 2025
      Repetitive marks on pages printed by your Oki Printer are often caused by a damaged image drum cartridge, which results in marks every 1.6 inches (4.06 cm) due to surface nicks and scratches. Generating a cleaning page may temporarily resolve the issue.
  • T
    thowardSep 2, 2025
    What to do if Oki Printer prints all black?
    • B
      Barbara LoganSep 2, 2025
      If your Oki Printer is printing all black pages, it indicates a hardware problem. Contact service.
  • K
    kurtwilliamsAug 31, 2025
    Why does my Oki Printer print pages with grey background?
    • M
      Michael FriedmanSep 1, 2025
      A grey background on pages printed by your Oki Printer is often due to static electricity, typically caused by dry environments, which makes toner stick to the background. To fix this, change the paper to a smoother laser bond or use a humidifier.

Overview

This document describes the installation and usage of a 2nd Paper Tray, an auxiliary paper tray designed to enhance the paper handling capabilities of an Oki printer. The specific model is Oki PN-40834406, a 500-sheet Second Paper Tray.

Function Description

The 2nd Paper Tray serves as an additional paper input source for compatible Oki printers, increasing the printer's overall paper capacity and allowing for the use of different media types or sizes without manually swapping paper in the main tray. It is designed to integrate seamlessly with the printer, providing an expanded paper supply for continuous printing tasks. The tray supports automatic paper feeding, and its settings can be configured through the printer's control panel or the printer driver on a connected computer.

Important Technical Specifications

  • Model Number: Oki PN-40834406
  • Capacity: 500 sheets of 20-lb. US Bond paper. This significant capacity reduces the frequency of paper refills, especially for high-volume printing.
  • Compatibility: Designed for specific Oki printers, indicated by the need to align holes/plugs on the tray with pins/connectors on the printer.
  • Connection: Utilizes a dedicated connection cable to communicate with the printer, ensuring proper recognition and functionality.
  • Media Support: The tray supports various media types, sizes, and weights, which can be configured via the printer's settings (TRAY2 PAPERSIZE, TRAY2 MEDIATYPE, TRAY2 MEDIAWEIGHT).

Usage Features

Installation

  1. Unpacking: The installation process begins with unpacking the tray and removing all shipping materials.
  2. Printer Preparation: The printer must be turned off, unplugged, and its interface cable removed. The manual feed tray on the printer needs to be pulled down.
  3. Tray Placement: The auxiliary tray is positioned beneath the printer, ensuring that the holes/plug on the bottom of the printer align with the pins/connector on the tray. A tactile "seating and locking" sensation confirms correct placement.
  4. Cable Connections: The connection cable between the tray and the printer is attached, followed by reattaching the printer's interface cable.
  5. Power On: The printer is then plugged in and turned on.

Verification of Installation

After physical installation, the tray's functionality must be verified:

  • Operator Panel Models: For printers with an operator panel, users navigate to the INFO. MENU, press SELECT twice, and print a MenuMap.
  • Control Button Models: For printers with a control button, users take the printer off-line, press and hold the control button for 2-5 seconds, and print a MenuMap.
  • MenuMap Check: The MenuMap should display "TRAY2" under the MEDIA MENU listing. If not, the connection between the printer and tray should be rechecked.
  • Settings Configuration: The MEDIA MENU settings on the MenuMap should be reviewed and adjusted for TRAY2 PAPERSIZE, TRAY2 MEDIATYPE, and TRAY2 MEDIAWEIGHT to match the media intended for use.

Loading Paper

  1. Tray Access: The tray is pulled out from the printer.
  2. Guide Adjustment: Paper guides within the tray are positioned to accommodate the paper size.
  3. Paper Fanning: The paper stack should be fanned to prevent misfeeds.
  4. Loading: The paper bar is lifted, and up to 500 sheets of 20-lb. US Bond paper are loaded, ensuring the stack remains below the full line.
  5. Tray Insertion: The paper bar is lowered, and the tray is pushed back into the printer.
    • Note for Tray 1: If Tray 2 is installed, to access Tray 1, the Tray 2 front panel must be opened, and Tray 1 slid out.

Activating the Tray in the Printer Driver

The 2nd Paper Tray must be activated in the printer driver for the operating system to recognize and utilize it.

  • Windows (PCL Driver):

    1. Navigate to Start → Settings → Printers (or Printers and Faxes for XP).
    2. Right-click the Oki printer icon and select Properties.
    3. Go to the Device Option(s) tab.
    4. For "Available Tray," select "Lower Cassette."
    5. Click OK and close the dialog boxes.
  • Windows (PostScript Emulation Driver):

    1. Navigate to Start → Settings → Printers (or Printers and Faxes for XP).
    2. Right-click the PostScript emulation printer icon and select Properties.
    3. XP, 2000, NT 4.0: Click the Device Settings tab.
    4. Me, 98: Click the Device Options tab.
    5. XP, 2000, NT 4.0, Me: Under "Installable Options," click "Available Tray" and select "2."
    6. 98: Under "Change setting for Available Tray," select "2 (1 Optional Tray)."
    7. Click OK and close the dialog boxes.
  • Macintosh (PostScript Emulation Driver):

    • OS 8.x and 9.x:
      1. Activate Chooser from the Apple menu.
      2. Select LaserWriter 8.
      3. Click Printer → Setup, then Configure.
      4. Change "Available Tray" to "2 (1 Optional Tray)."
      5. Click OK twice, then close Chooser.
    • OS X.1: No activation is required.
    • OS X.2:
      1. Activate Print Center from Local Hard Drive → Applications → Utilities → Print Center.
      2. Highlight the printer name and select Printers → Show Info.
      3. Click the "Available Tray" drop-down menu and select "2 (1 Optional Tray)."
      4. Click Apply Changes and exit to the desktop.

AUTOFEED Feature

This feature allows the printer to automatically switch to Tray 2 when Tray 1 is empty.

  • Printers with Operator Panel: Set "AUTOTRAY" to "on" in the Print Menu.
  • Printer with online Status Monitor: Go to the "Paper" tab in the Status Monitor and select "Auto Tray Switch."

Maintenance Features

The document primarily focuses on installation and initial setup, with limited explicit mention of ongoing maintenance. However, implicit maintenance aspects include:

  • Proper Loading: Correctly fanning paper and loading it below the full line helps prevent paper jams and ensures smooth operation, reducing wear and tear on the feeding mechanism.
  • Driver Updates: Keeping printer drivers updated ensures optimal performance and compatibility with operating system changes.
  • Connection Security: Regularly checking the connection between the printer and Tray 2 ensures consistent communication and prevents errors.
  • Media Settings: Accurate configuration of media type, size, and weight settings prevents misfeeds and ensures proper print quality, extending the life of printer components.

Overall, the 2nd Paper Tray is a valuable accessory for Oki printers, significantly enhancing their paper handling capabilities for users requiring increased capacity or the flexibility to use multiple media types simultaneously.

Oki 40834406 Specifications

General IconGeneral
BrandOki
Model40834406
CategoryPrinter Accessories
LanguageEnglish

Related product manuals