I GB F
4
36
- Non avvitare completamente
le viti e lasciarle circa 10 mm
fuori rispetto al muro.
ATTENZIONE:
Vericare che le viti
siano comunque ben
salde al muro.
- Do not tighten the screws all
the way but let about 10 mm
protrude from the wall.
ATTENTION:
In any case, make sure
the screws are rmly in
place in the wall.
- Ne pas visser à fond les vis,
les laisser dépasser de 10
mm par rapport au mur.
ATTENTION :
S’assurer que les vis
sont de toute façon
solidement xées au
mur.
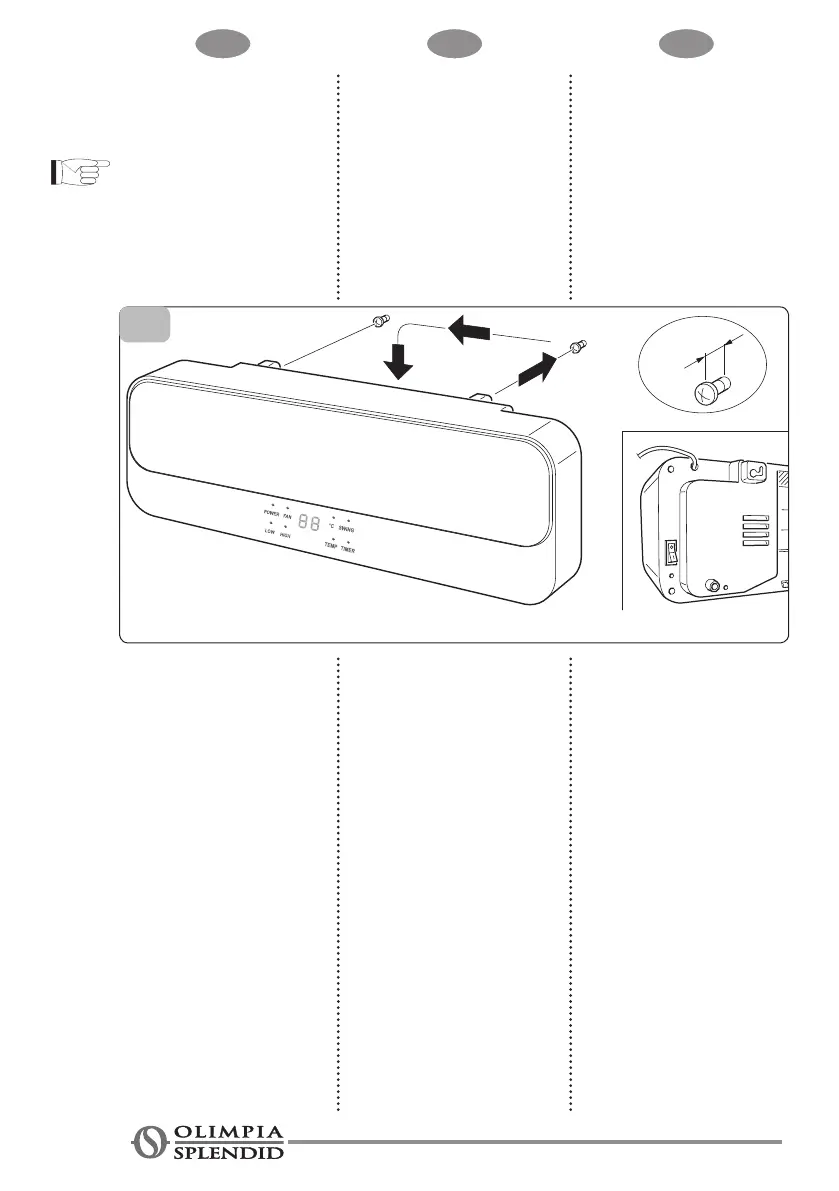
Appendere l’apparecchio alle
2 viti precedentemente ssate
al muro come indicato nella
sequenza in gura (g. 4) e
come sotto descritto:
- appoggiare l’apparecchio
contro il muro, vericando
che i fori situati sul retro del
prodotto siano in corrispon-
denza delle viti inserite nel
muro;
- spingere verso sinistra di
circa 10 mm l’apparecchio
e poi farlo scendere di circa
8 mm.
- verificare infine che l’ap-
parecchio sia stabile e ben
ancorato al muro.
Hang the unit to the 2 screws
previously xed to the wall as
shown in the sequence in the
gure (g. 4) and as described
below:
- place the unit against the
wall, making sure that the
holes at the back of the
product are matched to the
screws in the wall;
- push the unit about 10 mm
to the left and then lower it
about 8 mm.
- Finally, check that the unit is
stable and properly anchored
to the wall.
Accrocher l’appareil aux 2 vis
précédemment xées au mur
de la façon indiquée dans la
séquence de la gure (g. 4) et
de la façon décrite ci-dessous :
- poser l’appareil contre le
mur, en s’assurant que les
orices situés à l’arrière du
produit se trouvent au niveau
de vis insérées dans le mur ;
- pousser l’appareil vers la
gauche d’environ 10 mm puis
le faire descendre d’environ
8 mm.
- Enn, s’assurer que l’appa-
reil est stable et bien ancré
au mur.