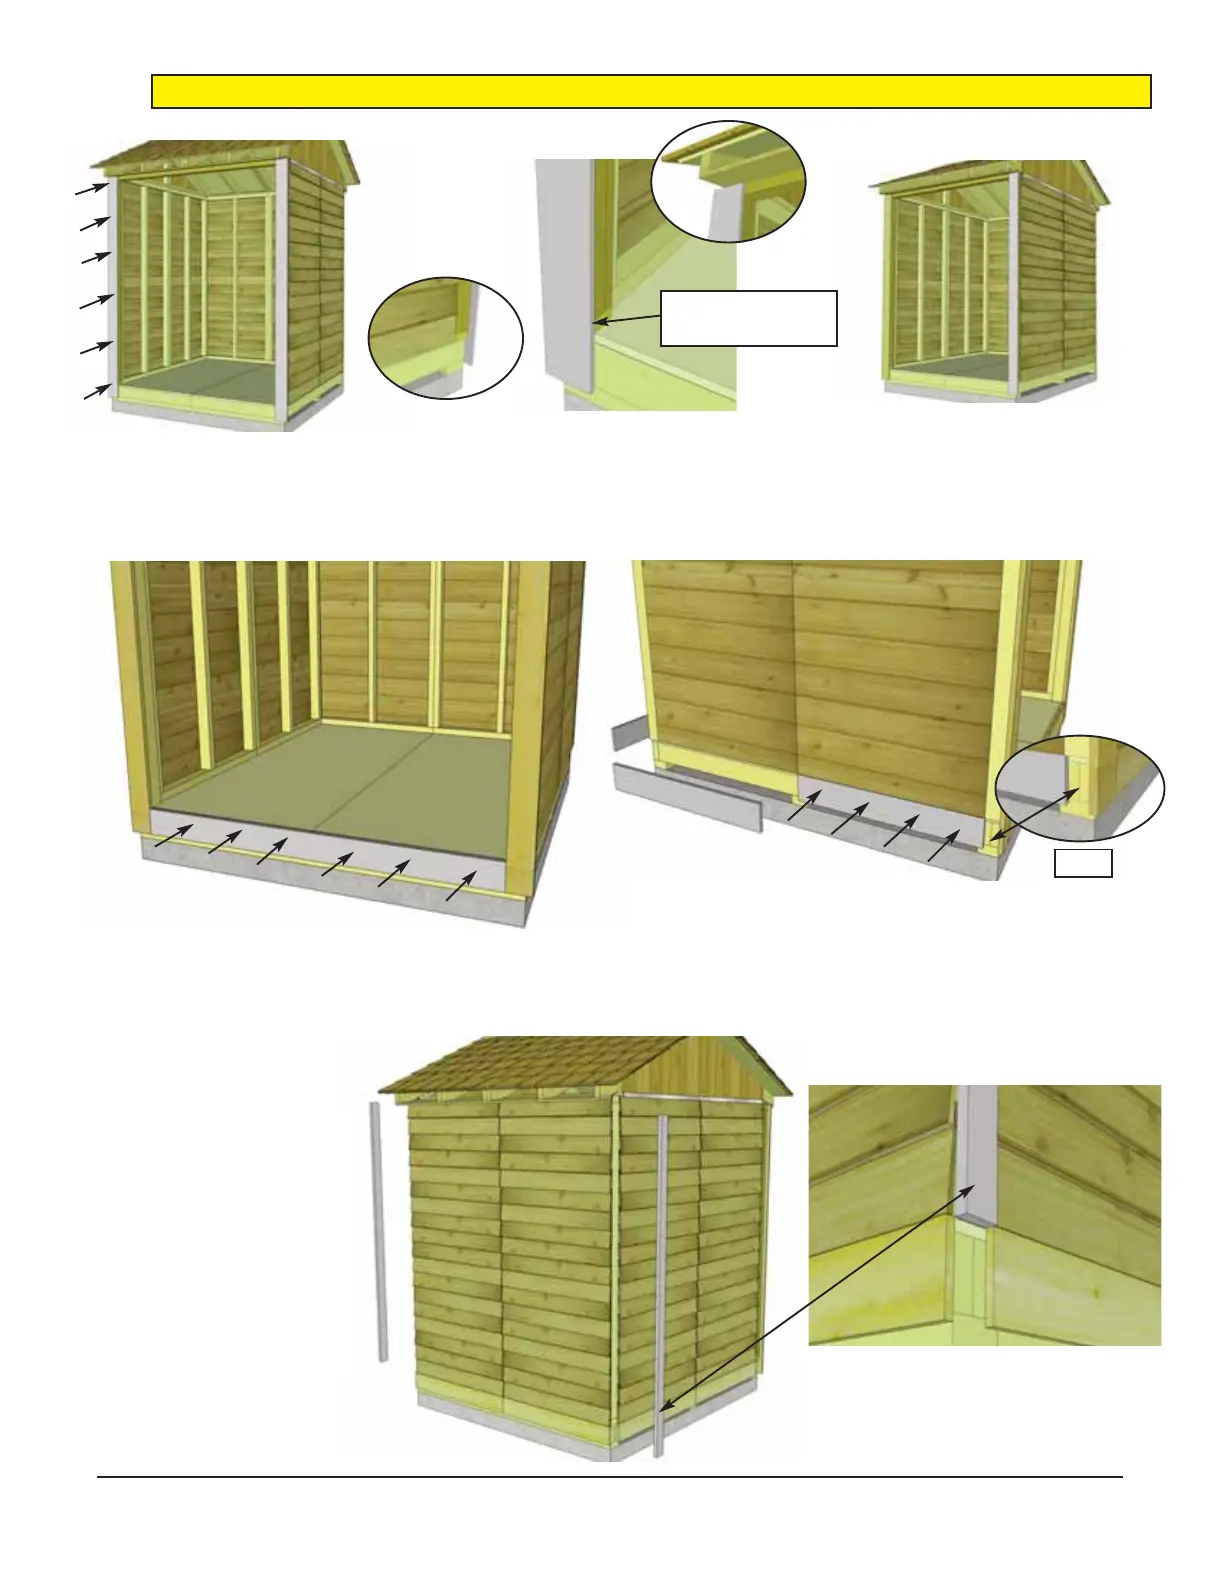
57. Attach Rear Filler
Trims - 4 pcs- 3/4” x 2
1/2” x 75”- (Part 4D)
with 6 - 1 1/2” Finishing
Nails (Part F).
Strips are positioned
flush with siding and
bottom Skirting.
Side Bottom Skirting
55. Attach Front Bottom Skirting - 3/4” x 4
1/2” x 64” (Part 4B) between door trims with
6 - 1 1/2” Finishing Nails (Part F).
56. Attach Side and Rear Bottom Skirting
- 1/2” x 4 1/2” x 34 3/4” (Part 4C) with 4 - 1 1/2”
Finishing Nails (Part F) per piece.
54. Locate both 3/4” x 4 3/8” x 79” Door Trims (Part 4A). Position a Trim so it covers the Door
Jambs and is flush with the inside of it. Secure with 8 - 1 1/2” Finishing Nails (Part F) per piece.
Flush with inside
of Door Jamb
Door Jamb
Gap
Note: All Trim, Facia and Bottom Skirting pieces will be positioned rough face out when installed.
Toll Free 1-888-658-1658 www.outdoorlivingtoday.com sales@outdoorlivingtoday.com
Page 26