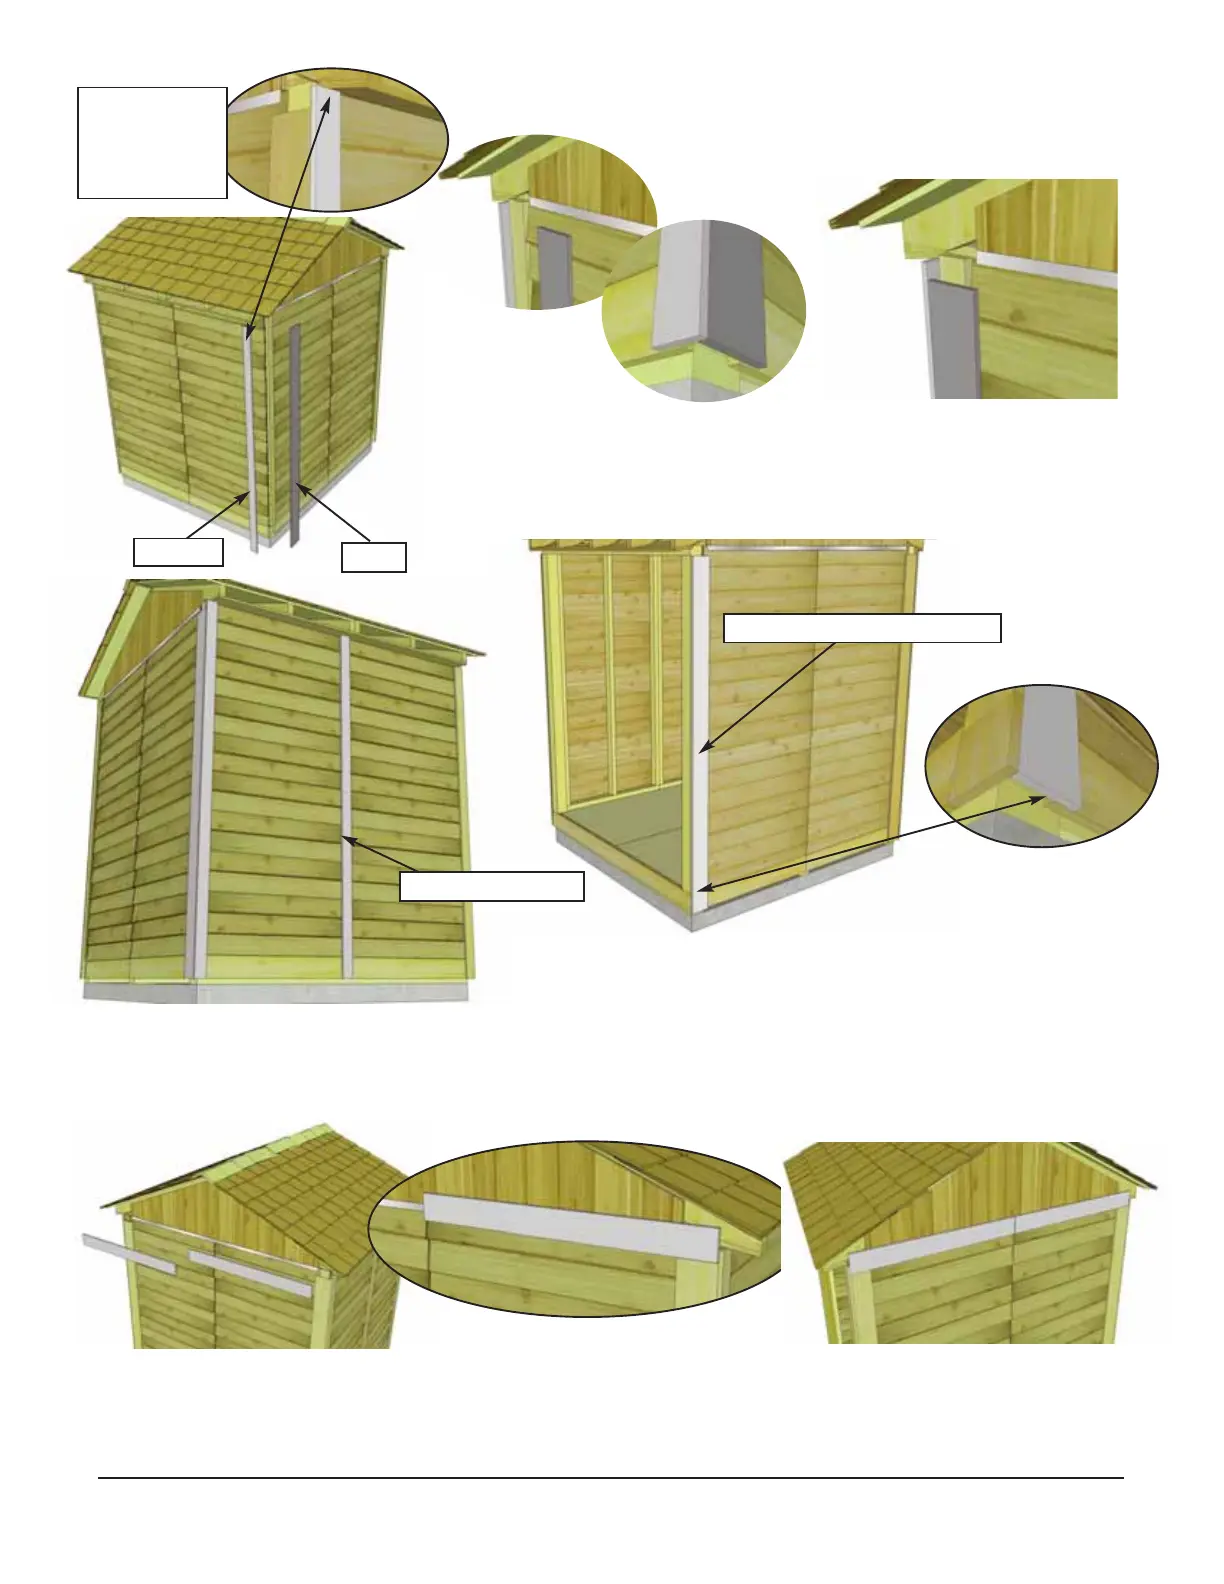
58. Attach Side Rear Wide Trim - 1/2” x 4 1/2” x 77 1/2” (Part 4E)
and Narrow Trims (Rear Wall) 1/2” x 2 1/2” x 79” (Part 4F) with
6 - 1 1/2” Finishing Nails (Part F) per piece.
59. Attach Narrow Trim (Rear Wall) 1/2” x 2 1/2” x 79” (Part 4F) on wall seam. Use 6 - 1 1/2”
Finishing Nails (Part F) to secure. Attach Side Front Wide Trims - 1/2” x 4 1/2” x 77 1/2” (Part 4G)
with 6 - 1 1/2” Finishing Nails (Part F). Door Trim (4A) will cap side trim as shown above.
60. Attach Horizontal Gable Trims - 4 pcs 1/2” x 4 1/2” x 37 7/8” (Part 4H) with 4 - 1 1/2” Finishing
Nails (Part F) per piece. Position over gable and wall seam. Make sure gable trims covers
flashing completely. Align even with outside of wide trim leaving a slight gap a center.
Narrow
Wide
Align trim
tight under-
neath Soffit
and Rafter
Narrow Trim (4F)
Side Front Wide Trim (4G)
Toll Free 1-888-658-1658 www.outdoorlivingtoday.com sales@outdoorlivingtoday.com
Page 27