Toll Free 1-888-658-1658 www.outdoorlivingtoday.com sales@outdoorlivingtoday.com
Page 22
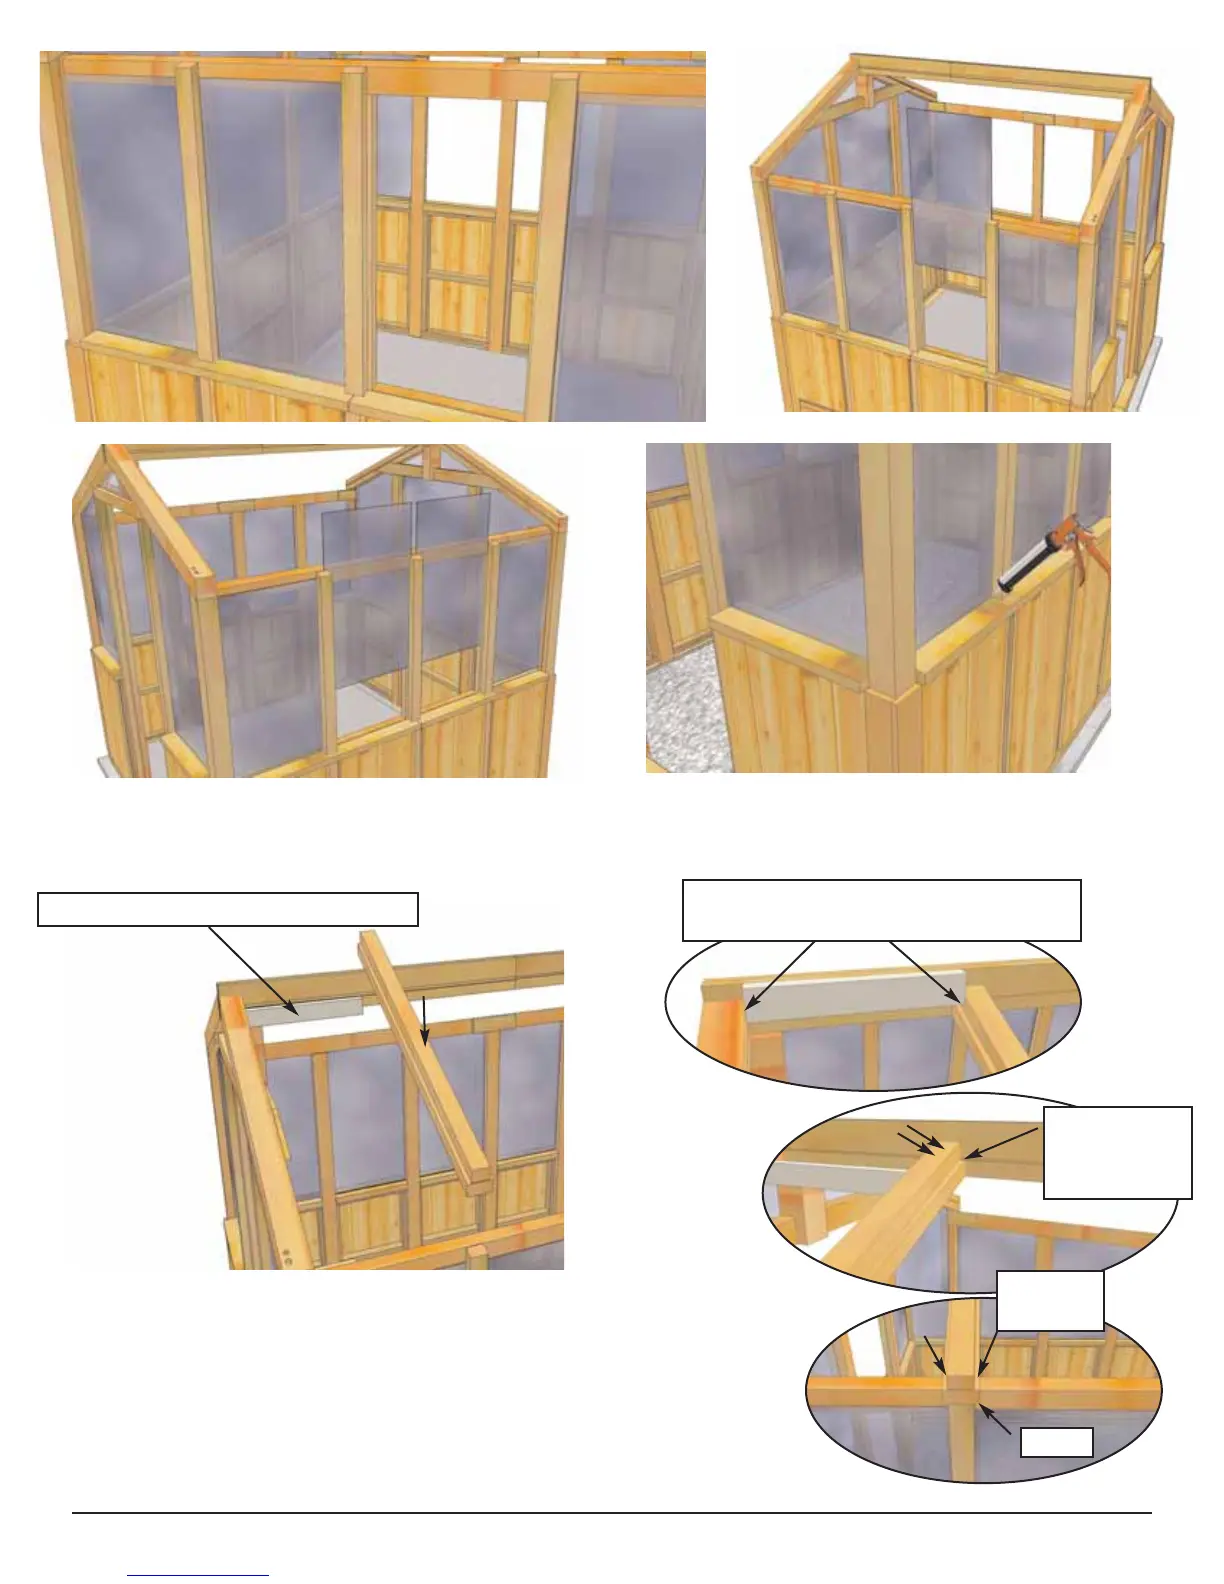
44. Once all Side Windows are installed. Caulk Window / Wall Top Cap seam. Work around the
entire Greenhouse. Gaps in Wall Top Caps can also be caulked at this time. No need to caulk sides
or top at this time.
45. Locate Part U - Roof Rafters - 3 1/4” x 3 1/2” x 50 3/4” and
Rafter Template Spacer - 20 3/16”. With Spacer aligned tight
against outside Rafter, position Rafter so dado cut of Ridge Board is
aligned with gap in Rafter and tight against 2x3 edge of Rafter. Angle
Screw to Ridge Board with 2 - 3” Screws. At bottom, align with
Spacer. Rafter end should sit flush with outside of Side Post. Screw
Rafter to Side Top Plate Support with 2 - 3” screws.
Rafter Template Spacer - 20 3/16”.
Align dado
cuts with gap
in Rafter.
2 - 3”
Screws
Flush
Spacer tight against Outside Rafter
Spacer tight against 2x3.